Motivation
Recently I had an opportunity to work on an Angular application, where I needed to integrate FileStack and I have gone through a few Stack overflow posts (https://stackoverflow.com/questions/43459805/filestack-with-angular-2) regarding FileStack and decided to write and FileStack Component in Angular.
Overview
FileStack is a powerful service for uploading the file to a website or mobile app. It enables us to upload and store large files, transform and manipulate images and other file types, and deliver that content with festinant speed, responsively, across all types of desktop or mobile devices. It also allows integrating more than 25 of the world’s leading cloud drives.
There is a guideline under file stack doc “How can I integrate FileStack into my AngularJS application?” to integrate FileStack in AngularJS application.
Angular Component combines the AngularJS Directive, Controller, and Scope. In this article, we will learn how to create/use the FileStack component in Angular.
Pre-Requisites
- Node.js (5+)
- Angular CLI
- FileStack Library
Getting Ready
Step 1: Installing Node JS.
Please refer to this link to download and install Node.js
Step 2: Installing Angular CLI.
Please refer to this link to install Angular CLI
Generating Angular App
Follow the following steps to generate an Angular app:
Step 1: Run the following command to generate an Angular app:
1 |
ng new ng-filestack |
Step 2: Go to ng-filestack folder and run the following command to run the application:
1 |
ng serve |
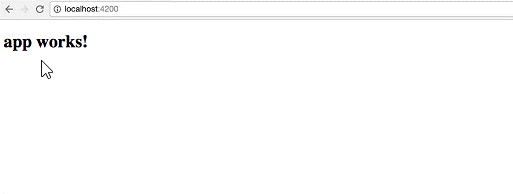
Step 3: Navigate to http://localhost:4200/ to the initial output:
Including FileStack Library
Add the following code in application index.html:
Creating Litteral
Let’s create litterals to define the input format accepted by FileStack Component.
Do the following steps :
Step 1: Create providers folder under src folder.
Step 2: Create litterals folder under providers folder.
Step 3: Create app-litterals.ts file under litterals folder and add the following code.
1 2 3 4 5 6 7 8 9 10 |
ng new ng-filestack interface AppLitterals { uploadOthers: any; } export const AppLitteralsConfig: AppLitterals = { uploadOthers: '.jpg,.jpeg,.png,.JPG,.JPEG,.pdf,.PDF,.PNG,.BAT,.bat,.BMP,.bmp,.CSV,.csv, .CVS,.cvs,.d oc,.docx,.DOC,.DOCX,.MAC,.mac,.MAP,.map,.PPT,.ppt,.PPTX,.pptx,.PSD,.psd,.PSP,.ps p,.QXD,.qxd,.txt,.TXT,.RTF,.rtf,.TAR,.tar,.TIF,.tif,.XLS,.xls,.XLSX,.xlsx,.zip,.ZIP,.rar ,.RAR,i mage/*' } |
Creating Service
Let’s create service and define FileStack configuration with getter and setter methods.
Follow the below steps :
Step 1: Create a services folder under providers folder.
Step 2: Create app-config.services.ts and add the following code:
1 2 3 4 5 6 7 8 9 10 11 12 13 14 15 16 17 18 19 20 21 22 23 24 25 26 27 28 |
import { Injectable } from '@angular/core'; @Injectable() export class AppConfigService { public filestackConfig : any = { key: 'AopksPQORR6IgXcMjzRQjz' }; public s3Config : any = { s3Key : 'xxxxxxxxxxx', signatureVersion : 'xx', bucket : { customer : 'xxxxxxxxx', application : 'xxxxxxx', user : 'xxxxxx' } }; constructor() {} //get filestack config getFilestackConfig() { return this.filestackConfig; } //get s3 config getS3Config () { return this.s3Config; } } |
Creating FileStack Component
Let’s create FileStack Component.
Follow the steps :
Step 1: Create filestack.ts under app/feature/filestack folder and add the following code:
1 2 3 4 5 6 7 8 9 10 11 12 13 14 15 16 17 18 19 20 21 22 23 24 25 26 27 28 29 30 31 32 33 34 35 36 37 38 39 40 41 42 43 44 45 46 47 48 49 50 51 52 53 54 55 56 57 58 59 60 61 62 63 64 65 66 67 68 69 |
declare var filestack; import { Subscription } from 'rxjs/Subscription'; import { Component, HostListener, ElementRef, Renderer, EventEmitter, Output, Input, OnInit, OnDestroy } from '@angular/core'; import { AppConfigService } from "providers/services/app-config.services"; @Component({ selector: "file-stack", templateUrl: "filestack.html" }) export class FileStackComponent implements OnInit, OnDestroy { private el: HTMLElement; @Input("data-accept") private dataFormat: any; @Output("complete") private output: EventEmitter = new EventEmitter(); private appConfigSubscriber: Subscription; constructor(private _elementRef: ElementRef, private _renderer: Renderer, private appConfigService: AppConfigService) { this.el = _elementRef.nativeElement; } ngOnInit() {} //open filestack on click event @HostListener("click", ['$event']) onFileStackFieldClick(event: MouseEvent) { let accept = (this.dataFormat || "").split(","); let maxFiles = this.el.getAttribute("data-maxfiles"); if (this.appConfigSubscriber) { this.appConfigSubscriber.unsubscribe(); this.appConfigSubscriber = null; } let filestackConfig = this.appConfigService.getFilestackConfig().key; let fileStackClient = filestack.init(filestackConfig, { policy: 'policy', signature: 'signature' }); fileStackClient.pick({ accept: accept, maxFiles: parseInt(maxFiles), /*fromSources: 'local_file_system',*/ /*storeTo: { location: 's3', // s3 configuration },*/ onFileSelected: function(file) { return file; } }) .then((result: any) => { if (result.filesFailed.length > 0) { this.output.emit({ success: false, data: result.filesFailed }); } else { result.filesUploaded = result.filesUploaded || []; this.output.emit({ success: true, data: result.filesUploaded }); } }); } ngOnDestroy() { if (this.appConfigSubscriber) { this.appConfigSubscriber.unsubscribe(); this.appConfigSubscriber = null; } } } |
I have added @Input (data-accept) to accept the file format to be supported by FileStack and @Output to emit output once file upload is completed.
onFileStackFieldClick method is to initialize the FileStack on click on FileStack element.
ngOnDestroy to destroy the FileStack in case we are using multiple instances of file stack.
Step 2: Create filestack.html and add the following code:
Importing Component And Service To App Module
Modify app.module.ts to import the Component and Service.
Do the following steps :
Step 1: Import AppConfigService and FileStackComponent.
1 2 |
import { AppConfigService } from "providers/services/app-config.services"; import { FileStackComponent } from "app/feature/filestack/filestack"; |
Step 2: Add Component in declarations.
declarations: [ AppComponent, FileStackComponent]
Step 3: Add Service to providers.
providers: [AppConfigService]
Using FileStack In App
Let’s use FileStack Component in app component.
Step 1: Open app.component.html and add the following code :
1 2 3 4 5 6 7 8 9 10 11 12 13 14 15 16 17 |
<div class="file-stack-dev"> <div> <file-stack [data-accept]="AppLitteralsConfig.uploadOthers" data-maxFiles="6" (complete)="onFileStackUploadComplete($event)"> <button class="btn-font"> <i></i> Upload File Using File Stack </button> <br> <br> </file-stack> <span *ngFor='let file of uploadedFiles; let i = index;'> <a href='{{file.url}}'class="font-red" target="_blank"> <i class="fa fa-file"></i> File {{file.originalPath}} </a> <br> </span> </div> </div> |
In the above code, I have used FileStack Component (<file-stack>) with data-accept as “input” and complete as “output”. data-accept value is getting from AppLitteralsConfig and the complete event is being handled at AppComponent.
Step 2: Open app.component.ts and replace it with the following code :
1 2 3 4 5 6 7 8 9 10 11 12 13 14 15 16 17 18 19 20 21 22 23 24 |
import { Component } from '@angular/core'; import { AppLitteralsConfig } from 'providers/litterals/app-litterals'; @Component({ selector: 'app-root', templateUrl: './app.component.html', styleUrls: ['./app.component.css'] }) export class AppComponent { public uploadedFiles: Array = []; public AppLitteralsConfig: any = AppLitteralsConfig; constructor() {} /** * Method to handle file stack upload complete * @param files file stack uploaded data */ onFileStackUploadComplete(files) { this.uploadedFiles = []; if (files.success) { files.data.forEach((data) => { this.uploadedFiles.push(data); }); } } } |
In the above code, I have handled FileStack output (complete) event and pushing record in an array to bind at HTML.
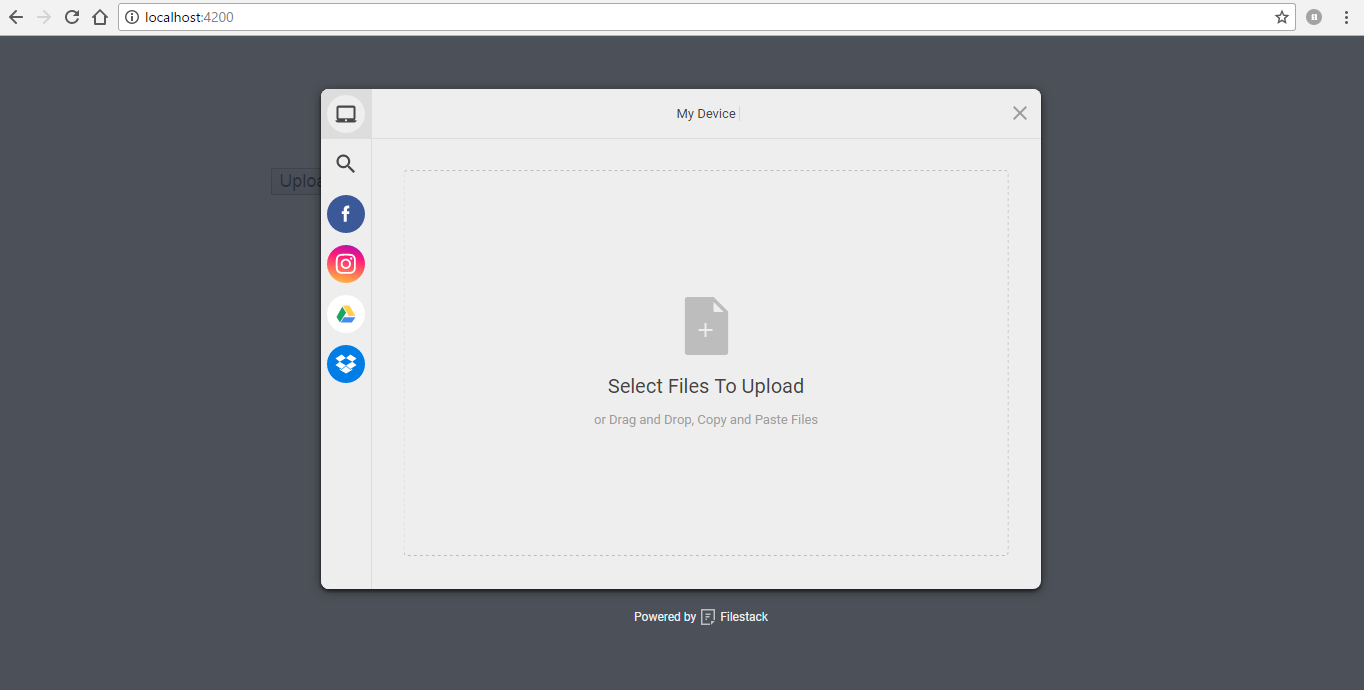
Step 3: Run your application and you will see the following output on click on the Upload File button:
Integrating with Cloud Drives
To store files in Cloud Drives we need to pass could configuration/credentials to FileStack at the time of initialization using storeTo.
Let’s add s3 cloud configuration to file stack and files will get stored at s3 cloud drive.
Step 1: Open FileStack component and add the following code to get the s3 configuration from AppConfigService.
1 |
let s3Config = this.appConfigService.getS3Config(); |
Step 2 : Add s3 configuration in storeTo.
1 2 3 |
storeTo: { s3Config } |
How to get the demo app?
You can download ng-filestack demo application source code from GitHub.
Summary
In this article, we have learned and created FileStack component in Angular with Cloud Drives integration.
At WalkingTree we are excited about the possibilities that Angular brings in for the new age applications. Hope this article will save a good amount of time for you when you come across this kind of need.
If you want your thoughts or proof of concepts around Angular or any technology to be validated by the industry experts? We will be excited to guide you!
References
- Angular Official Website
- Angular CLI
- How can I integrate FileStack into my AngularJS application?
- https://stackoverflow.com/questions/43459805/filestack-with-angular-2


