Blogs
Migration From AngularJS (1.x) To Angular (2+)

Overview
AngularJS has been one of the great JavaScript frameworks over the past few years and we have used this to build few really cool solutions. While we stay excited about the capabilities that AngularJS provides to us, what is interesting to see is that few customers have started seeing value in migrating their Apps to the latest version of Angular. However, there is a significant difference in AngularJS and Angular and it makes it difficult to migrate if you don’t plan and execute efficiently.
In this article, we will write about how to migrate AngularJS application to Angular.
Pre-Requisites
- Node.js (5+) – the article assumes that you have a working setup of Node.js
- Angular CLI
Getting Ready
Step 1: Installing Node JS.
Please refer to this link to download and install Node.js
Step 2: Installing Angular CLI.
Please refer to this link to install Angular CLI
Running AngularJS app
This tutorial assumes that you are comfortable with developing AngularJS apps.
Download our gulp generated ng1(AngularJS) app from GitHub which includes the following features –
- Directive
- Filter
- Service
- Controller
- Dependency injection
- Routing
- Unit testing
- CSS
- Gulp build
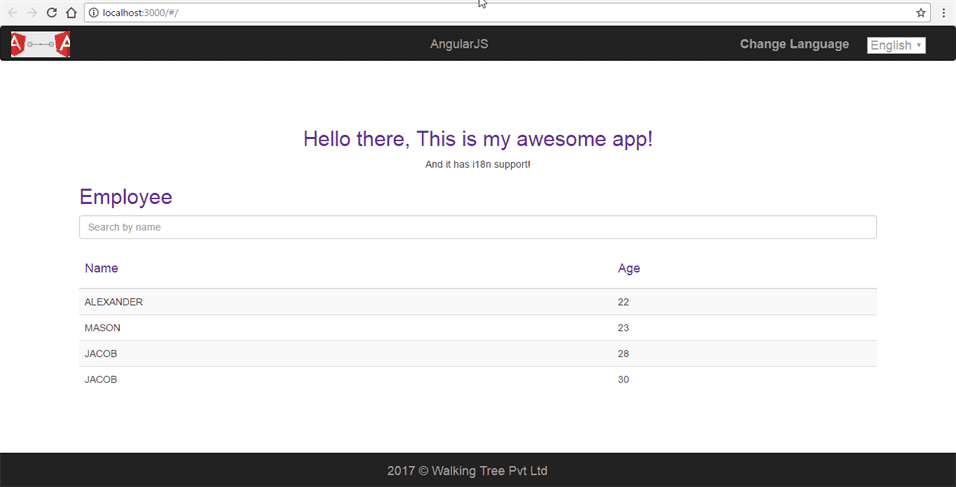
Read the Readme.md file to set up and run AngularJS app. After running the app, you will see the following output:
Generating Angular App
We will use Angular CLI to generate Angular app. This app would be identical to ng1(AngularJS) app.
Step 1: Run the following command to generate Angular app –
ng new angular-migration
Step 2: Go to angular-migration folder and run the following command from terminal to start the application –
ng serve
Step 3: Navigate to http://localhost:4200/ to see the initial output.
 Now we have a working starter project in place for migration. Let’s restructure it to make it identical to ng1 app.
Including Third-Party Libraries
There are two ways of including the third-party library of JavaScript and CSS.
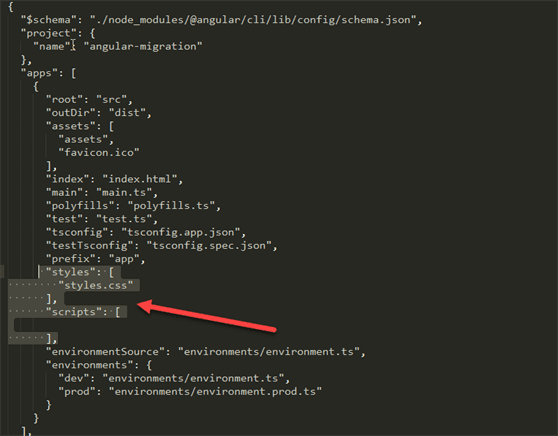
- Include JavaScript and CSS file in index.html.
- Add a reference to the .angular-cli.json app scripts/css.
Setting Up Root and Bootstrap Component
In the AngularJS app, ng-app is at the <html> element level. It provides control over the <head> and allows us to dynamically update the <title> with a custom metadata. In Angular, our root component is located inside the <body>.
<body>
     <app-root>Loading...</app-root>
     </body>
<app-root> is an Angular component selector, you can find it under src/app folder.
import { Component } from '@angular/core';
@Component({
 selector: 'app-root',
 templateUrl: './app.component.html',
 styleUrls: ['./app.component.css']
})
export class AppComponent {
 title = 'app works!';
}
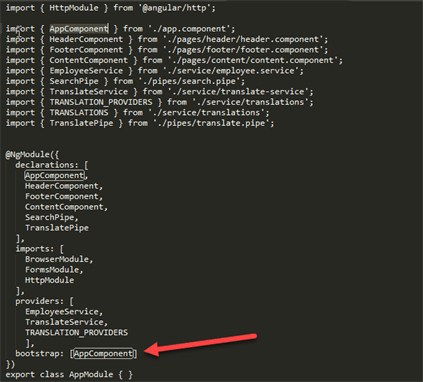
We can change the bootstrap component at src/app/module.app.ts
Adding Router Module And Routes
Router module and router, enable users to navigate from one page/view to the next view as users perform different tasks in the application.
Do the following steps:
Step 1: Create app.routing.ts file under src/app folder.
Step 2: Add the following code to set the routes for different components
import { NgModule } from '@angular/core';
import { RouterModule, Routes } from '@angular/router';
import { AppComponent } from './app.component';
const appRoutes: Routes = [{
 path: '', component: AppComponent
}];
@NgModule({
 imports: [
 RouterModule.forRoot(appRoutes, { useHash: true })
 ],
 exports: [
 RouterModule
 ]
})
export class AppRoutingModule { }
You can import different components and set the routes.
Step 3: Add the following code to app.module.ts to include router module in application
import { AppRoutingModule } from './app.routing';
and add AppRoutingModule module into imports.
imports: [
     AppRoutingModule
     ]
This will make AppRouting module available through the application.
Transclusion of AngularJS Components into Angular
Let’s generate AngularJS app component in Angular. We can use the Angular CLI commands to generate new components for our app.
Create pages folder under src/app and do the following steps:
Step 1: Generate header component.
ng g component ./pages/header
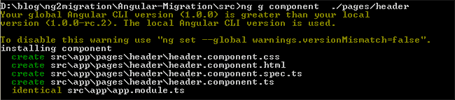 The previous command has generated the header component and included it in the app module.
Now we can find following files under header folder –
- header.component.css – CSS file to add styles related to the header.
- header.component.html – Html file to add markup code related to the header.
- header.component.spec.ts – TypeScript file to add unit testing code related to the header.
- header.component.ts – TypeScript file to add TypeScript code related to header
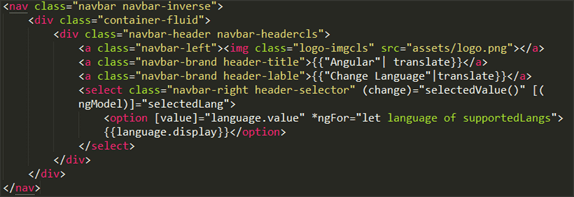
Step 2: Add the following html code to header.component.html
 Step 3: Add following CSS code to header.component.css
.navbar-headercls{
 width: 100%;
}
.header-title{
 margin-left: 12% !important;
}
.header-lable{
 margin-left: 33% !important;
}
.logo-imgcls{
 width: 25%;
 margin-top: 2%
}
.header-selector{
 margin: 1%;
}
Step 4: Add the following code to header.component.ts
import { Component, Input, Output ,OnInit, EventEmitter } from '@angular/core';
@Component({
  selector: 'app-header',
  templateUrl: './header.component.html',
  styleUrls: ['./header.component.css']
})
export class HeaderComponent implements OnInit {
  public supportedLangs: any;
  public selectedLang: any;
  constructor() {
  }
  ngOnInit() {
      this.selectLang();
  }
  selectedValue(){
    this.selectLang(this.selectedLang);
  }
  selectLang(lang?: any) {
    if(!lang) {
      if(localStorage.getItem('lang'))
        lang = localStorage.getItem('lang');
      else
        lang = 'en';
    }
    localStorage.setItem('lang', lang);
    if( lang == 'en'){
          this.supportedLangs = [
            { display: 'English', value: 'en', id: '0' },
            { display: 'Hindi', value: 'hi', id: '1' }
          ];
          this.selectedLang = this.supportedLangs[0].value;
      }else{
          this.supportedLangs = [
            { display: '?????????', value: 'en' },
            { display: '?????', value: 'hi' }
          ];
          this.selectedLang = this.supportedLangs[1].value;
      }
  }
}
We can see the @Component selector is app-header. We generally want custom elements to be hyphenated as per the W3C spec for custom elements.
Similarly, we can generate the other components and the markup/CSS and typescript code.
Step 5: Generate footer component.
ng g component ./pages/footer.component
Step 6: Generate content component.
ng g component ./pages/content.component
Transclusion of AngularJS Service to Angular Service
Let’s generate service in Angular to load the employee list in content component. Do the following steps:
Step 1: Generate employee service.
ng g service ./service/employee.service
 You can find employee.service.spec.ts and employee.service.ts under app service folder.
Step 2: Inject employee service in app module to use it.
import { EmployeeService } from './service/employee.service';
providers: [ EmployeeService ]
Step 3: Add method to load the employee list from the JSON file.
getEmployeeData() {
 return this.http.get('assets/data/data.json')
}
Step 4: Inject employee service into the content component and call employee service method getEmployeeData to load employee list.
import { Component, OnInit } from '@angular/core';
import { EmployeeService } from './../../service/employee.service';
@Component({
  selector: 'app-content',
  templateUrl: './content.component.html',
  styleUrls: ['./content.component.css']
})
export class ContentComponent implements OnInit {
  public employees: any = [];
  public search : string = "";
  constructor(public employeeService: EmployeeService) { }
  ngOnInit() {
      this.getEmployeeData();
  }
  getEmployeeData() {
    this.employeeService.getEmployeeData()
            .subscribe(res => this.employees = res.json());
  }
}
Angular Component Interaction
Let’s Include header/footer in content component and bind employee list and allow to communicate with content and root component.

Transclusion of AngularJS Filter to Angular Pipe
Let’s create the pipe to filter employee list.
Step 1: Generate SearchPipe
ng g pipe ./pipes/search.pipe
 Step 2: Inject SearchPipe and add into declarations in app module.
import { SearchPipe } from './pipes/search.pipe';
declarations: [SearchPipe]
Step 3: Use Search Pipe in content.html to filter employee list.

Modifying App Component and Routing Module
Let’s modify app routing module and app component to demonstrate the routing for other components in the application. Do the following :
Step 1: Generate a login component.
ng g component ./pages/login.component
Step 2: Add routes for default URL and Login page.
import { LoginComponent } from './pages/login/login.component';
import { ContentComponent } from './pages/content/content.component';
const appRoutes: Routes = [
  {
    path: '', component: ContentComponent
  },
  {
    path: 'login', component: LoginComponent
  }
];
Step 3: Add router outlet in app component.
<router-outlet></router-outlet>
Router outlet is a placeholder that Angular dynamically fills based on the current router state.
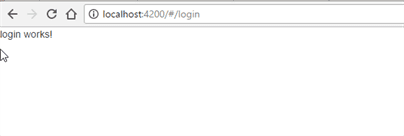
Step 4: Run the application and change routing to /login in URL and you will see the login page.
 We are done with migrating the app from AngularJS to Angular.
Run the “ng serve” command and open “http://localhost:4200/” in the browser to see the migrated output.
Unit Testing
Angular CLI generates .spec.ts file for your Component/Service and Pipes. Also, it add basic unit testing code (you can also do it manually). Open app.component.spec.ts and you will see the following unit testing code –
import { TestBed, async } from '@angular/core/testing';
import { AppComponent } from './app.component';
describe('AppComponent', () => {
 beforeEach(async(() => {
 TestBed.configureTestingModule({
 declarations: [
 AppComponent
 ],
 }).compileComponents();
 }));
 it('should create the app', async(() => {
 const fixture = TestBed.createComponent(AppComponent);
 const app = fixture.debugElement.componentInstance;
 expect(app).toBeTruthy();
 }));
 it(`should have as title 'app works!'`, async(() => {
 const fixture = TestBed.createComponent(AppComponent);
 const app = fixture.debugElement.componentInstance;
 expect(app.title).toEqual('app works!');
 }));
 it('should render title in a h1 tag', async(() => {
 const fixture = TestBed.createComponent(AppComponent);
 fixture.detectChanges();
 const compiled = fixture.debugElement.nativeElement;
 expect(compiled.querySelector('h1').textContent).toContain('app works!');
 }));
});
You can keep adding your unit testing code on top of it. Angular internally use Karma for unit testing. Run the following command to execute your test cases –
ng test

Above command launch the browser with unit test case report where you can see success and Failures list.
Building App
Run the following command to build the application –
ng build
The build artifacts will be stored in the dist folder. Use the -prod flag for a production build.
A Look at the migrated app
In this article, so far you have seen how to create an Angular (2+) app and how to map the existing features, from the AngularJS, in the Angular app.
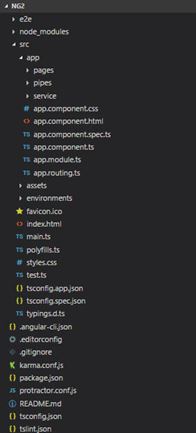
After migration, you shall have following directory structure
How to get the demo app?
You can download ng1 and ng2 demo application source code from GitHub.
Summary
In this article, we have successfully migrated an AngularJS app to Angular. The migration included taking care of Component, Routing, Service, Pipe, build, etc.. I hope this article guides you in planning the migration of your old app to the latest version of Angular.
WalkingTree offers Migration Services to help you with the end-to-end migration of your existing application to Angular(+Ionic). Feel free to contact us with your migration need and our professional services team would be just a click away.