Blogs
Getting started with Apache Royale

In the first blog, we considered the different options available for migrating Flex applications to HTML and decided upon taking up the approach using Apache Royale, the natural successor of Flex. In this blog, we will look at getting started with a simple Helloworld Apache Royale application and the prerequisites required for the same.
Getting started with Apache Royale
In this blog, we will look at the steps to get started with using Royale and create a new Apache Royale project using Moonshine IDE.
Prerequisites
To get started with this approach, we first need to set up our system with the prerequisites.
Below is the exhaustive list of the recommended installations and setup. If you need to test existing flash components while you try to migrate them to HTML, you would need the flash player and debugger also, hence included in the below list.
- Install Java SDK(1.8) from here and set up JAVA_HOME in your system environment variables, pointing to the installed folder and add to your system Path environment variable.
- Install Ant 1.10.7 from here and set up ANT_HOME in your system environment variables, pointing to the unzipped folder and add to your system Path variable.
- Install Adobe AIR Integration Kit from here and set up AIR_HOME in your system variables and add to your system Path environment variable.
- Install Apache Flex SDK from here and set up FLEX_HOME in your system variables, pointing to the SDK folder and add to your system Path environment variable.
- Download the Flash Player projector content debugger from here and set up FLASHPLAYER_DEBUGGER in your system variables, pointing to the .exe file and add to your system Path.
- Download Adobe Flash Player playerglobal swcs from here and set up PLAYERGLOBAL_HOME(the player swc file should be placed inside the main folder within a folder of version number like C:\Player\11.7\playerglobal.swc and the PLAYERGLOBAL_HOME should point to the main folder as C:\Player )
- Add system environment variable for JAVA_TOOL_OPTIONS: -Dfile.encoding=UTF-8
- Install Moonshine IDE for flex/royale projects from here. This IDE is used for Flex and Royale related projects and it includes some of the SDK prerequisites like Apache Flex SDK and Apache Royale SDK, as part of the IDE, which can be installed after launching the IDE first time.
After setting up the prerequisites, we will get started with opening an existing Flex application or creating a new Apache Royale application in the IDE, as both can be manipulated and compiled using the IDE.
Creating a new Apache Royale application
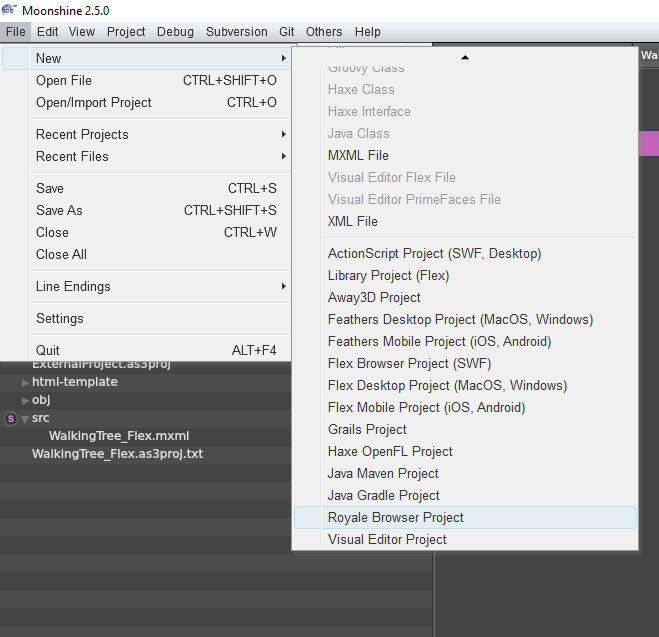
Using the Moonshine IDE, you can choose to create a new Browser Royale Project or open an existing project by specifying the correct project type.
Open the Moonshine IDE and select the option File->New->Royale Browser Project.
The following screen comes up where you can provide the project details and also select the Royale SDK folder which will be used to compile your project. This can be the default folder included in the IDE or you can provide your own framework location.
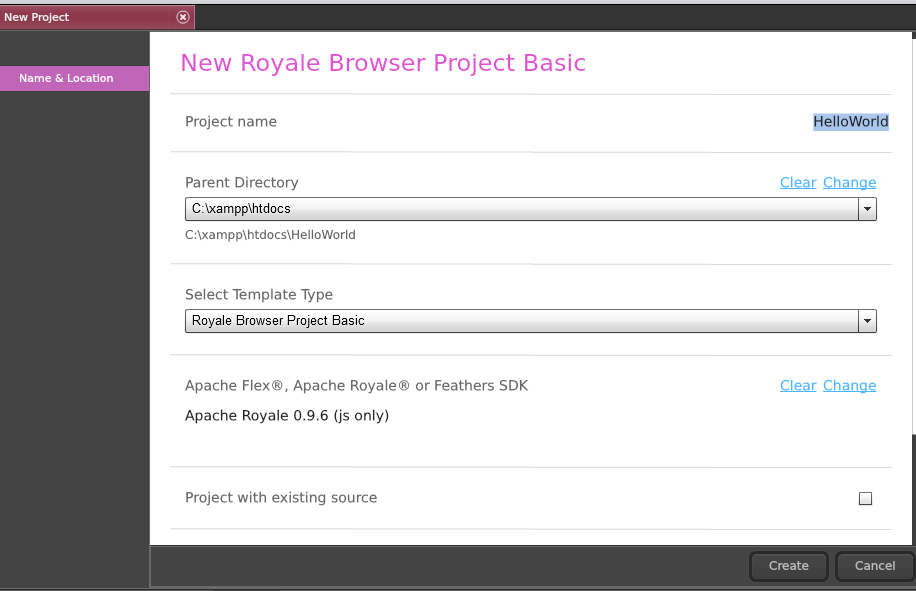
Next use the Create button to create the Royale project. The following HelloWorld project gets created which has the single HelloWorld.mxml file as shown:
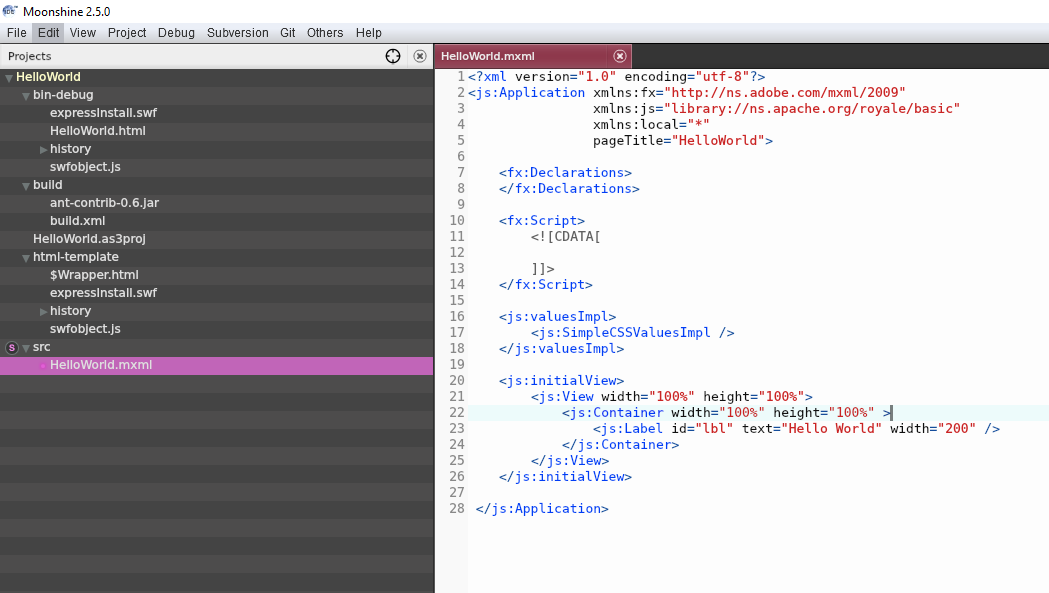
The Royale project structure is as follows:
- The src folder contains the source code in the form of mxml and as files. In this simple HelloWorld example, we have a single HelloWorld.mxml.
- The other files like build/build.xml are related to the configuration.
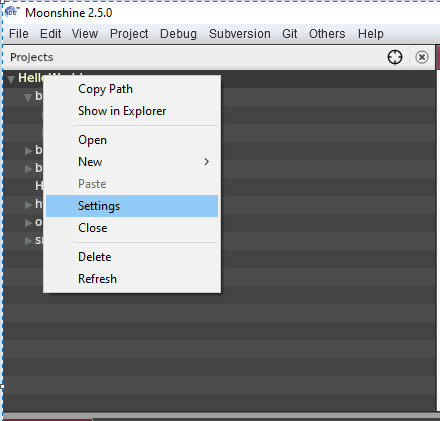
In order to make any changes to the project settings, right click on the project and choose settings as shown
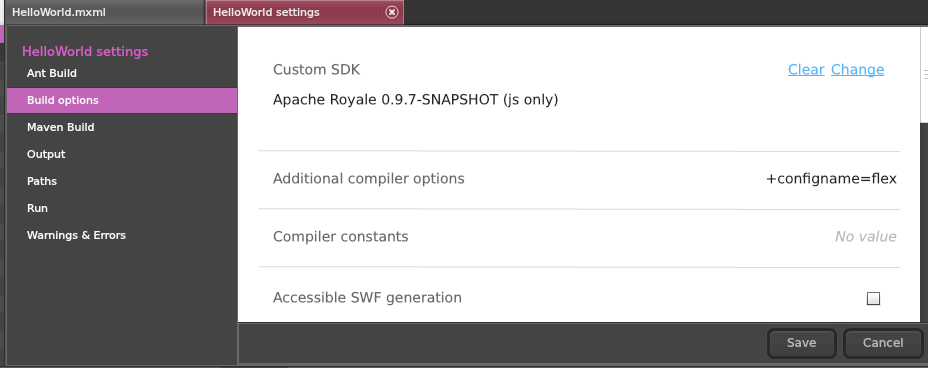
This opens up the below settings page. Here you can ensure that the correct SDK is selected for compilation and also add compiler options( +configname=flex , this option ensures the compiler takes care of any existing flex code)as shown below.
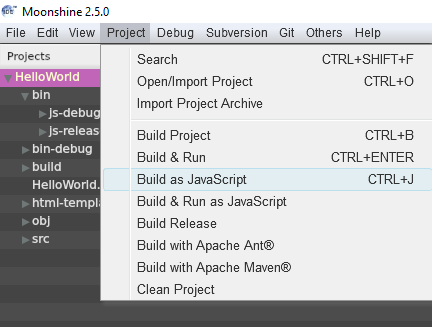
Now choose the option to Build as JavaScript as shown
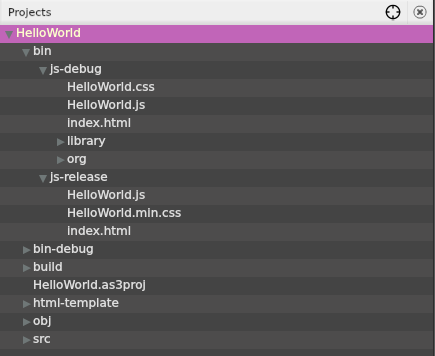
This generates the bin folder with two sub-folders js-debug(debuggable version) and js-release(production version), containing the code transpiled to HTML, CSS and JS files as shown
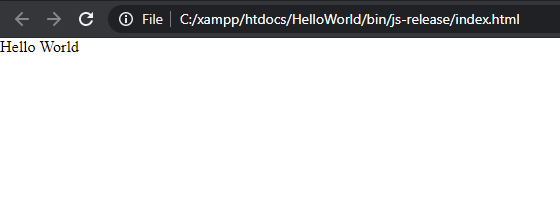
On opening the index.html in browser, you can see the output as shown below
You can also create an Apache Royale from terminal using Maven by following the steps given here.
In the next blog of this series, we will look at an example of making a minor enhancement to the Apache Royale framework using Maven.