Overview
Kaa is an Open Source IoT Platform that enables one to connect and manage IoT devices via the cloud. Its modular and scalable architecture makes it a great Open Source platform that can be easily extended. Kaa platform is more of a middleware without its own dashboard to monitor the devices. In this article, we will see how we can extend our Real-time Monitoring with Arbela and PubNub discussion to let Kaa push the data to the PubNub data stream and start monitoring Kaa Endpoints (EPs) with Arbela.
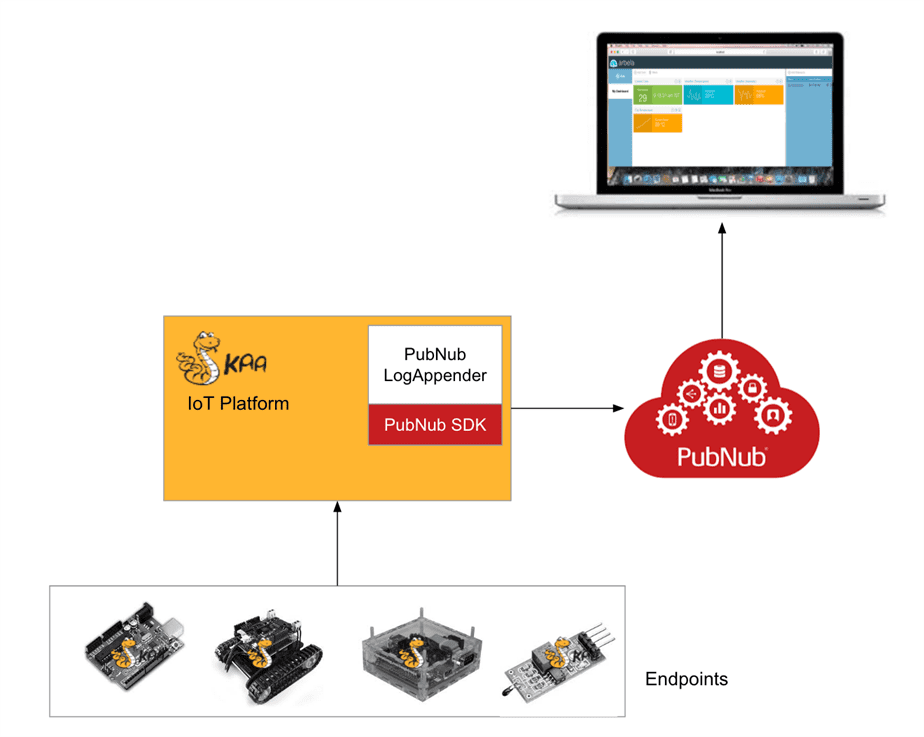
The below diagram depicts the solution architecture where the Endpoints are connected to Kaa platform. Kaa uses a custom PubNub Log Appender to push the messages arriving from the EPs to a PubNub channel to which Arbela has subscribed:
Getting Started
We need to get Kaa server running. Also, we need tools to build and run the Endpoint client. So, let us setup our environment.
Installing Prerequisites
- Java SDK 1.8
- Oracle VirtualBox VM – latest version – required to install and run Kaa sandbox
Starting Kaa Sandbox
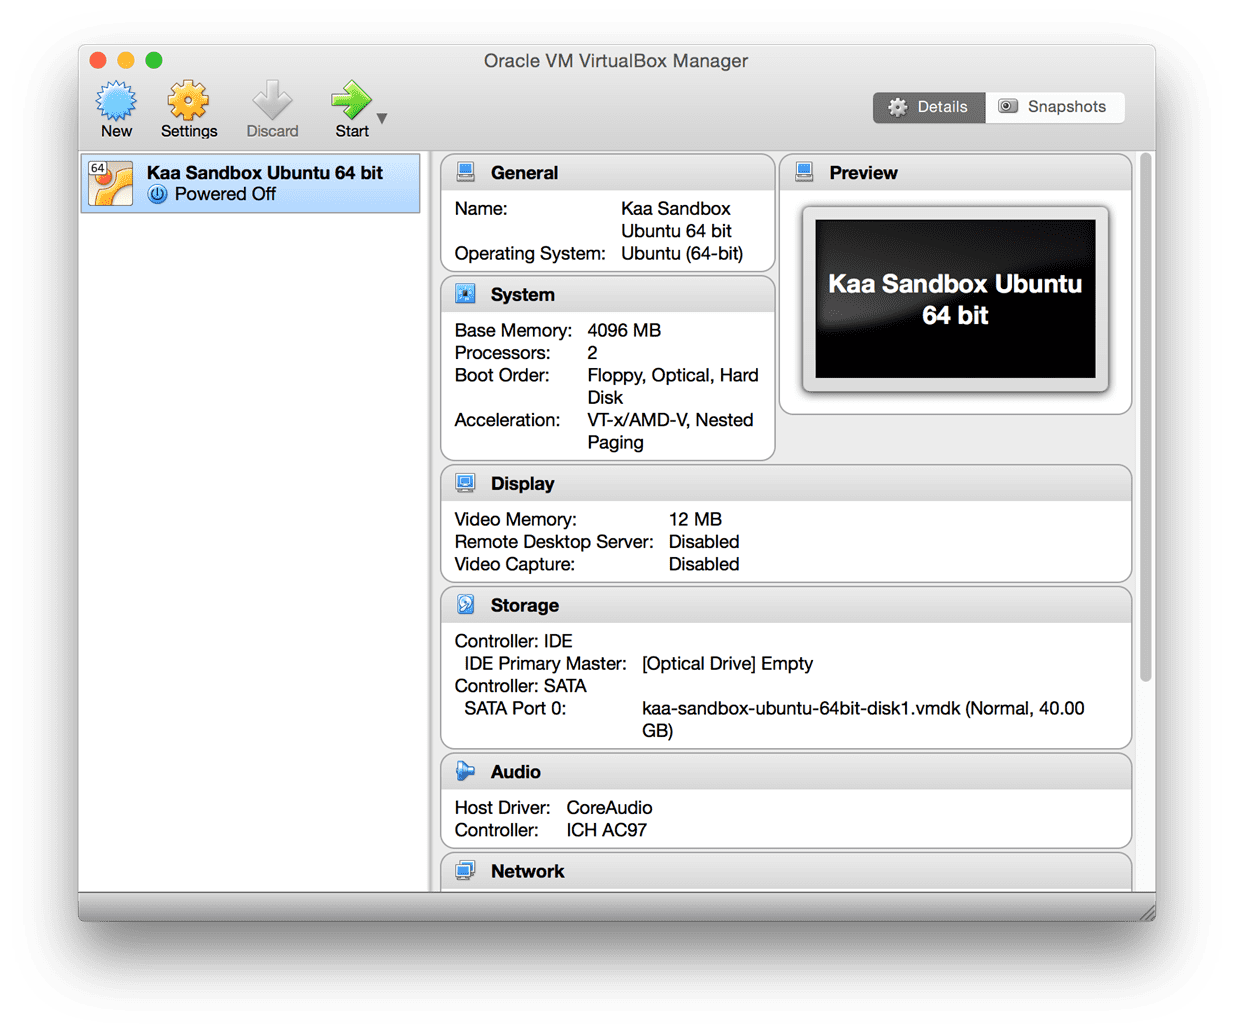
- Download and install Kaa Sandbox VM image. Upon successful installation, you shall see Kaa Sandbox Ubuntu 64 bit server listed, as shown below:
Right click on it and Start the server. Verify that you are able to access the Kaa Sandbox using the following URL, which is displayed on the VM console:
http://<sandbox public IP address>:8080/kaaAdmin/ You shall see the Kaa Sandbox with the pre-built applications, as shown below:
Verify that you are able to access the Admin client using the following URL:
http://<sandbox public IP address>:8080/kaaAdmin/ You shall see the Admin client prompting for login, as shown below:
Our Kaa server is running and the clients (Sandbox+Admin) are ready. Let us get started.
Step 1: Creating Application
First, we need to create a Kaa Application.
Log in to Kaa Admin client as Tenant Admin using the following credentials:
Username: admin
Password: admin123
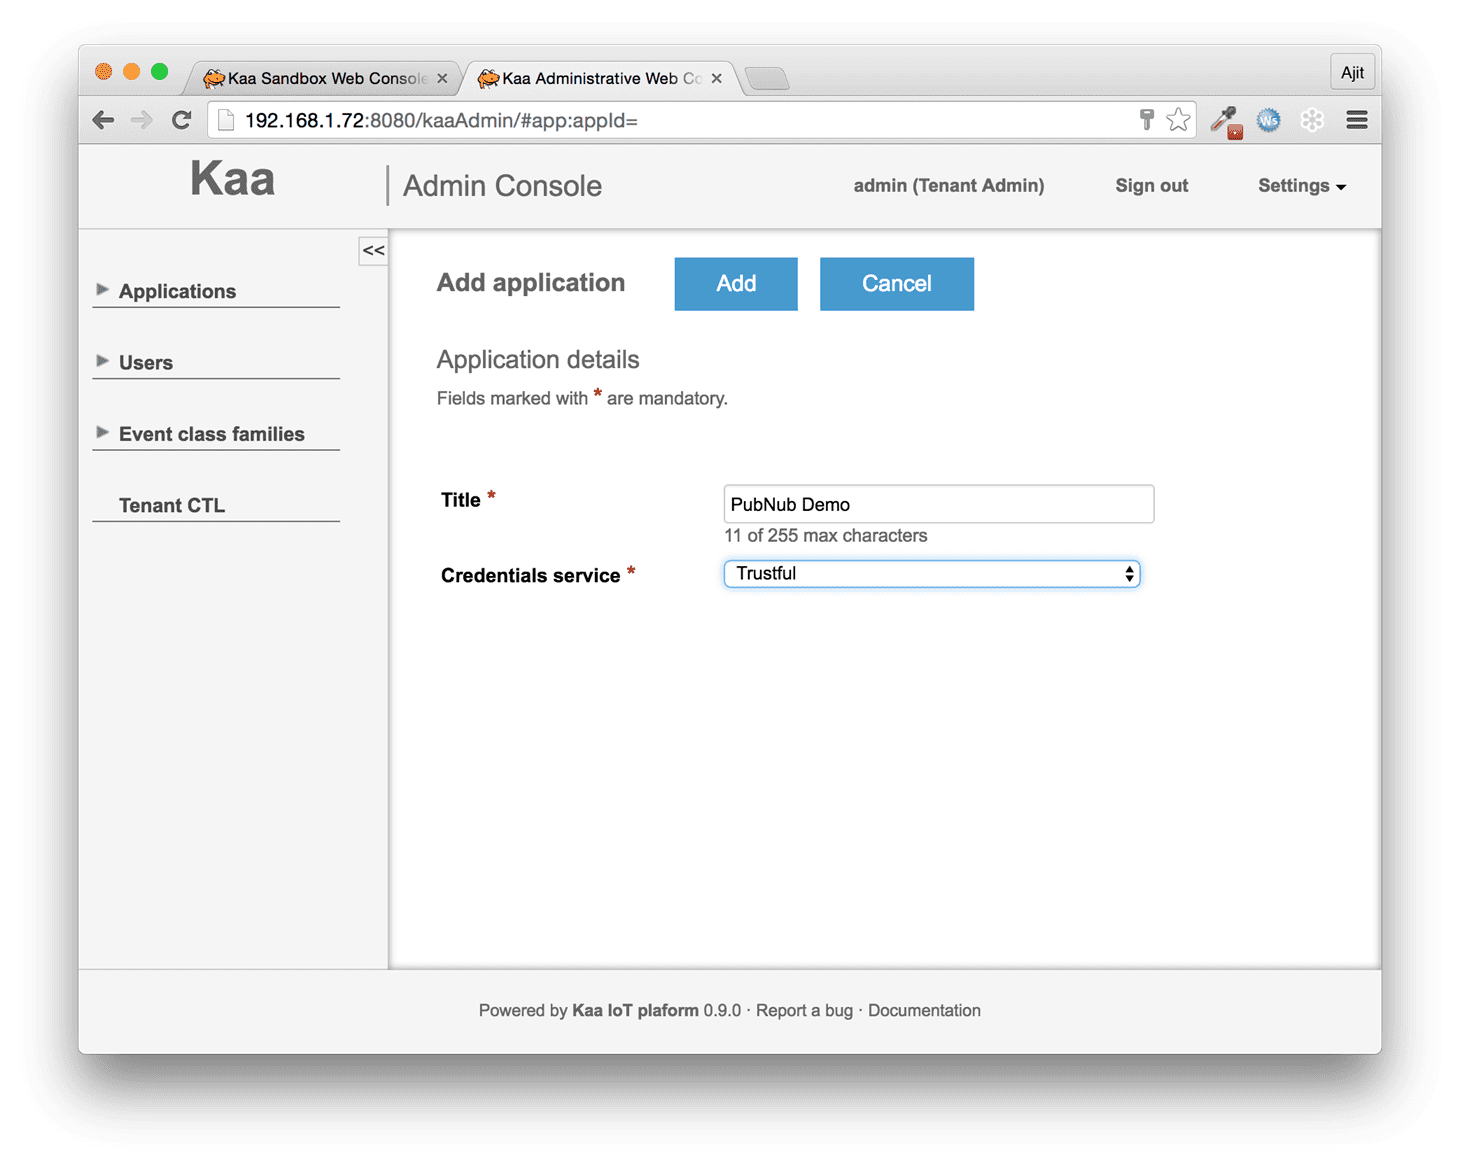
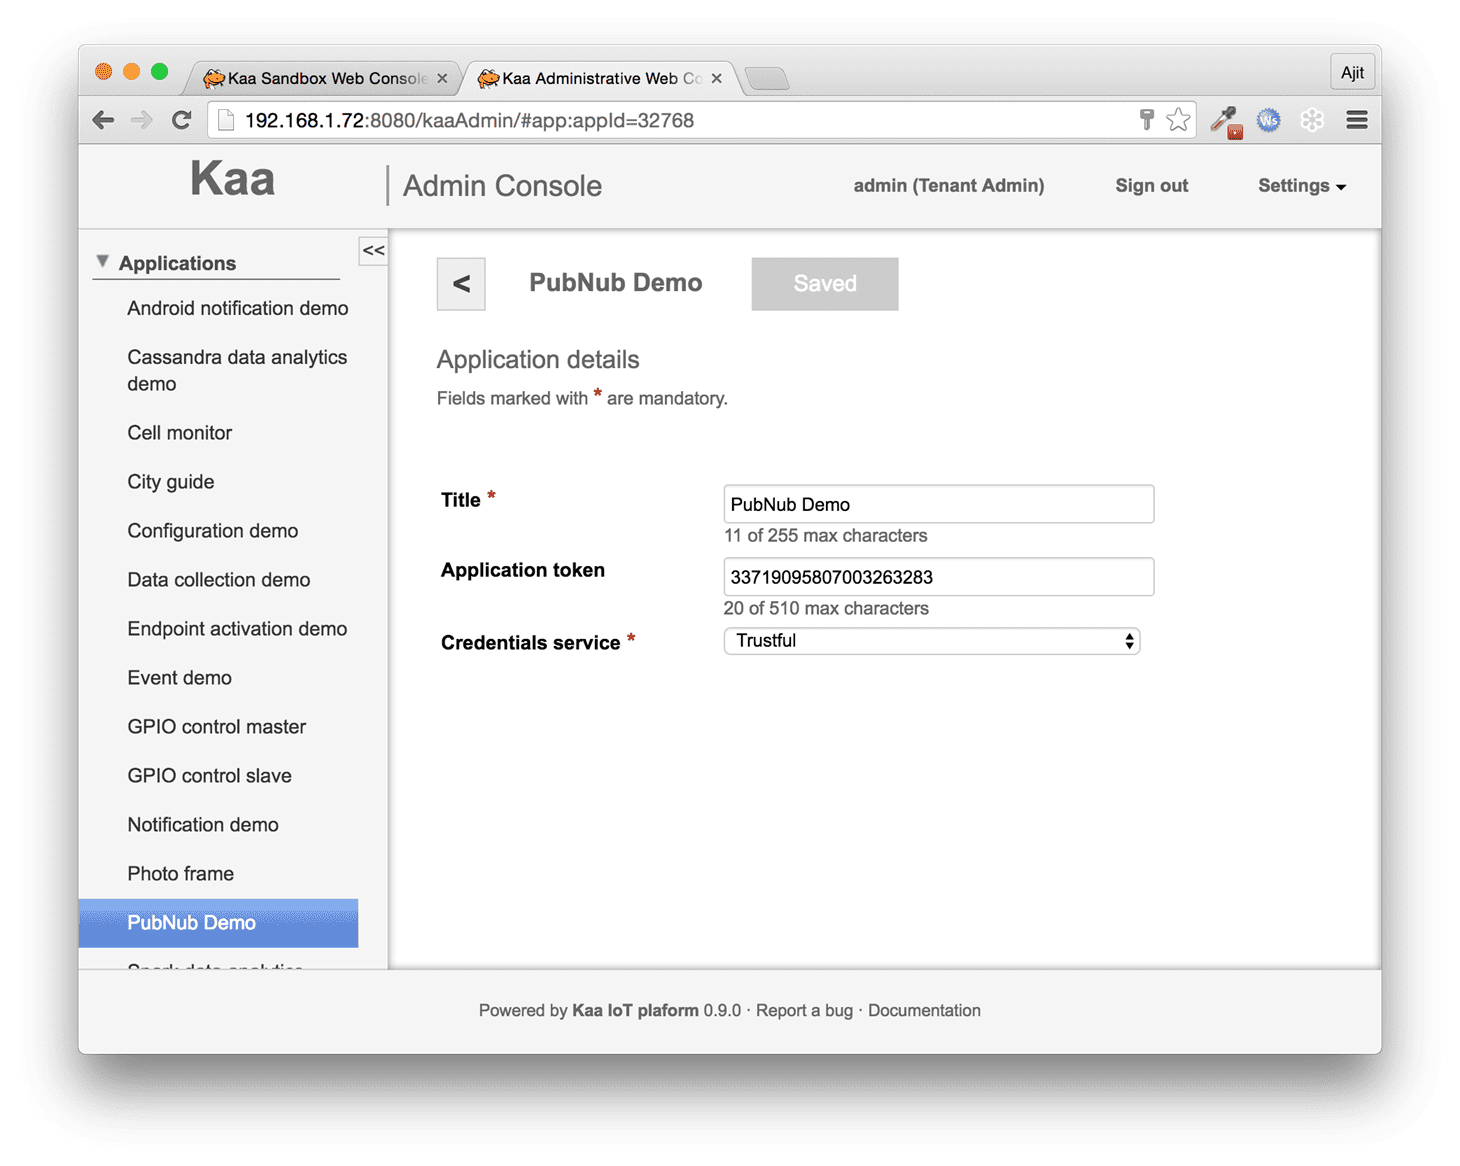
Click on Add application button to create a new application with the following detail:
- Title: any text of your choice. E.g. PubNub Demo
- Credentials service: Trustful
Click on Add button. The newly added application shall appear under Applications node on the left hand side, as shown below:
You may read the official Kaa document – Your first Kaa Application – for more detail.
With the application created, logout from Admin client.
Next, we need to configure the schema so that Kaa knows how to serialize and deserialize the messages between EP and control server.
Step 2: Configuring Schema
Save the following schema definition in a file, say, kaa-log-schema-v2.avsc:
{
  "type" : "record",
  "name" : "RecordWrapper",
  "namespace" : "org.kaaproject.kaa.log",
  "fields" : [ {
    "name" : "recordHeader",
    "type" : [ {
      "type" : "record",
      "name" : "RecordHeader",
      "namespace" : "org.kaaproject.kaa.server.common.log.shared.avro.gen",
      "fields" : [ {
        "name" : "endpointKeyHash",
        "type" : [ {
          "type" : "string",
          "avro.java.string" : "String"
        }, "null" ]
      }, {
        "name" : "applicationToken",
        "type" : [ {
          "type" : "string",
          "avro.java.string" : "String"
        }, "null" ]
      }, {
        "name" : "headerVersion",
        "type" : [ "int", "null" ]
      }, {
        "name" : "timestamp",
        "type" : [ "long", "null" ]
      }, {
        "name" : "logSchemaVersion",
        "type" : [ "int", "null" ]
      } ]
    }, "null" ]
  }, {
    "name" : "recordData",
    "type" : [ {
      "type" : "record",
      "name" : "DeviceData",
      "namespace" : "org.kaaproject.kaa.schema.pubnub.logging",
      "fields" : [ {
        "name" : "channel",
        "type" : {
          "type" : "string",
          "avro.java.string" : "String"
        }
      }, {
        "name" : "message",
        "type" : {
          "type" : "record",
          "name" : "Payload",
          "fields" : [ {
            "name" : "value",
            "type" : {
              "type" : "string",
              "avro.java.string" : "String"
            }
          }, {
            "name" : "since",
            "type" : {
              "type" : "string",
              "avro.java.string" : "String"
            }
          } ],
          "description" : "Contains device payload"
        }
      } ]
    }, "null" ]
  } ]
}
Login to Kaa Admin client as Tenant Developer using the following credentials:
- Username: devuser
- Password: devuser123
Expand PubNub Demo node under Applications. Expand Schemas node and click on Log. You shall see a default schema added, by default. However, for our device, which will send a message like:
{
“channel”: “TEMP”,
“message”: {
“value”: “39”,
“since”: “06:00 AM”
}
}
We need a different schema to be configured. Click on Add Schema button to add a new schema. Enter the following detail:
- Name: Any name of your choice. E.g. Device Schema
- Description: Text describing the log schema. E.g. Used to send log messages from the device
- Upload from file: Select the .avsc file that we created earlier and upload it.
Click on Add button to add the new schema. You shall see the newly added schema under Log schemas, as shown below:
Step 3: Configuring PubNub Log Appender
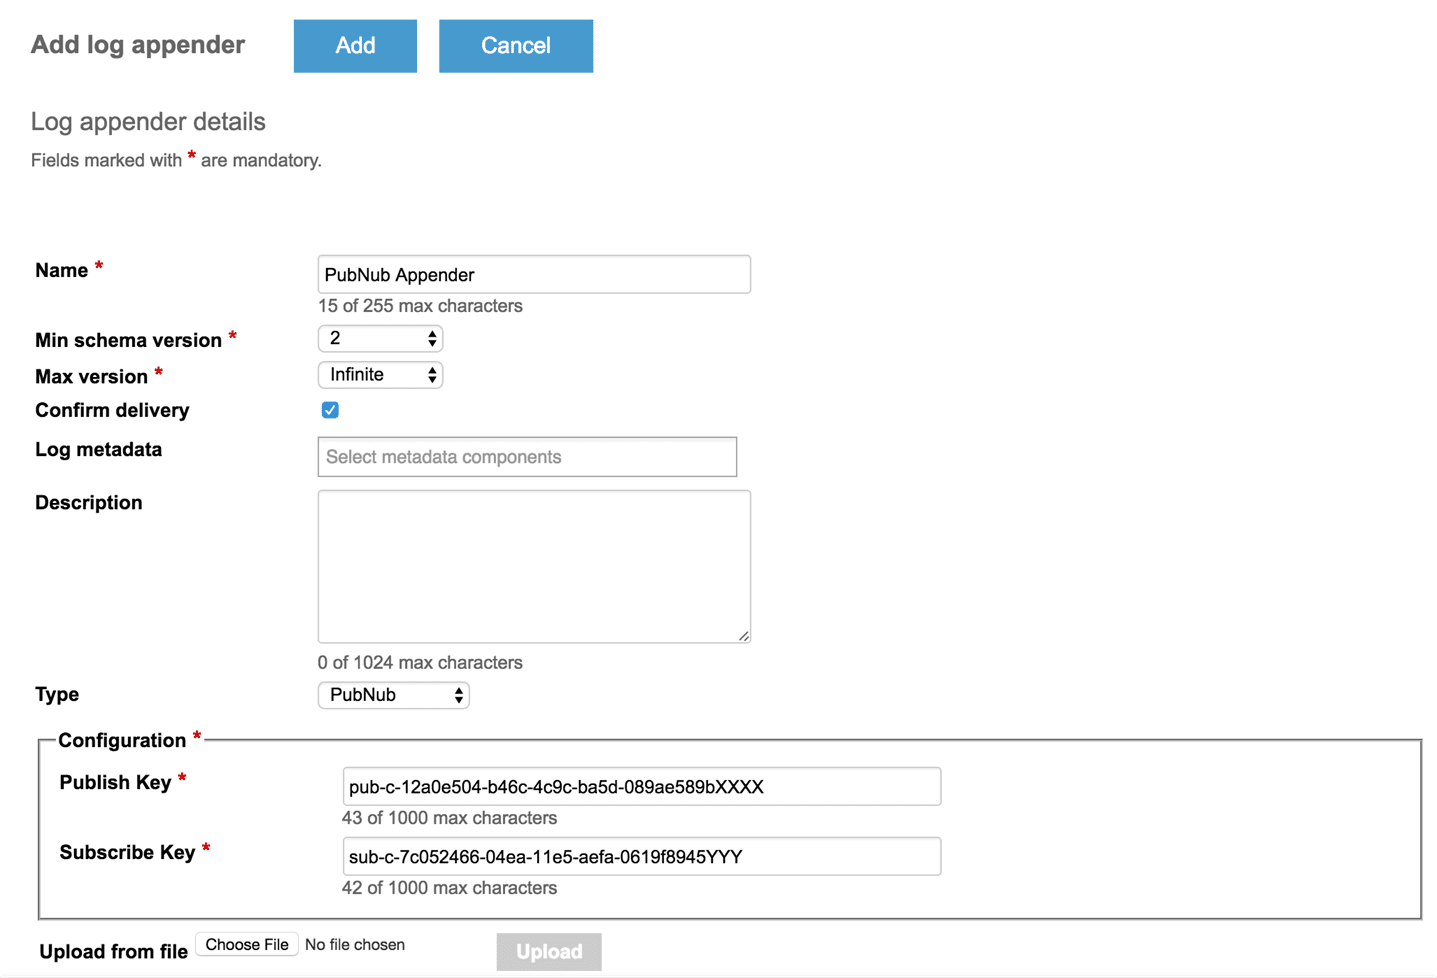
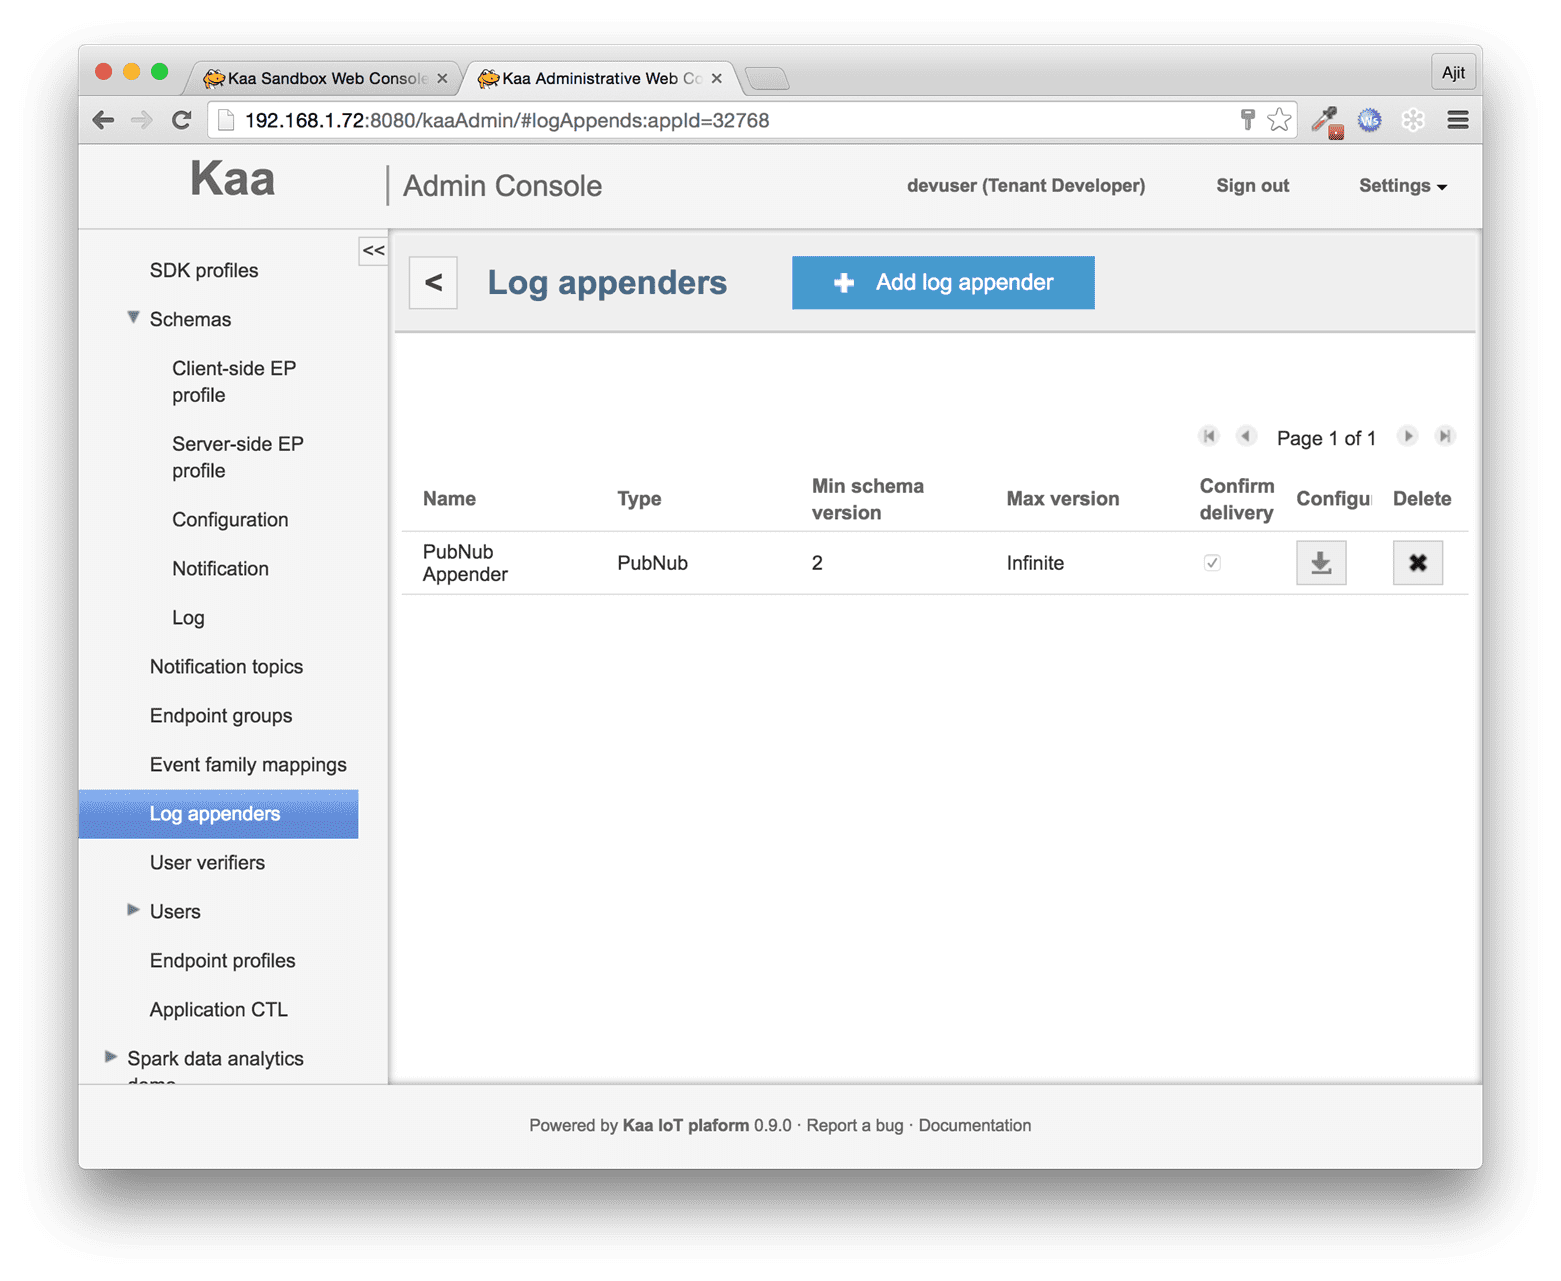
Select Log appenders and click on Add log appender button to add PubNub Log Appender to this application with the following detail:
- Name: any name of your choice. E.g. PubNub Appender
- Min schema version: 2
- Max version: Infinite
- Confirm delivery: Checked
- Type: PubNub. This will bring up the configuration specific to the selected log appender.
- Publish Key: Your PubNub publish key
- Subscribe Key: Your PubNub subscribe key
Click on Add button to add the PubNub Log Appender to the application, as shown below:
Step 4: Building Endpoint Client
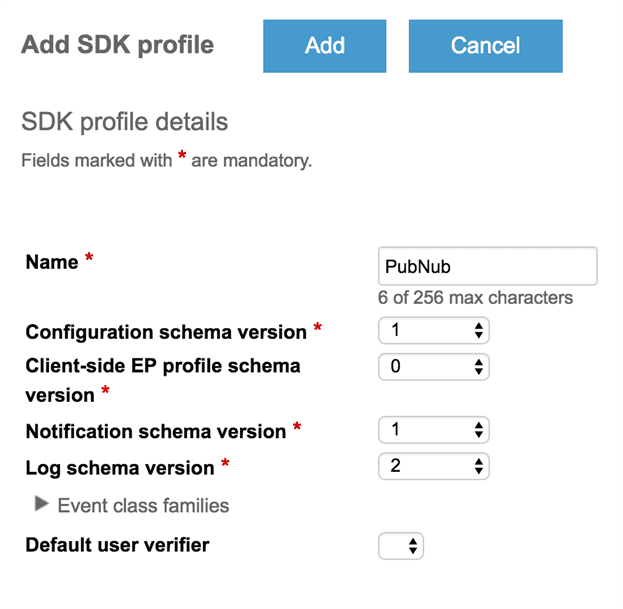
Select SDK Profiles node under PubNub Demo application node and click on Add SDK Profile button to add a new profile, with the below detail, to the application using which we will develop the Endpoint client:
- Name: Any name of your choice
- Configuration schema version: 1
- Client-side EP profile schema version: 0
- Notification schema version: 1
- Log schema version: 2
Click on Add button to create the new profile, as shown below:
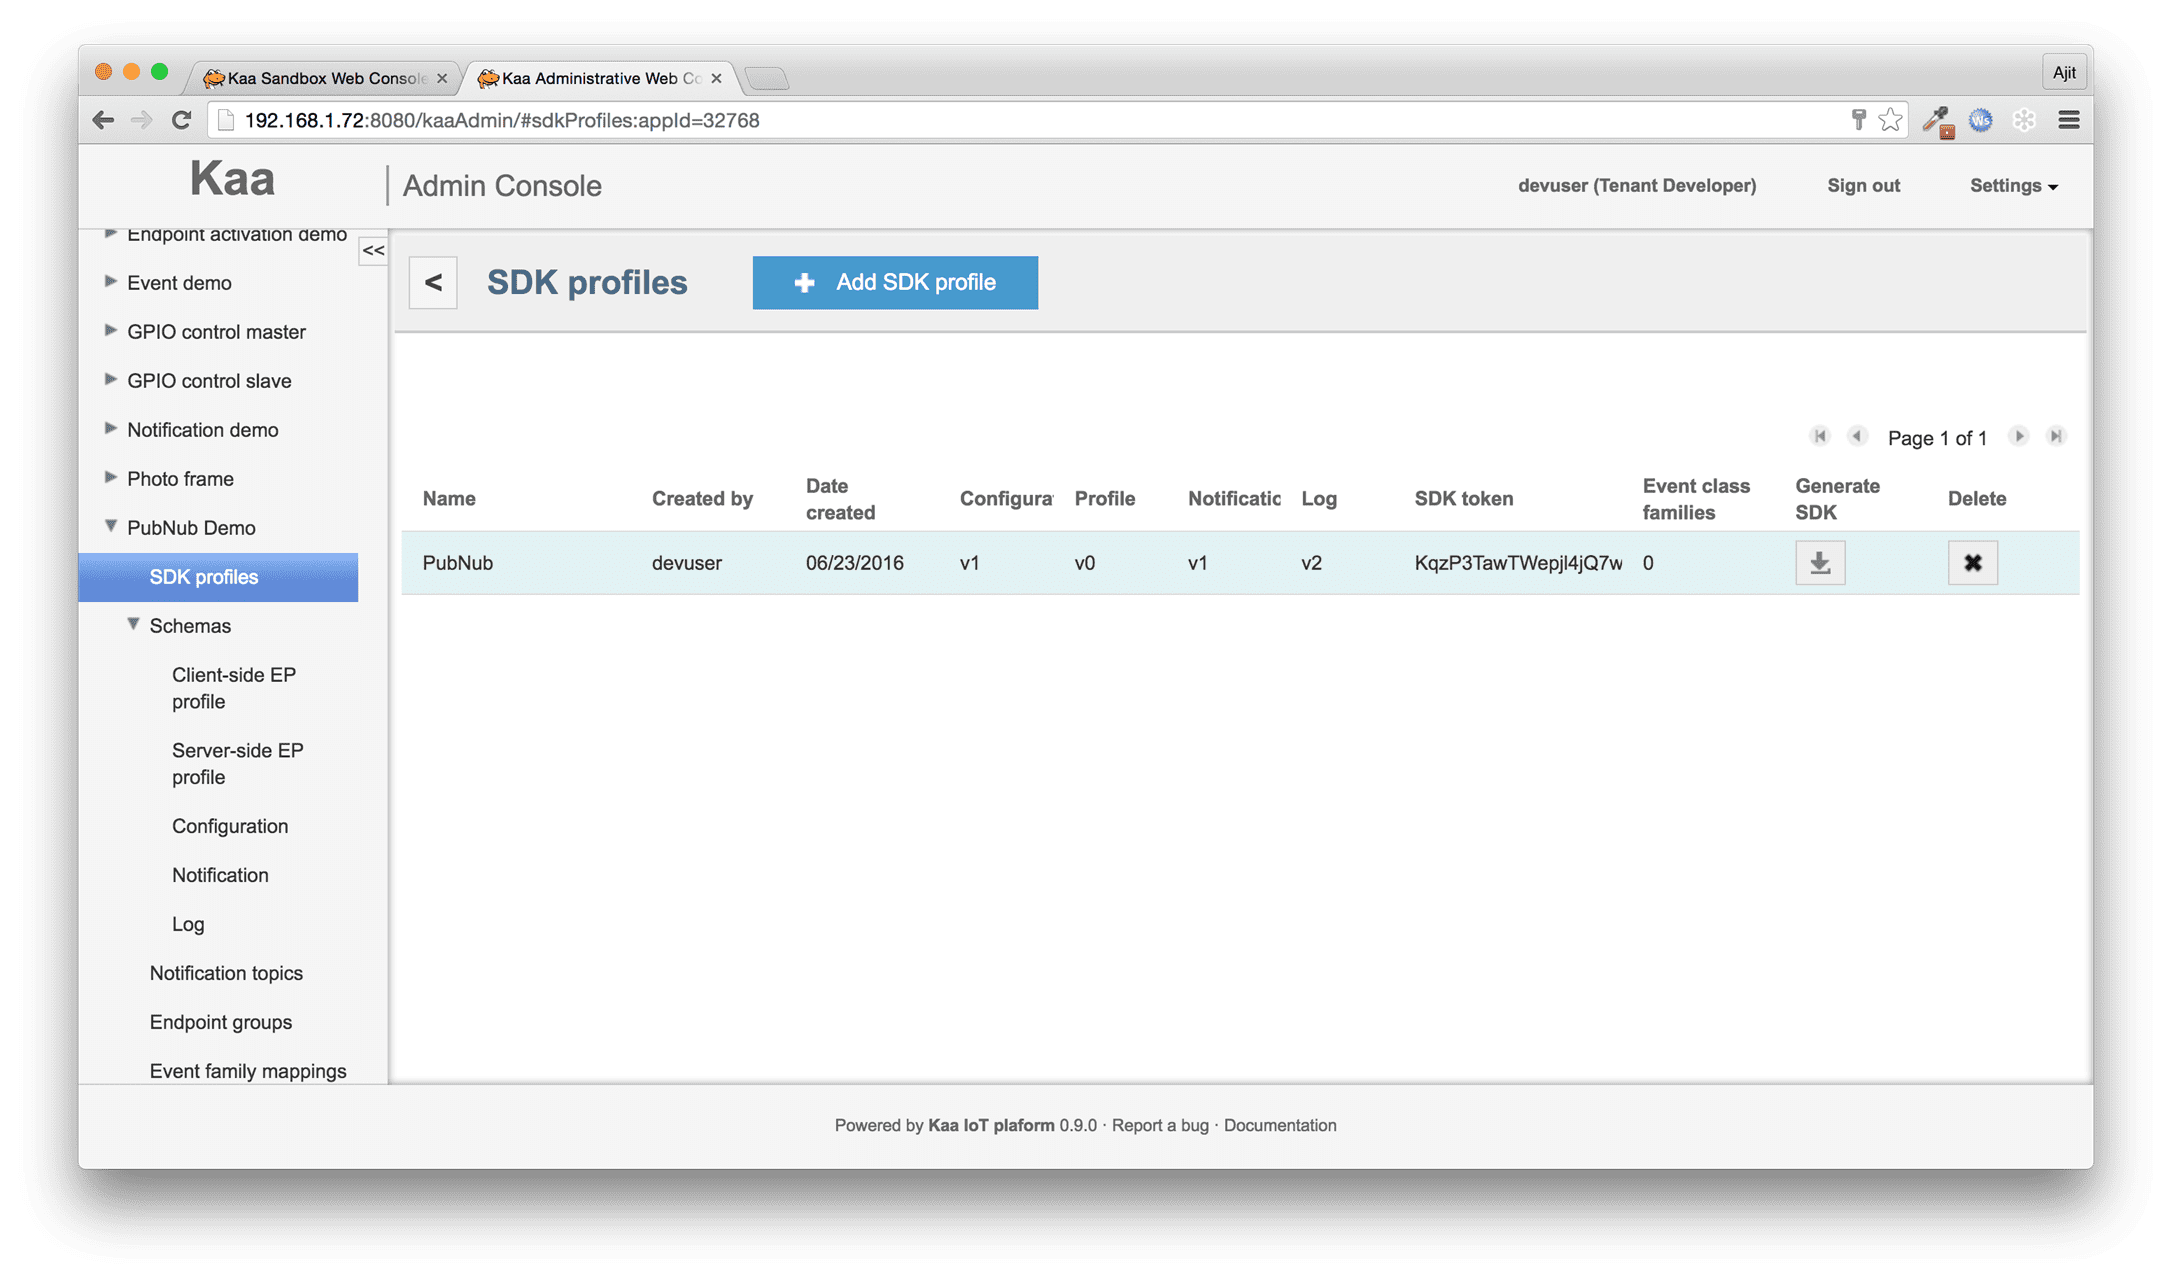
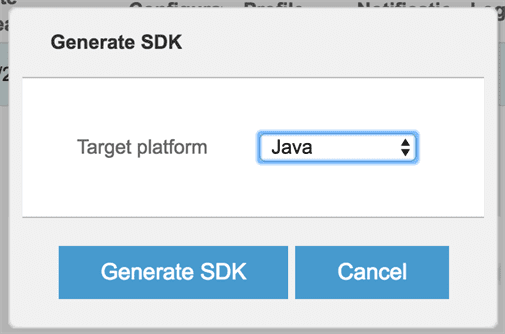
Click on button under Generate SDK column to generate the SDK for our Endpoint client development. It will prompt you for the platform selection, as shown below:
In this article, we will build a Java client for our EP, so select Java as the Target platform and click on Generate SDK to download the SDK JAR file (say, kaa-java-ep-sdk-KqzP3TawTWepjl4jQ7wPg5XiAUg.jar) for the client development.
Now, use your favourite Java IDE (e.g. Eclipse) to create a Java project and add the generated SDK JAR to its build path. Add a class, say, PubNubEP with the following code to send messages from EP to the Kaa control servers:
import java.util.Date;
import java.util.HashMap;
import java.util.LinkedList;
import java.util.List;
import java.util.Map;

import org.kaaproject.kaa.client.DesktopKaaPlatformContext;
import org.kaaproject.kaa.client.Kaa;
import org.kaaproject.kaa.client.KaaClient;
import org.kaaproject.kaa.client.SimpleKaaClientStateListener;
import org.kaaproject.kaa.client.logging.BucketInfo;
import org.kaaproject.kaa.client.logging.RecordInfo;
import org.kaaproject.kaa.client.logging.future.RecordFuture;
import org.kaaproject.kaa.client.logging.strategies.RecordCountLogUploadStrategy;
import org.kaaproject.kaa.schema.pubnub.logging.DeviceData;
import org.kaaproject.kaa.schema.pubnub.logging.Payload;

import org.slf4j.Logger;
import org.slf4j.LoggerFactory;

/**
 * A demo application that shows how to use the Kaa logging API.
 */public class PubNubEP {

    private static final int LOGS_TO_SEND_COUNT = 1;
    private static final Logger LOG = LoggerFactory.getLogger(PubNubEP.class);

    public static void main(String[] args) {
        LOG.info("Data collection demo started");

        //Create a Kaa client with the Kaa desktop context.
        KaaClient kaaClient = Kaa.newClient(new DesktopKaaPlatformContext(), new SimpleKaaClientStateListener() {
            @Override
            public void onStarted() {
                LOG.info("Kaa client started");
            }

            @Override
            public void onStopped() {
                LOG.info("Kaa client stopped");
            }
        });

        // Set record count strategy for uploading logs with count threshold set to 1.
        // Defined strategy configuration informs to upload every log record as soon as it is created.
        // The default strategy uploads logs after either a threshold logs count
        // or a threshold logs size has been reached.
        kaaClient.setLogUploadStrategy(new RecordCountLogUploadStrategy(1));

        // Start the Kaa client and connect it to the Kaa server.
        kaaClient.start();

        // Collect log record delivery futures and corresponding log record creation timestamps.
        Map<RecordFuture, Long> futuresMap = new HashMap<RecordFuture, Long>();

        // Send logs in a loop.
        for (DeviceData log : generateLogs(LOGS_TO_SEND_COUNT)) {
            futuresMap.put(kaaClient.addLogRecord(log), (new Date()).getTime());
            LOG.info("Log record {} sent", log.toString());
        }

        // Iterate over log record delivery futures and wait for delivery
        // acknowledgment for each record.
        for (RecordFuture future : futuresMap.keySet()) {
            try {
                RecordInfo recordInfo = future.get();
                BucketInfo bucketInfo = recordInfo.getBucketInfo();
                Long timeSpent = (recordInfo.getRecordAddedTimestampMs() - futuresMap.get(future))
                        + recordInfo.getRecordDeliveryTimeMs();
                LOG.info(
                        "Received log record delivery info. Bucket Id [{}]. Record delivery time [{} ms].",
                        bucketInfo.getBucketId(), timeSpent);
            } catch (Exception e) {
                LOG.error(
                        "Exception was caught while waiting for callback future",
                        e);
            }
        }

        // Stop the Kaa client and release all the resources which were in use.
        kaaClient.stop();

        LOG.info("Data collection demo stopped");
    }

    public static List<DeviceData> generateLogs(int logCount) {
        List<DeviceData> logs = new LinkedList<DeviceData>();
        for (int i = 0; i < logCount; i++) {
         Payload payload = new Payload(String.valueOf( 23), "06:00 AM");
            logs.add(new DeviceData("TEMP", payload));
        }
        return logs;
    }
}
Save the file and build the project. Run this client to send the following message to the Kaa server:
{
“channel”: “TEMP”,
“message”: {
“value”: “23”,
“since”: “06:00 AM”
}
}
So, the message from the EP is being sent to the PubNub data stream cloud. Now, let us connect the last piece in the Jigsaw!
Step 5: Connecting Arbela
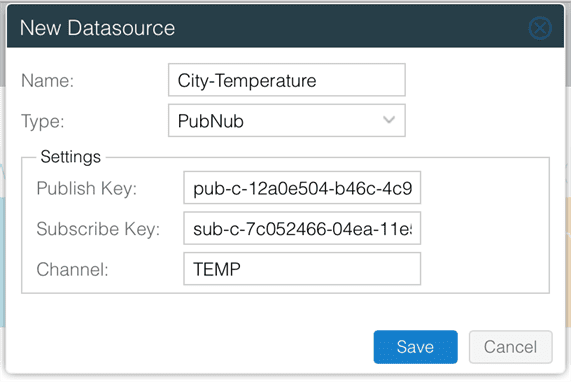
Open Arbela in your browser. Add a new datasource with the following detail:
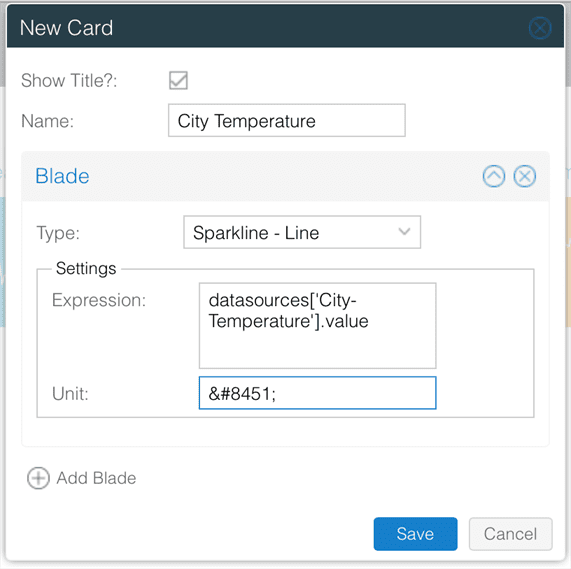
Add a new card with the following detail:
Click on Save button and you shall see the data from the device being displayed inside the card, as shown below:
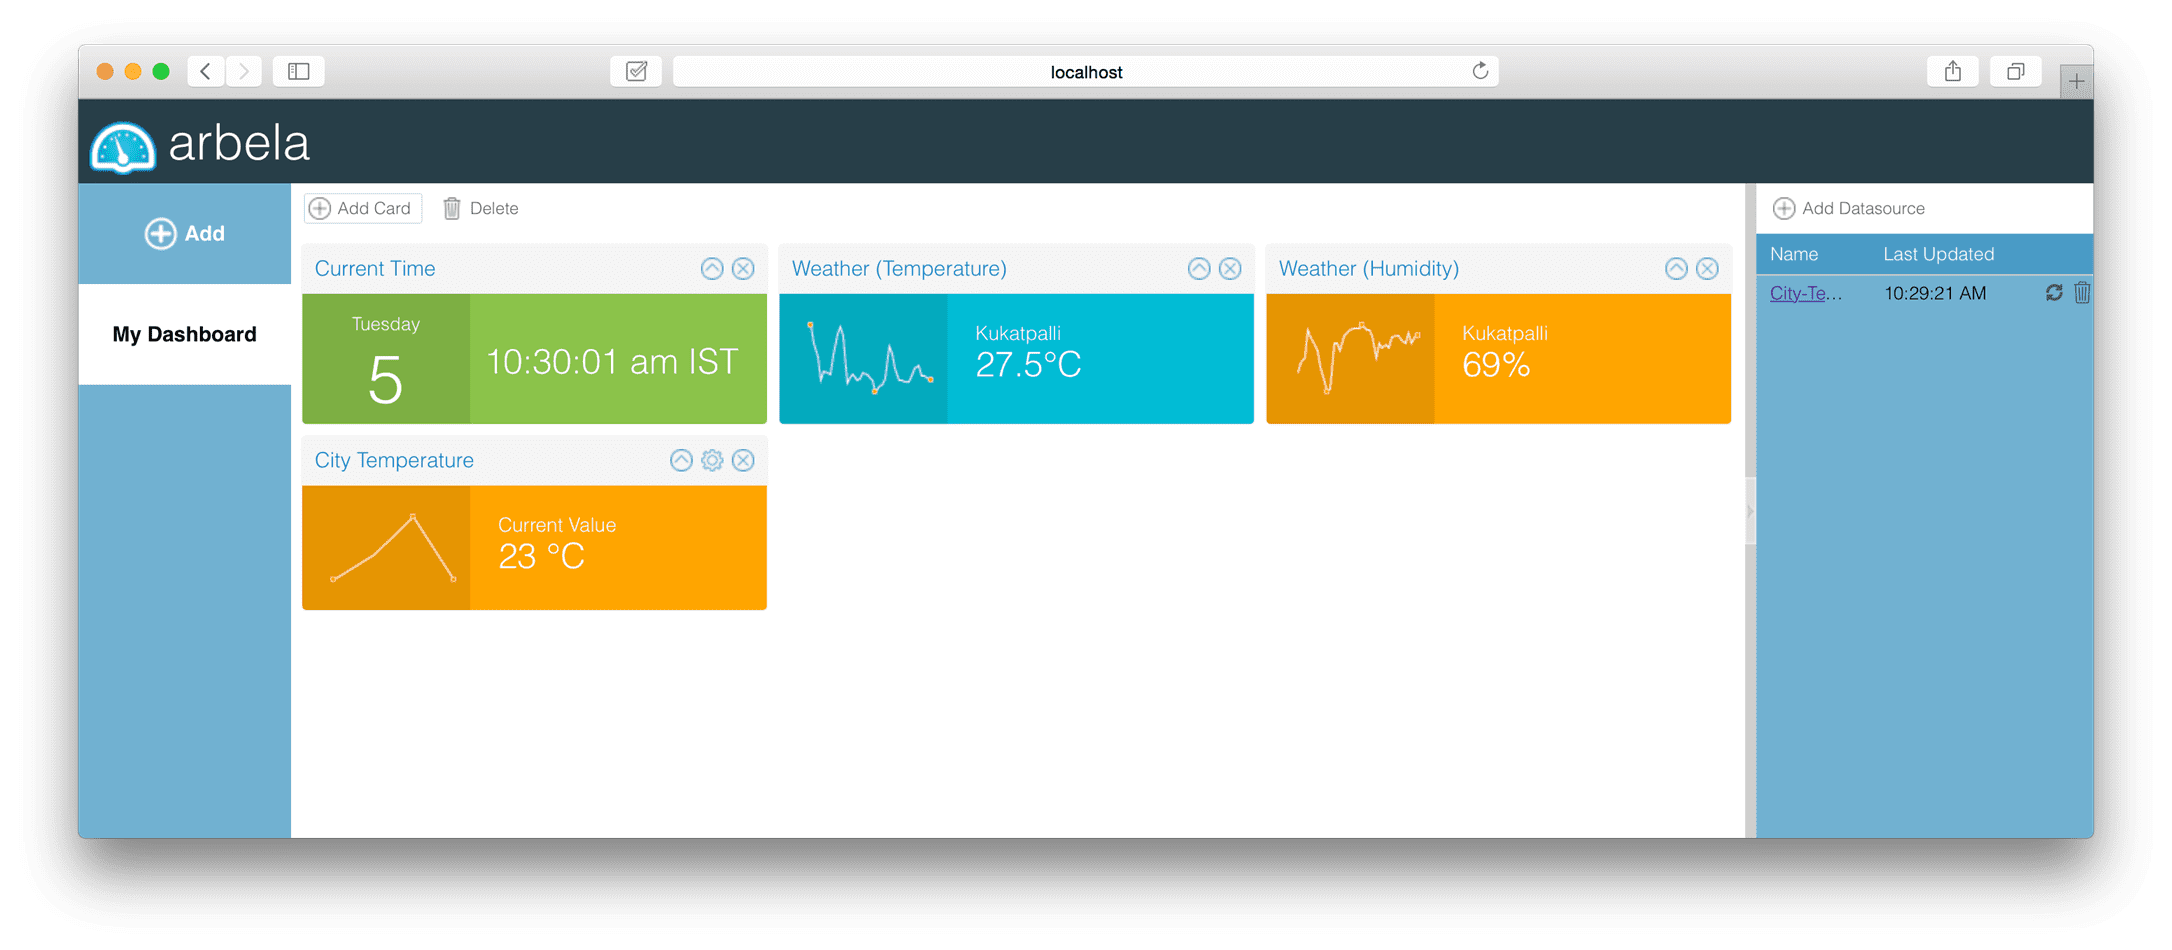
Eureka! Our setup is ready to connect and monitor any Kaa device!
Summary
In this article, we talked about using Kaa, PubNub, and Arbela to provide an end-to-end solution to the users to connect, manage, and monitor their devices, in real-time.
To learn more about Walking Tree’s IoT, PubNub, and Kaa offerings, please send your inquiries to connect[at]walkingtree[dot]tech or submit your query on the Contact Us page.
View Comments (1)
Thank you very much for this article. I have a question
I would like to carry out tests with Kaa Sandbox .. I would like to use as endpoint a ds18b20 temperature sensor (with NodeMCU) and to recover the data via an MQTT broker. my question is how to connect the broker to the Kaa platform and be able to view the data on the dashboard..Thank you