Problem Statement :
In this article, we will discuss how to test the Sencha Touch application in IOS Simulator.
Pre-Requisites :
- Sencha Touch SDK 2.2.1
- Sencha CMD 3.1
- Sencha Touch knowledge
- Sencha Cmd Knowledge
- Working Sencha Touch application
Details :
We will discuss how to run the application in IOS Simulator and the Device in the step by step.
In this article am taking our Voodoo Music App as an example. i.e working Sencha Touch application
Step 1: Install Sencha Cmd and create a Sencha Touch Project
If your project is not created with the Sencha Cmd then
Install Sencha Cmd and create a Sencha Touch project
Step 2 : Build your Application
Build the application using sencha app build Command, and move all the required images and build output files to a single folder.
For More Information refer: Create, Build & Package Sencha Touch project using Sencha Cmd
Step 3: Install IOS Simulator
Download and install Ios Simulator in Mac
Step 4: Create an App Identifier in Ios Provisioning Portal
- Log in to the iOS Development Center at
https://developer.apple.com/devcenter/ios/index.action
- Enter Provisioning Portal
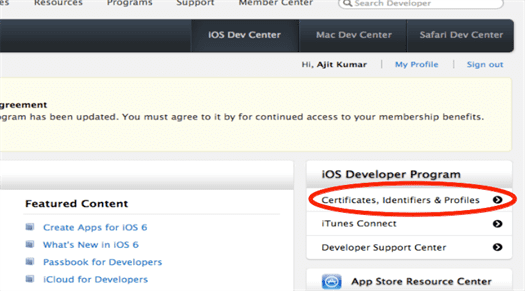
Click on Certificates, Identifiers and Portals on the right side of the page under iOS Developer Program
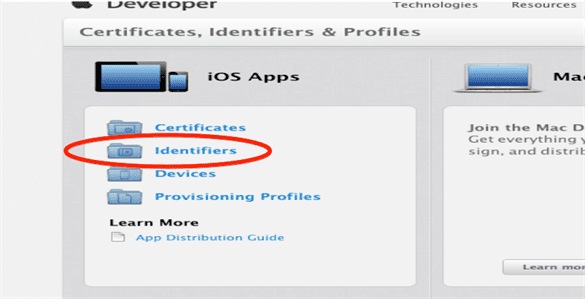
- Click on Identifierss on the left side of the page
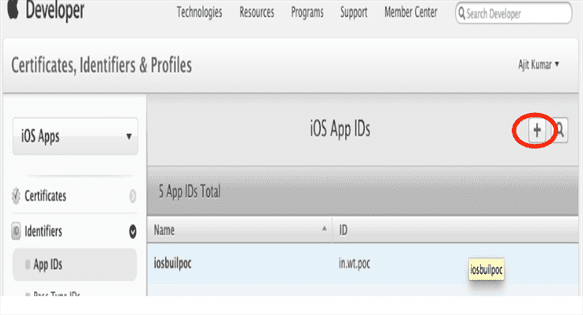
- Click on + button to add new app Id on the top of the page
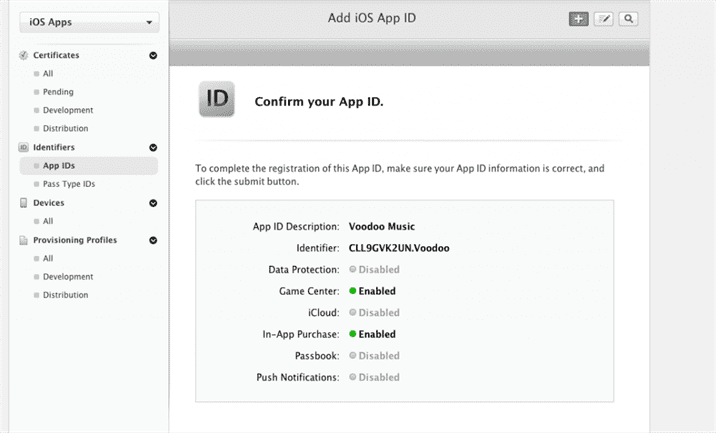
Which will Open a Register iOS App ID Form. Fill the form
App ID Description with the app name which you want to show in the device home screen, And click on continue to register.
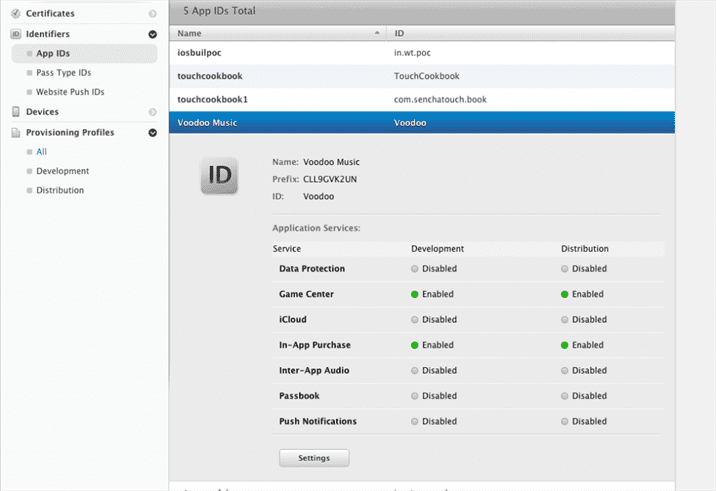
In My case, I have entered App ID as Voodoo Music.
You can see the created App Id in the App ID’s Under the Identified Group on the left side of the page.
Step 5: Create a Development Certificate
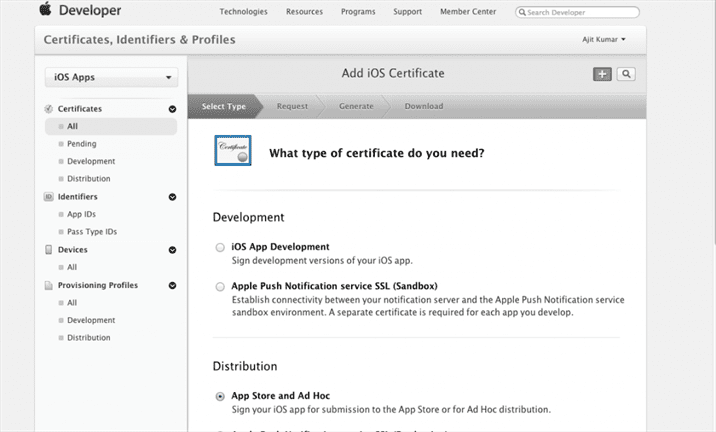
- Expand certificates in the Certificates, Identifiers & Profiles portal and select All.
click on + button to create a certificate
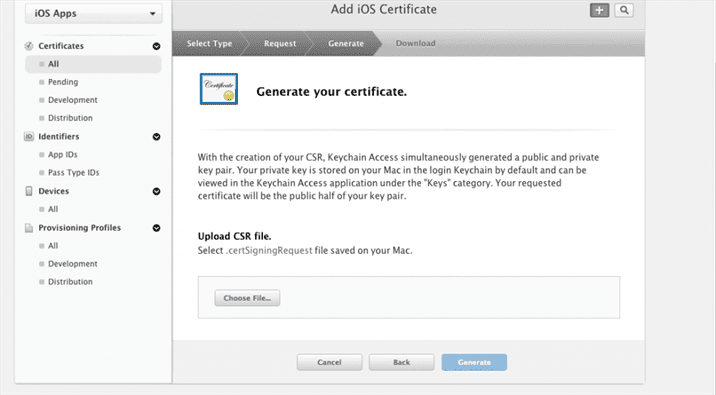
- Generate a Certificate Signing Request (CSR) with a public key, Follow the Instructions on the Second Tab
- Generate Certificate through submitting the CSR file
- Download the Certificate from the last tab, And install it in your machine by double click on the file. The installed certificate will be shown in the key chain access
Step 6: Create a Provision profile for your App
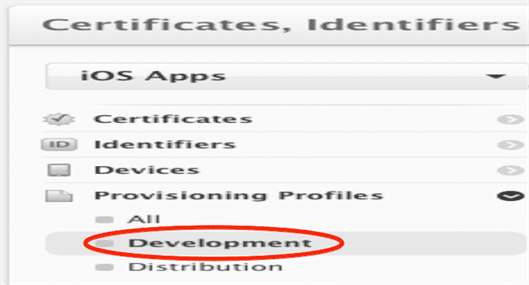
- Expand Provisioning Profiles under Certificates, Identifiers & Profiles portal
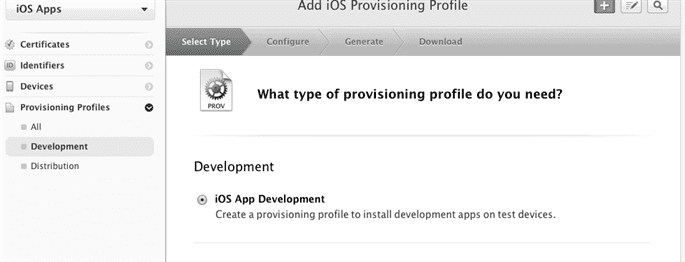
- Click on + Button Available on the top, in iOS Provisioning Profiles (Development)
- Select the Provision Profile type as iOS Development
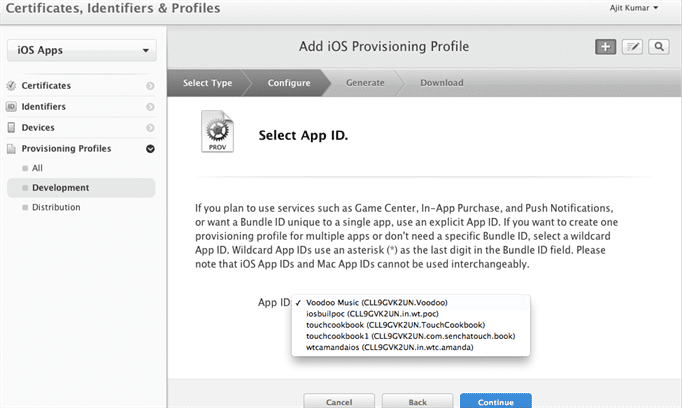
- Select the AppID for this Provision. Select the recently create an App ID
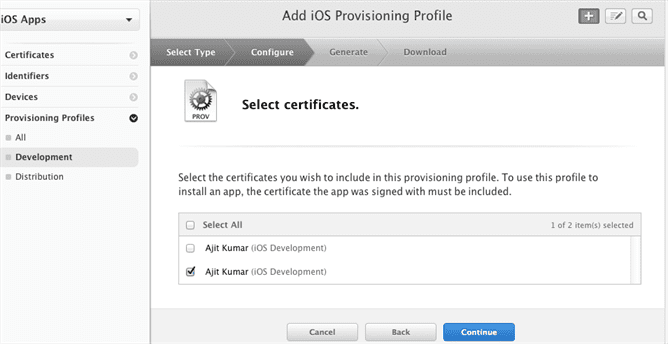
- Select the certificates you wish to include in the provision
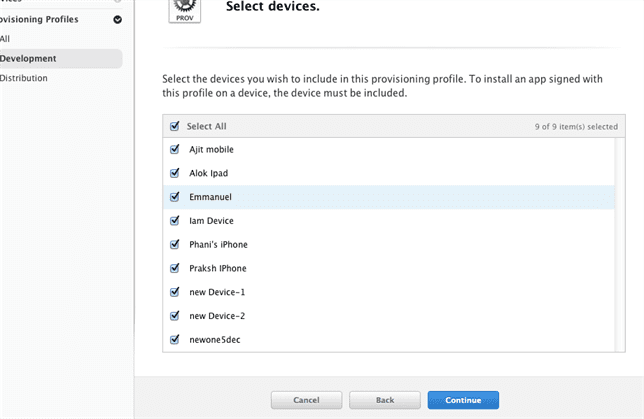
- Select the Devices you wish to include in this provision. I.e on which devices you want to install the app build with this Provision Profile. (This step is optional to run the app in the simulator)
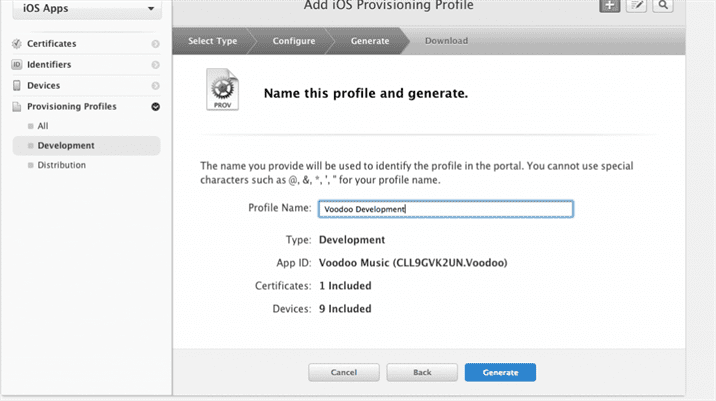
- Name this profile and Generate
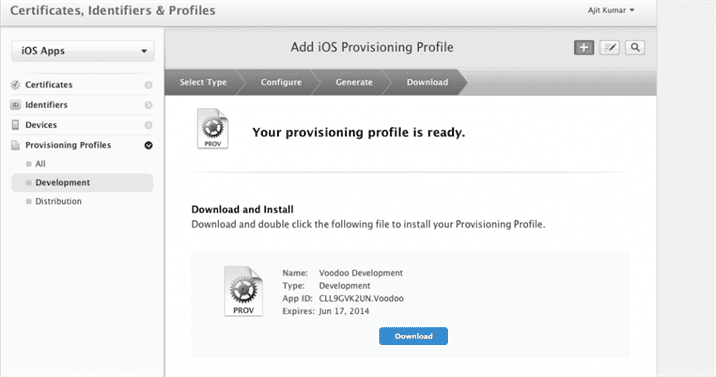
- Download the Provision Profile
Download the provisioning profile and remember the path of the file. Extension of the file will be.mobileprovision.
Step 7: Create packaging Configuration Template File
Open Terminal
cd to the project root folder.
issue the following command to generate the template for the native build configuration file
1 2 |
$ sencha app package generate This will generate iospackager.json file in project root directory . |
Step 8: Update the configuration file with your details
open the iospackager.json in your favourite editor. Fill the valid configurations with the valid values
applicationName
Name of the application to be displayed on the app, And it should match the Name of your app Id generated in the Provisioning Portal. in my case Voodoo Music
applicationId
This is the name namespace for your application, This should match with the ID of the appId generated in the Provisioning Portal
bundleSeedId
A ten character string which should match exactly with the prefix of the AppId generated in Provision Portal
versionString
This is the version of your application, initially, it will be 1.0
1 2 3 4 5 6 |
{ "57":"resources/icons/Icon.png", "72":"resources/icons/Icon~ipad.png", "114":"resources/icons/Icon@2x.png", "144":"resources/icons/Icon~ipad@2x.png" } |
Note : paths of the icons should be relative to the config file
inputPath
This is the location of your Sencha Touch 2 application, relative to this configuration file, in my case ./build/VoodooMusic/production
outputPath
This is where the built application file with be saved. Make sure that the output path is not in your input path, you may get into endless recursive copying. Provide the absolute path of the output folder
configuration
This is the configuration for your application. Debug should always be used unless you are submitting your app to an online store – in which case Release should be specified. For the first time to test the app in Emulator provide Debug.
platform
This is the platform where we will be running the application. For now, it will iOSSimulator, as we are building the application to run in iOS Simulator
certificatePath
For Mac OS this config is not required.
certificateAlias
This can be just a simple matcher. In our case certificate is installed in key chain access with the name iPhone Developer: Ajit Kumar (3H556WAT49). I just specified iPhone Developer
provisionProfile
The path to the provisioning profile (APP_NAME.mobileprovision) which you can create and then download from Apple’s provisioning portal
device Type
This is a device type that your application is targeted to run on.
Available Options are
– iPhone
– iPad
– Universal
orientations
Indicates the device orientations in which the application can run. Options are:
- portrait
- landscapeLeft
- landscapeRight
- portraitUpsideDown
Note. If this omitted, default orientations setting is all four orientations.
Step 9: Run your app on iOS Simulator
The final step is to run your app in iOS Simulator.
Sencha Cmd helps to build the .app file for your application and run in the Active iOS Simulator in your Machine.
Cd to the project root directory, And issue the below command
$ sencha app package run .json
The path to the configuration file which is prepared in the earlier steps.
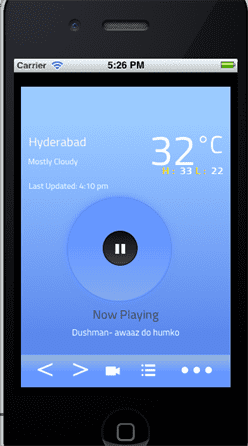
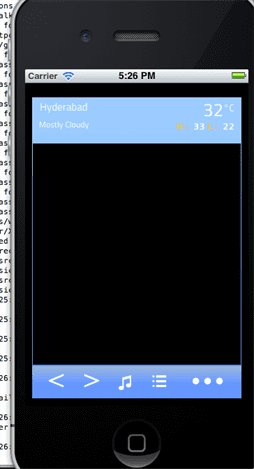
After Issuing this command you can see the app opening in iOS Simulator.
Summary
In this article, I have explained how to run Sencha Touch application in iOS Simulator, I hope by going through this article you are able to test your Sencha touch application in iOS Simulator in your machine’s.
At Walking Tree, we practice and recommend Sencha Products like ExtJS and Sencha Touch to build amazing web/touch apps. In case you are looking for training or professional assistance, contact us by visiting our website.
References
- https://developer.apple.com/devcenter/ios/index.action
- http://docs.sencha.com
