Blogs
Review of Sencha Architect App Development Book

Chapter 1: Introducing Sencha Architect
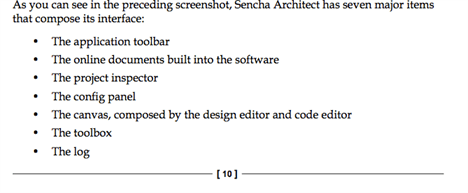
The chapter starts with listing down the softwares that we require to complete the samples given in the book and how to install Sencha Architect. Once we are able to launch the Sencha Architect, it describes all the different components – toolbar, toolbox, log, config, canvas, code editor, etc. – when to use them and what can be achieved using them.
I found the explanation of the Config section very useful where it explains how one can filter the configs, lock a particular filter and use it on different components, how to add custom config, and how the Architect ensures efficiency by providing selections for the model, stores kinda configs.
It was interesting to see the options available for both – ExtJS and Sencha Touch – on the Canvas to test how your application would look on different resolutions and devices(specific to Sencha Touch apps).
On the Canvas, having the capability to see the code while we are designing the UI is a great way to learn the Sencha best practices. The capability to see the Generated Class as well as the Generated JSON (object literal way to define an object) allows us to use any one of them in our application based on our application approach.
Walkthrough of the Settings was useful so that I can re-structure the Sencha Architect components so that I can use it more effectively. E.g. I like the Project Inspector to be on the left hand side as I have to add many classes to my project (I guess this is the case with every enterprise scale application development).
With JSHint enabled, I can be sure that the tool would take care of the syntax errors and would make it a lot easier to fixe them when I have to hand code certain part of the application (e.g. event handler, store code, etc.).
Overall, I enjoyed reading the chapter and in less than 15 pages, it helped me to understand how to use the Sencha Architect and I am kinda ready to take up the next challenge of creating a real application with it.
Couple of things that I felt would have enhanced my learning:
-
- If the items were numbered, it would have become a lot easier to relate the description to the items numbered in the screenshot.
- Couple of things could not be explored (e.g. the Config, custom config, filter, Resolutions, etc.) until we create a project and add components to a view. May be, just creating a bare minimum project, first, would have helped the reader to explore those sections better
- If the items were numbered, it would have become a lot easier to relate the description to the items numbered in the screenshot.
Chapter 2: Creating and ExtJS App
Nice step-by-step approach to create a simple, yet useful, ExtJS application using Sencha Architect. Starting from reading data from a database, the chapter shows how we can load them into a store and display them on a grid panel. And, all this is done by following the Sencha MVC architecture where we define model, store, view and controller.
The chapter also demonstrates how one can define a component (e.g. the Books grid panel in the example) and reuse it by using the Link functionality, which let us use the xtype/alias name of a defined component.
I loved the way how easily I could test whether the data is being loaded by the proxy (and reader) into the store (except that the error message was not informative when the DB connection detail was not correct in the db.php file) and how I could get my grid columns generated after associating the store to the grid panel. I think this saves considerable development time.
Chapter 3: Creating a Sencha Touch App
This chapter walks us through the steps to create a Sencha Touch based application using the Sencha Architect. Though we have seen creating a store and linking it with a model in the previous chapter, this chapter shows how we can group the store data. Also, the chapter shows how we can create a custom proxy to read the contact information using Cordova/PhoneGap and use that proxy on the store to load contacts into the store. This is a great way to see how we can create custom classes(and files) and use them in the code.
It also shows how we can make use of the Resources to use an external library, Cordova in this case, in the application. This is very useful as we might be integrating Google Map, GitHub, and other JavaScript APIs.
Chapter 4: Tips and Tricks
This chapter has a great list of Tips and Tricks that are very useful for any enterprise application development and in almost all projects you would need to apply one or more of these tips & tricks.
Using Eclipse for Web project development is very common. A Web project contains front-end code(JS+CSS+HTML) as well back-end code(e.g. servlet/WS+DAO). So, if you are using Eclipse for the overall project development and want to use Sencha Architect for the front-end development, the chapter hows how straight forward it is in the Architect.
My best topics was to share model/view/store/controller/application classes with other developers in the team or share them with other projects. The book shows how one can share (export), import, and re-use those classes in other projects. With this I could also import and add my view class to the toolbox and use them in any project I want.
Override was a great way to learn how we can do things like using third-party plugins (not part of the Sencha ExtJS/Touch framework), features (on the grids). Also, how we can use them in the application localization.
Other things like – Defining a custom class, using it in the application and creating sub-packages inside the main packages – view, store, model, controller – were also very practical need that arise in a projects and the book has the apt explanation and coverage. My one question that remained unanswered was how do I create a new folder/package under app. But, this is not that the author missed it but, there is no obvious and direct way to do it in Sencha Architect, yet.
I recommend every reader to read this chapter as the topics covered here are going to create an enterprise class scalable and maintainable application.
Chapter 5: Working with Resources
This chapter focuses on various use cases related to the Resources.
After going through the chapter, one can use a locally deployed ExtJS/Touch SDKs, use the debug/non-debug version of the SDKs, add application specific CSS file(s), add other JS files(e.g. in Chapter 3 we added Cordova JS file, Google Map JS API), test application using different themes offered by the frameworks (e.g. grey, access in ExtJS and Android, Blackberry in Touch), upgrade ExtJS/Touch versions (as long as they are supported by the Architect – this does not do any upgrade/modification to our application code, though!) . The chapter ends with the discussion about how to include a custom theme (that might have been created by Sencha Cmd) in our application.
Overall, the chapter was helpful in describing how we can work with the application as well as external resources.
Chapter 6: Simulating, Building, Packaging, and Deploying and App/Project
So far we created the ExtJS/Touch apps and ran them using the Preview. This chapter takes us to the next level in integrating the Sencha Architect with Sencha Cmd and build the application as a desktop/mobile application, package the Touch applications for Android simulator/device and iOS simulator/device and test them.
The chapter helps us build and package our application from the overall release strategy.
Overall, I enjoyed reading the book. After reading the book, one would learn how Sencha Architect can be used:
- to create UIS during the requirement gathering phase as it helps you to show, to your customer, how the final UI would look like and helps reduce the time spent in sign-off. Also, makes it easier for the development team to progress based on what was presented to the customer
- to create an application for a quick prototyping
- to create the part of the application(that is straight forward to implement in Sencha Architect) and hand it over to the development team for further development
- to create base widgets based on the company/project outlined standards and share them across the projects
- to build and package your app for the release. since this can be done using Sencha Architect, this responsibility does not have to be with the development team anymore. It can very well be shared with the Build and Release Management team
- to learn the best practices
- to cut down on the overall development effort. heavily
Thanks to the author for all that has been covered in this format of the book and the overall presentation!


