Problem Statement
The TinyMCE editor has got lots of features, which are not available in Ext JS HTML Editor. So, most of the Ext JS developers choose TinyMCE editor to full fill their requirements. Ext JS plugin for TinyMCE editor, which is available on Ext JS TinyMCE Editor can be used in an existing Ext JS application as a component. However, image upload to a HTML Editor is one of the major features that all of us need, which is not available in TinyMCE editor.
There are plugins available for TinyMCE editor to address this need, such as MoxieManager, PUpload, ResonsiveFileManger and more. Each of these plugins have their own advantages and disadvantages. Most of these plugins have a dependency on the server-side technology that makes them a heavy plugin (in terms of code size, features, and configuration needed to get them working) to use. In most of the use cases, as a developer, we would like to have a light-weight plugin with the flexibility to use our own server-side implementation to have the complete control on the implementation. Let us see how to use a file browser to upload an image and insert the image into the TinyMCE editor.
Getting Started
First get the below things in place
- TinyMCE ExtJS component
- Service/api to upload an image to server, which provides the following response to the UI in case of successful file upload:
{
 "data": {
 "fileUrl": "http://url/ofthe/uploaded/file",
 "filetype": "file/image/media",
 "poster": "posterurl/if/fieltype/ismedia",
 "source2": "source2url/iffiletype/ismedia"
 },
 "success": true
}
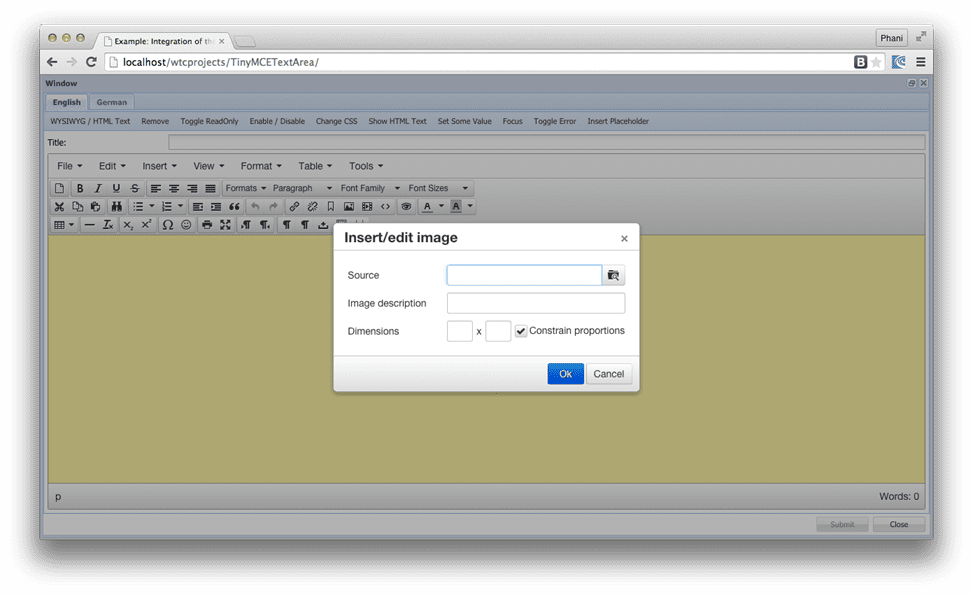
TinyMCE editor has got an image plugin, which is close to what we need. This plugin will allow user to type the image url, which is accessible on internet, capture image description and its dimensions. It allows the user to change/override the dimensions. Clicking on OK button will insert the image with the provided description as alt text and its height and width set based on the specified dimensions. The following screenshot shows the plugin screen:
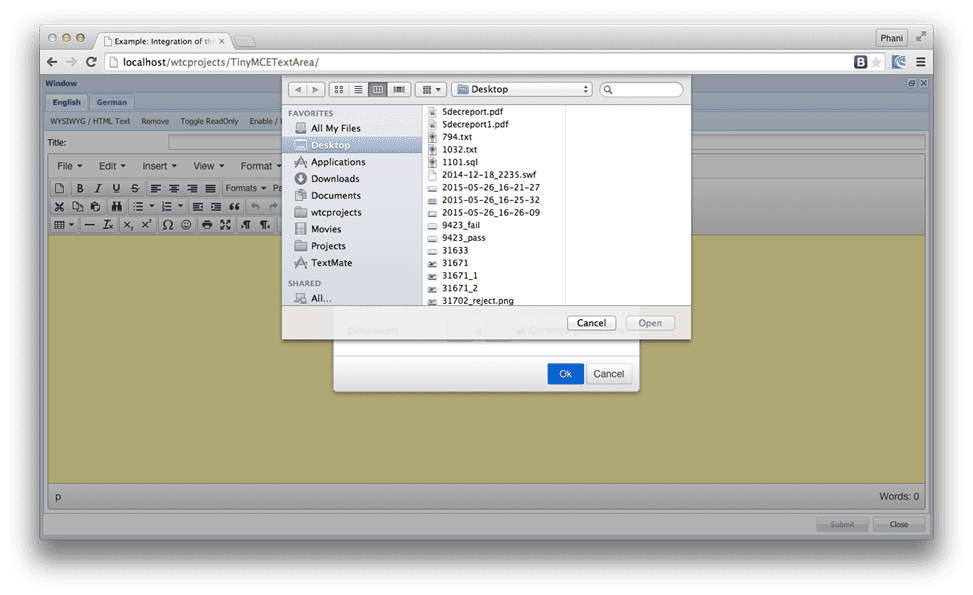
Based on the TinyMCE editor setting, this plugin can show the browse icon and will call a configured callback function. For example, the below screenshot shows a Browse icon next to the Source text field to launch the file browser for file selection:
Following settings are required to show this browser button and handle the upload behaviour:
file_picker_types: 'file image media',
file_picker_callback: function(callback, value, meta) {
    callback('mypage.png', {
       text: 'My text'
    });
}
These settings should be passed as part of TinyMCEConfig config object passed to the TinyMCETextArea while instantiating the component.
In the above settings code, file_picker_callback function has a parameter with the name callback, which will accept the file-URL and a meta data object.
We are going to modify file_picker_callback function to show the file browser and make an Ajax call to the service/api, which is already developed as described earlier , and set the url to the filepicker field in the Insert/edit image window through the callback function.
To show the file browser we have to:
- Create hidden form panel with the FileField
- Programmatically, click the fileInputEl element of the FileFiled to show the file browser.
- In the change handler of the FileField, submit the form and populate the filepicker field in the Insert/edit image window through callback function available as show below.
Once the image url is populated inside the filepicker field on the Insert/edit image window, remaining upload related functionality will be taken care by the image plugin.
Once this callback is configured in the settings, Clicking on Browse button on the Insert/edit image window will show the file browser, as shown below:
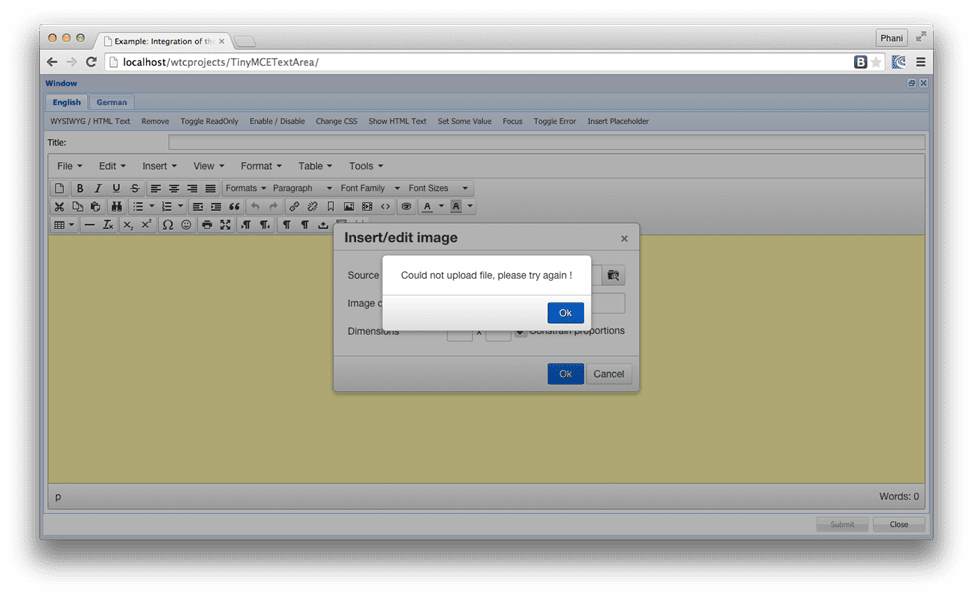
On failure of the file upload, we will show an alert using TinyMCE MessageBox class. We could not use the Ext.MsgBox class as the Ext JS z-index manager does not manage the z-index of the TinyMCE popups. The below screenshot shows the error message displayed on the screen in case of upload error:
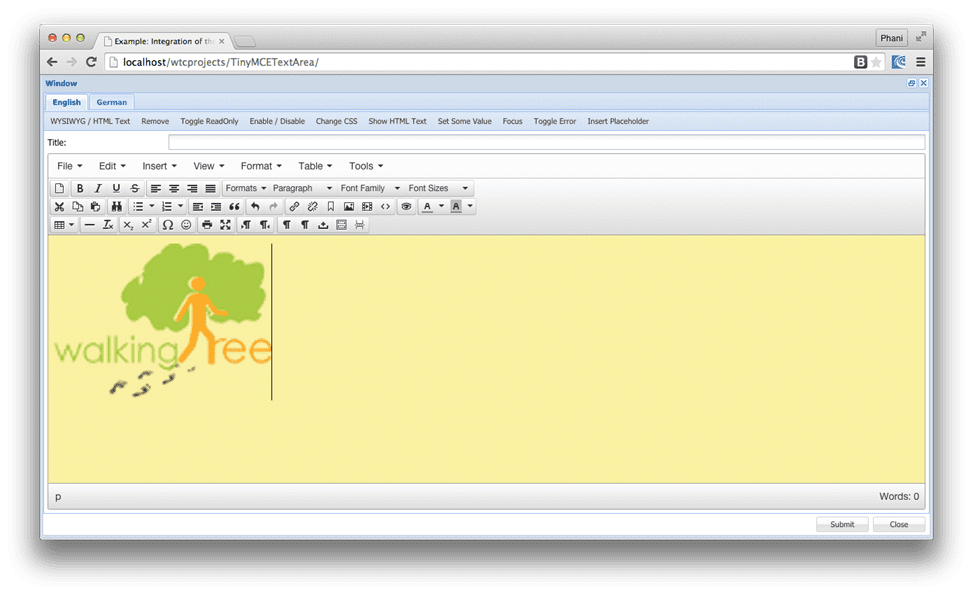
With this enhancement, now we have a capability to select a file from our disk, upload it, and use it in creating great content using them, as shown below:
You may download the code from GitHub. Give it a try and let me know how did it go!
Summary
In this article we learned how to add file upload functionality to the TinyMCE editor by extending its image plugin to use Ext JS.
References
- TinyMCE Editor API
- Ext JS TinyMCE Editor component
- Code on GitHub
View Comments (2)
hi thank you for the post i doesn't found the service api any example thank you very much
Hi,
I am trying to insert multiple images using above TINYMCE upload form...But I am facing issue i.e formPanel.reset is not a function. Is there any solution to solve this.
Thanks