Pre-requisite
- Sencha ExtJS 5.0 (the article uses 5.0.0.736 version)
- Web Server
- Chrome Browser (latest)
- Chrome App Launcher (latest)
What is a Chrome App?
Here is how Chrome App is described by Google:
Chrome Apps deliver an experience as capable as a native app, but as safe as a web page. Just like web apps, Chrome Apps are written in HTML5, JavaScript, and CSS. But Chrome Apps look and behave like native apps, and they have native-like capabilities that are much more powerful than those available to web apps.
This article is a quick (and, not so exhaustive) way to create a sample Chrome App using Sencha ExtJS.
WARNING: This article does not cover all the production aspects of creating Chrome Apps using Sencha ExtJS and hence MUST NOT be used in production.
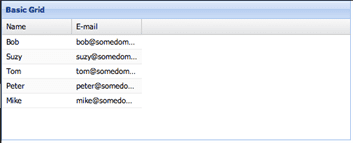
Review of an existing browser application
Let us start with reviewing an existing ExtJS application. Following screenshot shows the output of the sample ExtJS application that shows a grid with 5 records loaded into it:
The following steps would produce the above output:
1. Create a folder – say, ext5x-grid. We would use it to save the project specific code and other files. Make sure that the folder is accessible by your Web Server.
2. Create ext folder inside it and copy Sencha ExtJS SDK inside it. It is not mandatory to use this name. You are free to choose any name. Based on the name you choose to keep the SDK files, you may have to make changes to the index.html file to load the ExtJS script and css files.
3. Create index.html and copy the following content inside it:
<!DOCTYPE html> <html> <head> <meta charset="utf-8"> <title>Sencha ExtJS 4x Sample</title> <link rel="stylesheet" type="text/css" href="./ext/build/packages/ext-theme-classic/build/resources/ext-theme-classic-all.css"> <script type="text/javascript" src="./ext/build/ext-all.js"></script> <script type="text/javascript" src="app.js"></script> </head> <body> </body> </html>
4. Create app.js and copy the following content inside it:
Ext.onReady(function() {
var data =  [
{ name: 'Bob', email: 'bob@somedomain.com' },
{ name: 'Suzy', email: 'suzy@somedomain.com' },
{ name: 'Tom', email: 'tom@somedomain.com' },
{ name: 'Peter', email: 'peter@somedomain.com' },
{ name: 'Mike', email: 'mike@somedomain.com' }
];

var store = Ext.create('Ext.data.Store', {
data: data,
fields: ['name', 'email']
});

Ext.create('Ext.grid.Panel', {
renderTo: Ext.getBody(),
height: 200,
width: 500,
title: 'Basic Grid',
store: store,
columns: [
{
text: 'Name',
dataIndex: 'name'
},
{
text: 'E-mail',
dataIndex: 'email',
flex: 1
}
]
});
});
5. Access http://localhost/ext5x-grid/ in your browser to see the output, as shown above
What we have created, so far, is a web application. To make this a Chrome App, we would have to carry out additional steps. Only, then we would be able to install and run the application from Chrome App Launcher or Google Chrome -> Settings -> Extensions. Let us go through those steps and convert this web application into a Chrome App.
How do we make it a Chrome App?
Create Your First App is a good resource that describes what does it to create a basic Chrome App. So, to convert our web app into a Chrome App, let us follow the below steps:
1. Create main.js file and copy the following content inside it:
chrome.app.runtime.onLaunched.addListener(function() {
// Center window on screen.
var screenWidth = screen.availWidth;
var screenHeight = screen.availHeight;
var width = 500;
var height = 300;

chrome.app.window.create('index.html', {
id: "ExtJSSampleID",
bounds: {
width: width,
height: height,
left: Math.round((screenWidth-width)/2),
top: Math.round((screenHeight-height)/2)
}
});
});
onLaunch is the event that is fired by the app runtime after it has loaded the event page. This page contains the top-level logic of the application, which does not have its own UI, and is responsible for creating the windows for all other app pages. The event tells the event page what windows to launch and their dimension. The Chrome App Lifecycle describes this and the overall lifecycle, in detail.
In the above code, we are creating a window, which shall render index.html inside it. id is to uniquely identify an application. bounds is where we have specified the window dimension. Note that this window is different from the window object that we (web developers) are used to, which is available inside our web applications.
onLaunch event handler acts as an entry point to the application.
2. Create manifest.json file and copy the following content inside it:
{
"manifest_version": 2,
"name": "ExtJS 5x Sample",
"version": "0.1",
"minimum_chrome_version": "23",
"icons": {
"16": "icon_16.png",
"128": "icon_128.png"
},
"sandbox": {
"pages": [
"index.html"
]
},
"app": {
"background": {
"scripts": ["main.js"]
}
}
}
In the above code, we have defined the manifest for our Chrome App. The file content must be as the documented Manifest File Format. main.js, which we created in the earlier step, has to be added as the app’s background page – one of them would add listener to the onLaunch lifecycle event.
Manifest Version must be 2.
Other important configuration is – sandbox. Note that index.html is listed inside the sandboxed pages. This is needed so that ExtJS SDK code is not subjected to Content Security Policy.
3. Now, create/choose icons for your application. I have created two icons – icon_16.png(16 x 16) and icon_128.png(128 x 128). You may read more about the icons here.
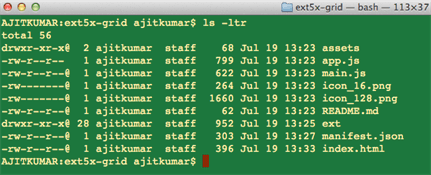
That’s all. We are done with the steps to convert the web application into a Chrome App. After creating all the above files, you shall have the following files in your folder:
assets folder is currently empty as we would not be publishing this on the Google Web Store.
Now, let us install and test drive this application.
Install and run the app
Follow these steps:
1. Bring up Google Chrome browser and got to Settings
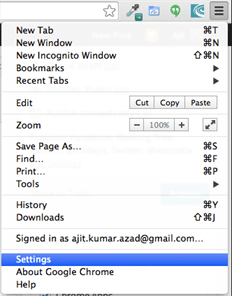
2. Select Extensions on the Settings tab and check Developer Mode, as shown below:
Once you check the checkbox, you shall see Load unpacked extension.. button
3. Click on Load unpacked extension.. button and select extjs4x-sample folder. This will add the extension to Chrome, as shown below:
If all the above steps were followed correctly, you shall see that the application is enabled and Launch link is present. Also, you shall see the application added to the Chrome App Launcher, as shown below:
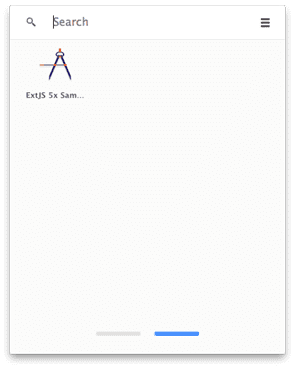
4. Click on Launch link or click on the application in Chrome App Launcher to run the application. This will launch a window and show the desired output, as shown below:
Hurrah! Bring out the creator inside you and start thinking of the great Chrome Apps that you can build using Sencha ExtJS. But, before you get any further, there are points to be aware of:
- Currently, the ExtJS SDK can be run only in the sandboxed mode as it uses eval (e.g. to decode JSON response), which violates the Content Security Policy and hence Chrome does not allow run the application unless it is sandboxed. You will have to review this for your application.
- Browser window object is not available and hence SDK code that works with it would not work
- For local storage you will have to use the Chrome Extensions APIs. The regular ExtJS proxy would not work
- In case you intend to use Google Maps in your application, it would not work as expected as there is some workaround needed, today, due to a bug
- Loading local .json files with syntax url:’treestore.json’ on proxy would not work. Refer to Content Security Policy
- There would be other areas that I am yet to figure out and list here
Conclusion
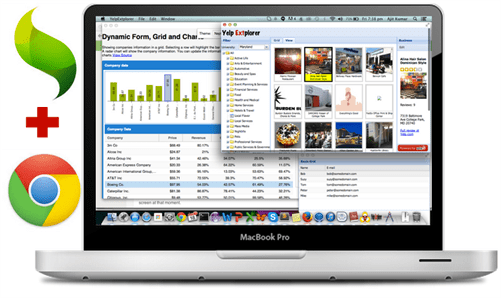
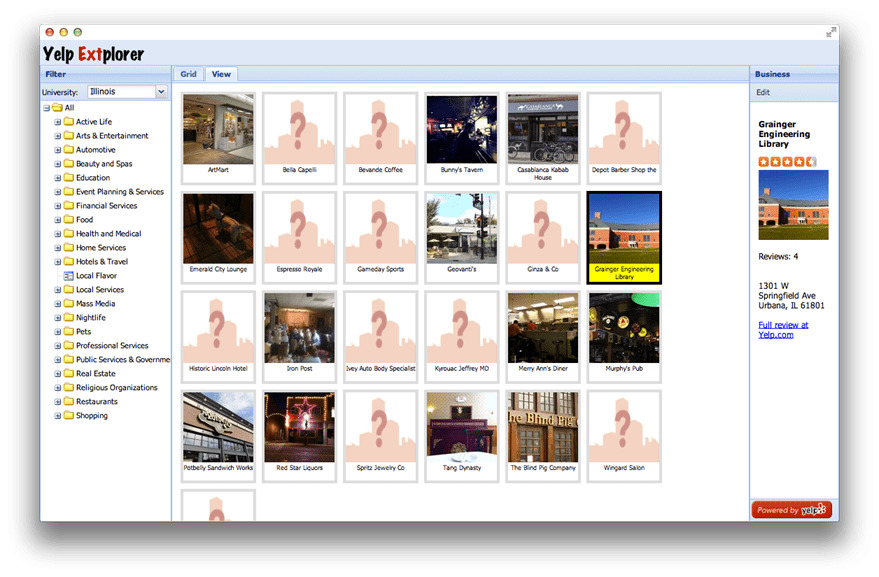
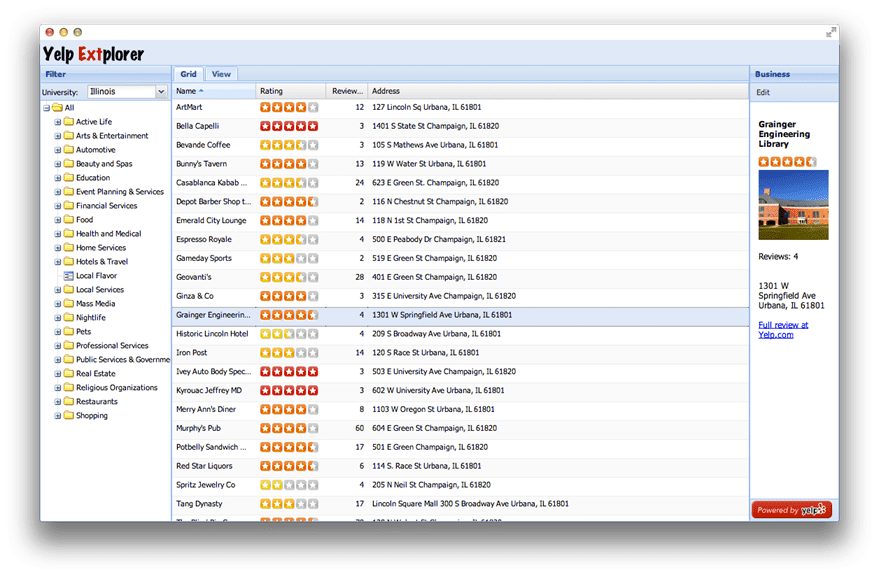
Though it looks promising and encouraging to build Chrome Apps using Sencha ExtJS, there would be a considerable effort on the ExtJS SDK front to modify existing APIs to align them with the Chrome App architecture, life cycle, and security aspects. Also, the SDK needs to be enhanced to provide APIs for the App specific capabilities that Chrome offers – e.g. working with bluetooth, TCP/UDP sockets, etc. Just to make us feel more better about all that we did in this article, here are the screenshots of other ExtJS applications that are converted into a Chrome Apps:
References
- Google Chrome App
- Google Map issue with Chrome Apps
- Download article code from GitHub
- Grid sample on SenchaTutorials
- Content Security Policy
- Manifest Sandbox
View Comments (6)
It's possible to same some data in my user computer (sqlite or something )? and can i access scanner tks
@fabioebner
Well, it is possible. However, you may want to go through the W3 spec for Web Database - http://www.w3.org/TR/webdatabase/ - which is inactive. The recommendation is to use Web Storage and IndexedDB. And, yes, you can work with them when you are creating Chrome App using Sencha Ext JS. You shall review the Chrome Apps APIs list - https://developer.chrome.com/apps/api_index - to see what all can be done inside your application.
Hello,
I've tried to build a chrome app with extjs5 (build with sencha cmd). I'm getting an error right away when starting the app.
I posted an entry related to my issue in the sencha community forum: http://www.sencha.com/forum/showthread.php?293638-How-to-make-a-chrome-app-with-ExtJS5
Any idea of that problem 'Access-Control-Allow-Origin' ?
Hi Fred,
Are you using the sandboxed approach? If not, what kind of changes you have done to take care of Content Security Policy related gaps that exist inside Ext JS SDK?
Hi Ajit,
Thank you so much for your post.
It helped me in creating chrome app with extjs .
Is there any way to add apps to chrome programatically?
@udayraman,
Completely, silent installation is not possible. You may want to go through https://developer.chrome.com/extensions/external_extensions to understand more about the type of installations and approach your solution accordingly.