


Blogs
Creating multi-page web application using ASP.NET and Sencha Ext JS
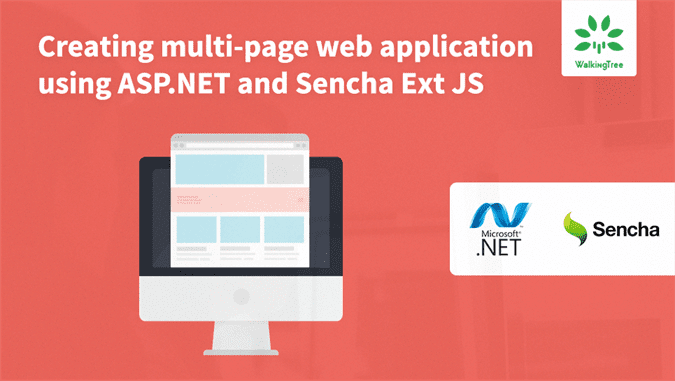
As far as client side Javascript frameworks go Sencha represents one of the most comprehensive solutions out there. Sencha predates several popular Javascript frameworks like React, Angular and Bootstrap. Ext JS supports MVC and MVVM architecture. It allows targeting multiple platforms and devices with support for flexible containers and layouts. Its feature set include a vast suite of oft requested components likes grid controls, charts, and much more.
On the server side ASP.NET is the best in class framework that has matured well. With its recent push to ASP.NET core the framework is now leaner with ability to run cross platforms.
In this article we will bring together these two client and server technologies. If you want to jump right to code, see the sample code on GitHub. We will assume that you have Sencha Cmd and Ext JS SDK setup on your machine. If not you can follow the instructions here.
Single page app framework
Sencha inherently is a single page app framework. Ideally we would create a single page Sencha app that talks to server via API calls. The server side might very well be an ASP.Net Web API backend or indeed Node.JS or any other API implementation.
However we are interested more in a multi-page ASP.Net application with Sencha being used on the different ASP.NET views.
Sencha Workspace
Each page in Sencha is treated as an app. Creating multiple pages requires creation of a Workspace that serves as a container for Apps.
Start off creating a new ASP.Net Project. Navigate to the parent directory of your ASP.Net project (typically your solution directory) and run the following command:
sencha generate workspace --ext <ASP.net Project Name>
This will create a sencha workspace and download the ext package. If you are committing this project to source control, you may omit checking in this folder as it can always be restored during the build process.
Our sample code contains two ASP.Net views, a login page and a home page. We will create two sencha apps for each of these pages
cd <ASP.net Project Name>
sencha generate app --ext HomePage apps/homepage
sencha generate app --ext LoginPage apps/loginpage
There are plenty of tutorials elsewhere on this site that cover designing the sencha view. So instead of repeating that we will here look into ways to integrate the generated sencha apps with our ASP.NET views.
Microloader
Sencha makes use of a script called microloader that does the bull-work of loading up the framework that then renders the view and manages its interactions. Within each generated app there exists an Index.html that contains a script tag that loads the microloader. Since we won’t be using the Index.html we will move some of this code into our shared/global layout file. Specifically the function that microloader uses for device detection and framework selection (classic vs modern) can be moved into our shared layout file.
<!DOCTYPE HTML>
<html manifest="">
<head>
  <meta http-equiv="X-UA-Compatible" content="IE=edge">
  <meta charset="UTF-8">
  <meta name="viewport" content="width=device-width, initial-scale=1, maximum-scale=10, user-scalable=yes">
  <title>@ViewBag.Title</title>
  <script type="text/javascript">
    var Ext = Ext || {}; // Ext namespace won't be defined yet...
    // This function is called by the Microloader after it has performed basic
    // device detection. The results are provided in the "tags" object. You can
    // use these tags here or even add custom tags. These can be used by platform
    // filters in your manifest or by platformConfig expressions in your app.
    //
       Ext.beforeLoad = function (tags) {
        var s = location.search,  // the query string (ex "?foo=1&bar")
            profile;
        // For testing look for "?classic" or "?modern" in the URL to override
        // device detection default.
        //
        if (s.match(/\bclassic\b/)) {
            profile = 'classic';
        }
        else if (s.match(/\bmodern\b/)) {
            profile = 'modern';
        }
        else {
            profile = tags.desktop ? 'classic' : 'modern';
            //profile = tags.phone ? 'modern' : 'classic';
        }
        Ext.manifest = "@ViewBag.Path" + profile; // this name must match a build profile name

        // This function is called once the manifest is available but before
        // any data is pulled from it.
        //
        //return function (manifest) {
        // peek at / modify the manifest object
        //};
    };
   </script>
   @RenderSection("scripts", required: false)
</head>
<body>
   @RenderBody()
</body>
</html>
Much of the above code is autogenerated by Sencha Cmd. Interesting bit here is the RenderSection and RenderBody place holders which will be used by our underlying razor views.
This is how our Index.cshtml now looks
@{
    ViewBag.Title = "The Home Page";
    ViewBag.Path = "/apps/homepage/";
}
@section scripts {
    <script id="microloader" data-app="adec6752-2e0f-4287-b08d-db80902c1be8" type="text/javascript" src="~/apps/homepage/bootstrap.js"></script>
}
The script tag is copied over the the Index.html under /apps/homepage. You may delete Index.html once this is done. Repeat the process for every view that you want to add.
Build Process
The sencha apps/pages must be built before they are used. To do this run
sencha --cwd apps/homepage app build
sencha --cwd apps/loginpage app build
You may script this out in a batch file add the script to the pre-build event for your solution project.
Sharing Code
Sencha Packages allow sharing code and resources between multiple apps within a workspace.
sencha generate package common
To use the common package elements with individual sencha apps simply “require” it within the app.json files.
"requires": [
        "common"
    ]
Sample Code
All of the code in this article is available on GitHub.


Good info. Lucky me I recently found your site by accident
(stumbleupon). I’ve saved as a favorite for later!