Blogs
Let’s Create Ext JS 6.6 Applications Using Templates and Open Tooling
As a follow-up to our previous article on Ext JS 6.6 and Open Tooling, this article demonstrates the creation of node based Ext JS applications. We start by creating different starter applications and having a look at their application structure. Later, we enhance one of these applications to add Charts package and Moment Library from npm’s Sencha and public repository respectively.
Get Started
Start setting the development environment by first installing the necessary software. Refer here for more details.
Login to Sencha’s NPM Registry
Get access to Ext JS 6.6 packages at Sencha’s NPM registry by running this command from the terminal window. Refer this article for more details.
npm login --registry=http://npm.sencha.com --scope=@sencha
Install the ext-gen Tool
Globally install sencha’s “ext-gen” tool which is used to create Ext JS node based projects.
npm install -g @sencha/ext-gen
Create Different Starter applications
Ext JS 6.6 offers four built-in templates to start with. Read here for more details.
1. classicdesktop
This is the default template. It creates an application with this “builds” object (similar to the classic application in older version but with a different theme.)

Go ahead and generate an application with this template by giving the following command. You can change the default application name “MyApp” to “MyClassicDesktopApp” with “-n” flag. The default mode for generating applications is “auto”.
ext-gen app -n MyClassicDesktopApp
The application gets generated in “my-classic-desktop-app” folder. Navigate to this folder and do a development build by running this command. This shall also generate the bootstrap files.
npm start
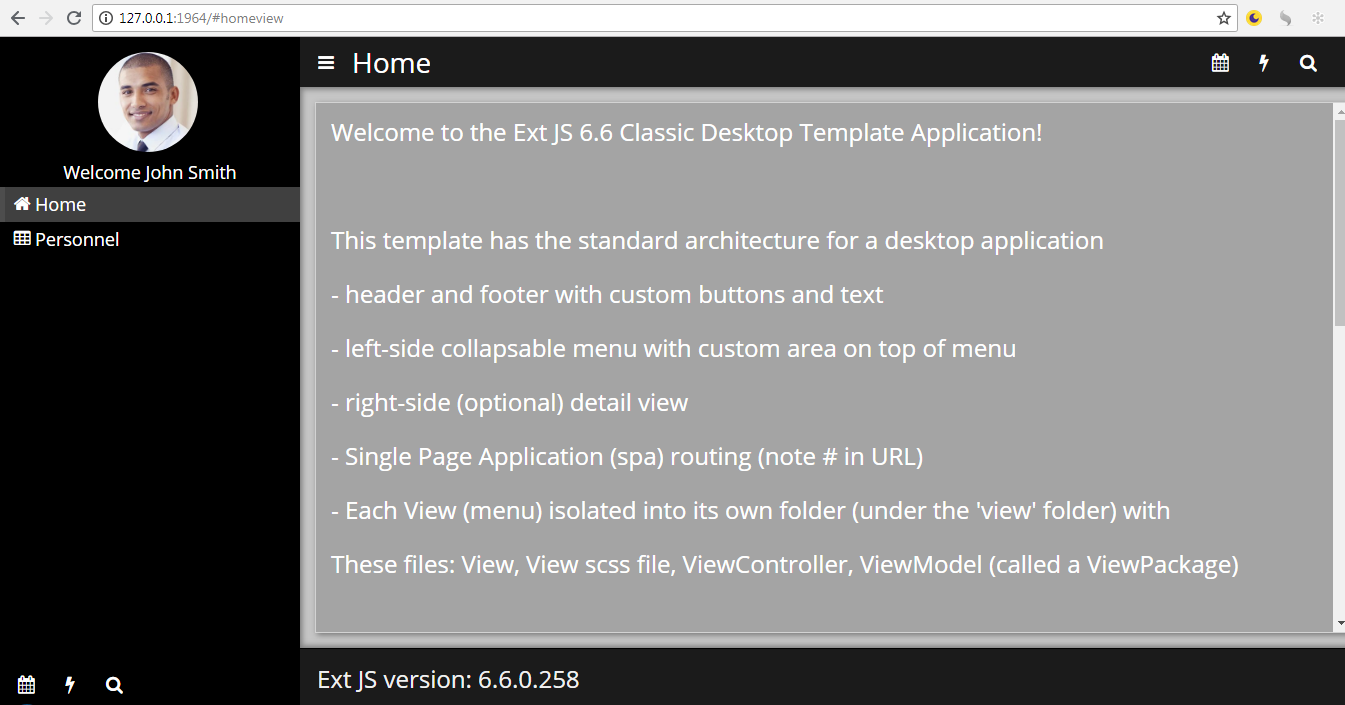
After the build is complete, the application launches in the browser with this viewport screen.

Open editor to see the application structure.

- app/desktop/overrides: For framework and application class overrides
- app/desktop/sass: For styling application but now ideally .scss files reside alongside their respective .js files and global styling goes in “Application.scss” file
- app/desktop/src: For application source code
- app/shared: For shared overrides, sass and src content but this is ideally needed in a universal application
- build: As before, for the content of different build environments
- generatedFiles: Now the bootstrap files reside in this folder as compared to the application root folder in older cmd generated apps
- node_modules: For downloaded and installed packages from npm public repository. Ext JS packages go in “node_modules/@sencha” folder
- packages: For locally created packages like locale, theme, and code. It can contain remote packages also though they are now added from npm repository and go in “node_modules” folder
- resources: As before, for application resources like hard-coded data, images, CSS files, etc.
- app.js: As before, it’s the entry point of an Ext JS application
- app.json: As before, it’s the manifest file
- build.xml: As before, this file contains the ANT build targets
- index.html: As before, this file is the starting point of an Ext JS application that loads the Microloader. (The “Ext.beforeLoad” function doesn’t show commented out in a classic desktop app :-))
- package-lock.json/package.json: These files hold application dependencies, scripts object and other details for npm projects
- webpack.config.js: Ext JS node projects use webpack for building applications, so this file has the configuration setting for it.
- workspace.json: As before, it has workspace settings for the application
2. moderndesktop
This template creates an application using modern toolkit and material theme, suitable for desktops and laptops. The list of browsers supported by modern toolkit can be viewed here. 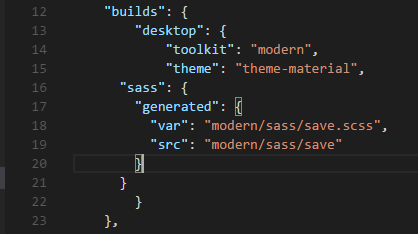
Generate an application using this template by the following command. You can try changing the default app name “MyApp” to “MyModernDesktopApp” with -n flag and theme with -m flag. The generated application structure is similar to the classicdesktop application.
ext-gen app -n MyModernDesktopApp
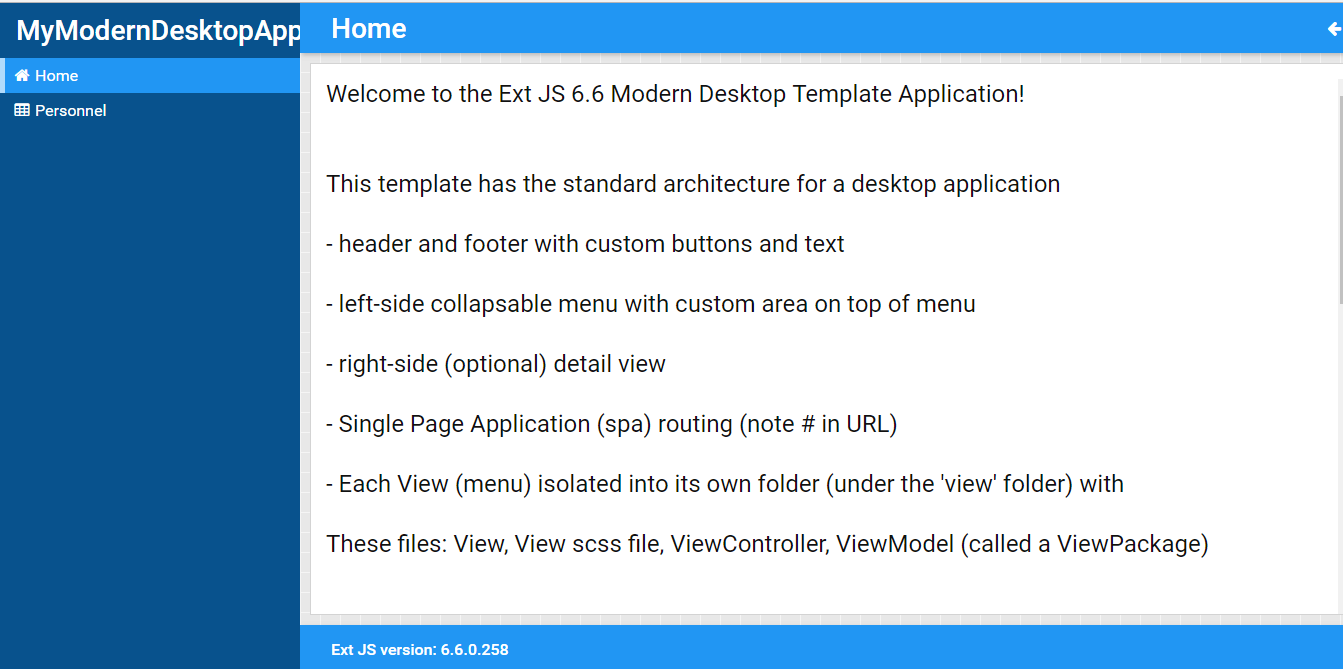
Once complete, navigate to “my-modern-desktop-app” folder and do a development build with command “npm start”. The application will launch in the browser with this view.
3. universalclassicmodern
This template uses both the toolkits to generate a universal application – the classic toolkit for desktops and laptops, and a modern toolkit for tablets and phones. Build object looks like this.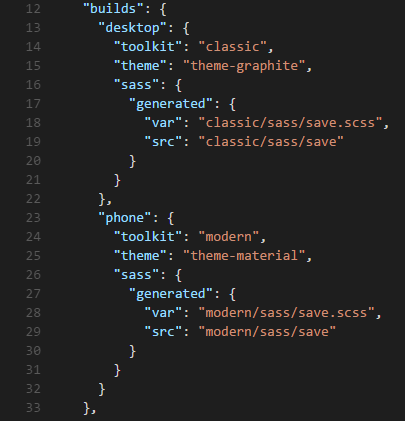
Generate a universal application by this command.
ext-gen app -n MyUniversalClassicModernApp
Run this command in terminal window to build both the profiles of a universal application.
npm run all
Once the application is built and running, you shall see this screen. This is the desktop version of the app.
Now run the phone version of the app by adding query string “?phone” to the URL, e.g “http://127.0.0.1:1964/?phone”. You shall see this screen.

The structure of a universal application is little different from the other two apps.
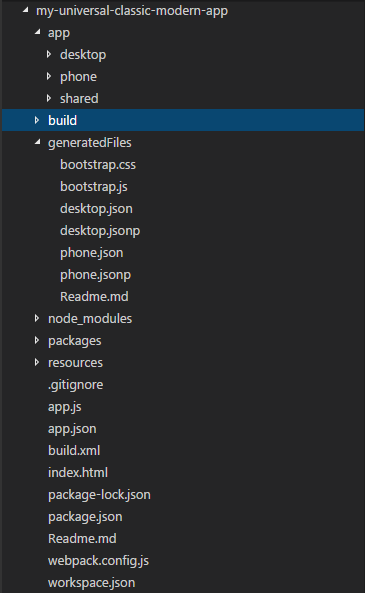
The difference is in the following folders:
- app: Compared to three different folders – classic, modern and app – in previous cmd version, now they all are grouped in one “app” folder as “desktop”, “phone” and “shared”.
- generatedFiles: Apart from bootstrap files, this folder also contains the two manifest files – desktop.json and phone.json. Previously these were “classic.json” and “modern.json” and resided in the application root folder.
- build: It contains build profiles in “desktop” and “phone” folders rather than “classic” and “modern” in the previous version.
4. universalmodern
According to Sencha docs, it uses the modern toolkit to generate 2 profiles – 1 for desktop and another for the phone (though currently, it did not generate correctly for me on Windows 7.)
Add the Moment Library
Download and install Moment library from npm’s public repository.
npm install moment --save
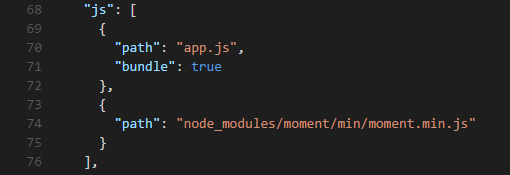
Open the editor and expand the “node_modules” folder. Look for “moment” folder and choose the minified js file that you want to use. Add its path to “js” array in app.json as shown below in this screenshot.
Notice that as you make changes to the code, webpack-dev-server starts compiling those changes. After compilation is complete, it also refreshes the application in the browser, just like “Sencha app watch” did. Now, look at the sources tab of Chrome developers tools to confirm that the moment js file is loaded.

You are now ready to use it in the application. So let’s use it in “PersonnelView” but before that modify its store to add a new “dob” field. For this, open “MyClassicDesktopApp.view.personnel.PersonnelViewStore” class in the editor and replace its code with this one.
Ext.define('MyClassicDesktopApp.view.personnel.PersonnelViewStore', {
 extend: 'Ext.data.Store',
 alias: 'store.personnelviewstore',
 fields: [
  'name', 'email', 'phone', 'dob'
 ],
 data: { items: [
  {name:'Jean Luc', email:"jeanluc.picard@enterprise.com", phone:"555-111-1111", dob:"01/08/1964"},
  { name:'ModernWorf', email:"worf.moghsson@enterprise.com", phone:"555-222-2222", dob:"12/10/1977"},
  { name:'Deanna', email:"deanna.troi@enterprise.com", phone:"555-333-3333", dob:"06/14/1972"},
  { name:'Data', email:"mr.data@enterprise.com", phone:"555-444-4444", dob:"09/23/2010"}
 ]},
 proxy: {
  type: 'memory',
  reader: {
   type: 'json',
   rootProperty: 'items'
  }
 }
});
Now add a new column “Date of Birth” in “MyClassicDesktopApp.view.personnel.PersonnelView” class. You can try using moment () function in this column to render date in the required format – may be something like this:
Ext.define('MyClassicDesktopApp.view.personnel.PersonnelView', {
    extend: 'Ext.grid.Panel',
    xtype: 'personnelview',
    cls: 'personnelview',
    controller: 'personnelviewcontroller',
    viewModel: { type: 'personnelviewmodel' },
    store: { type: 'personnelviewstore' },
    columns: [
        {
            text: 'Name',
            dataIndex: 'name',
            width: 100,
            cell: { userCls: 'bold' }
        },
        { text: 'Email', dataIndex: 'email', width: 230 },
        {
            text: 'Phone',
            dataIndex: 'phone',
            width: 150
        }, {
            text: 'Date of Birth',
            dataIndex: 'dob',
            width: 220,
            renderer: function (value, rec) {
                return moment(value).format("MMM Do YY");
            }
        }
    ],
    listener
        select: 'onItemSelected'
    }
});
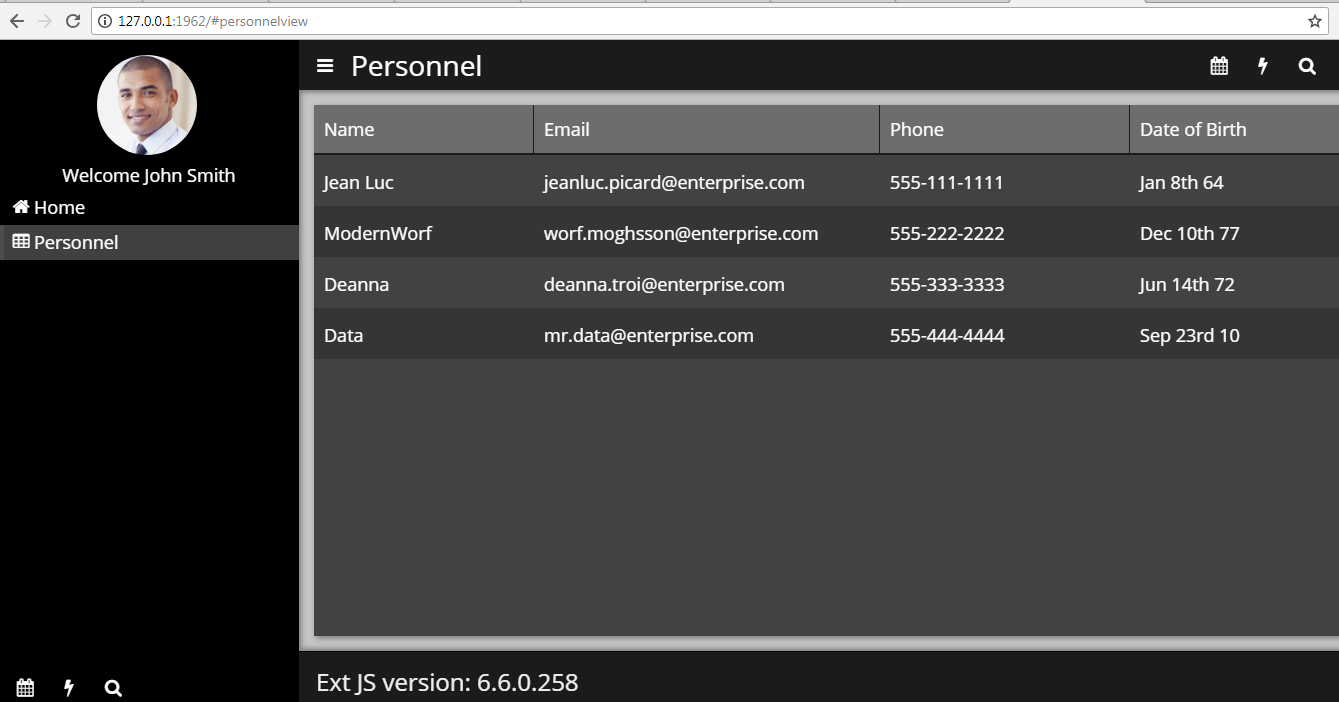
After the application is built and refresh, you shall see the following screen with the last column having the moment date.
Add the Charts Package
Download and install charts package by navigating to “my-classic-desktop-app” folder and running this command:
npm install @sencha/ext-charts --save
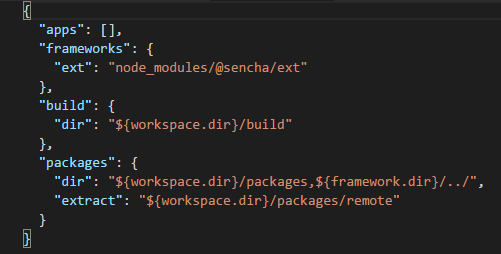
Edit “workspace.json” and append “dir” variable, under “packages” object, with the path of the newly installed package.
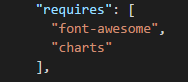
Edit “app.json” to require the “charts” package.
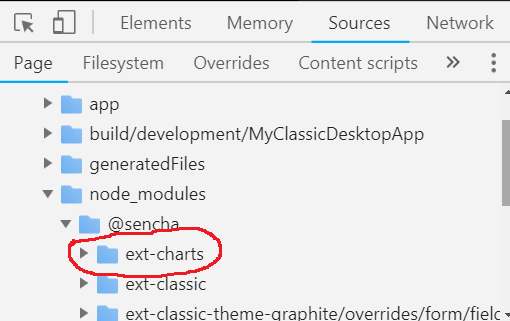
Confirm that the charts package is loaded.
Test using charts package by editing “‘MyClassicDesktopApp.view.personnel.PersonnelView” class and copying-pasting this code:
Ext.define('MyClassicDesktopApp.view.personnel.PersonnelView', {
    extend: 'Ext.container.Container',
    xtype: 'personnelview',
    cls: 'personnelview',
    controller: 'personnelviewcontroller',
    viewModel: { type: 'personnelviewmodel' },
    layout: 'vbox',
    items: [{
        xtype: 'grid',
        width: '100%',
        height: 250,
        store: { type: 'personnelviewstore' },
        columns: [
            {
                text: 'Name',
                dataIndex: 'name',
                width: 220,
                cell: { userCls: 'bold' }
            }, {
                text: 'Email',
                dataIndex: 'email',
                flex:1
            }, {
                text: 'Phone',
                dataIndex: 'phone',
                width: 250
            }, {
                text: 'Date of Birth',
                dataIndex: 'dob',
                width: 220,
                renderer: function (value, rec) {
                    return moment(value).format("MMM Do YY");
                }
            }
        ],
        listeners: {
            select: 'onItemSelected'
        }
    }, {
        xtype: 'polar',
        width: "100%",
        height: 280,
        store: {
            fields: ['name', 'hitCount'],
            data: [{name:'Ext JS', hitCount:46},
                  {name:'Hadoop', hitCount:25},
                  {name:'JS', hitCount:40},
                  {name:'Java', hitCount:16},
                  {name:'Touch', hitCount:36}]
        },
        series: {
            type: 'pie',
            angleField: 'hitCount',
            label: {
                field: 'name',
                display: 'rotate'
            },
            donut: 30
        }
    }]
});
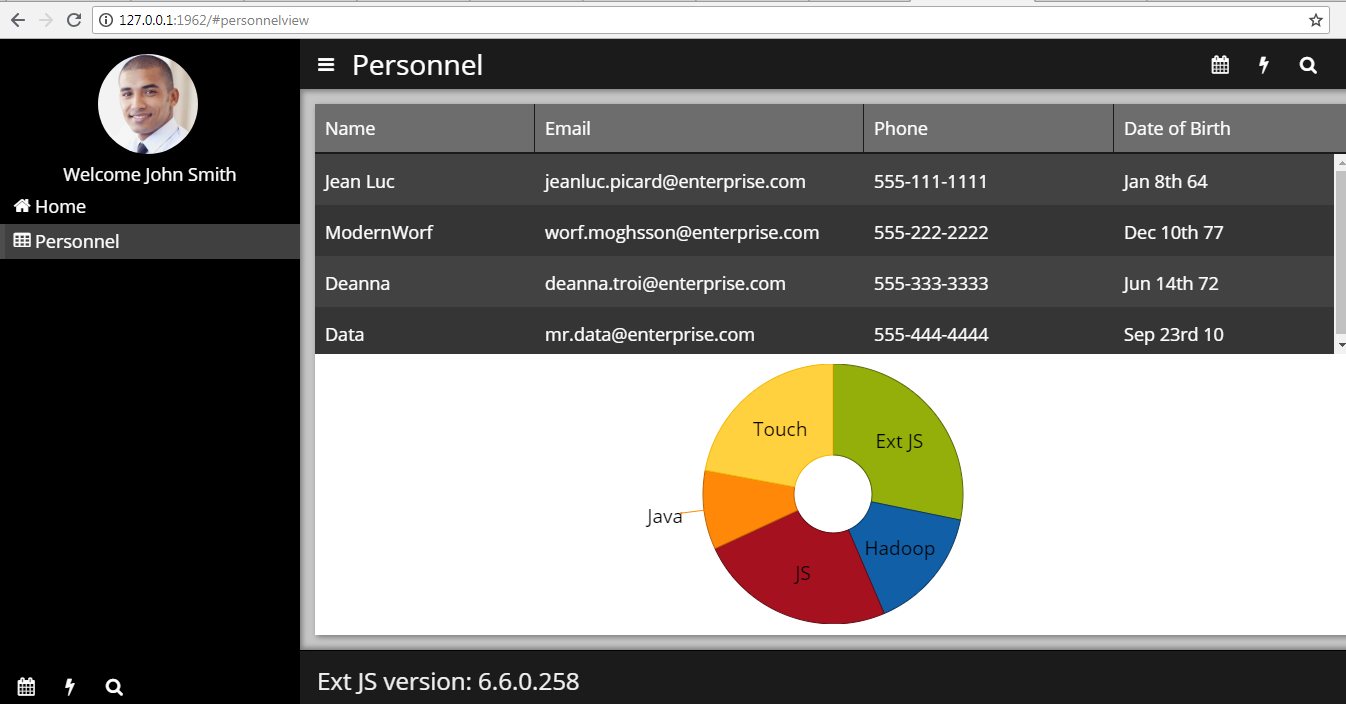
Application refresh will show this screen with grid and pie chart in vbox layout.
Summary:
Ext JS 6.6 has offered different starter applications for different form factors. As per Sencha docs, these applications implement best practices. We can go through their source code to have an idea about Sencha’s recommended way of writing and connecting different pieces of MVVM architecture. We can build our application on top of one of these applications after the required cleanup or we can create an application with one of these templates in interactive mode.
With support for open tooling, adding packages from npm’s Sencha and public repositories has become quite simple, aiding in managing dependencies and versions.