Blogs
Getting Started with Arbela!
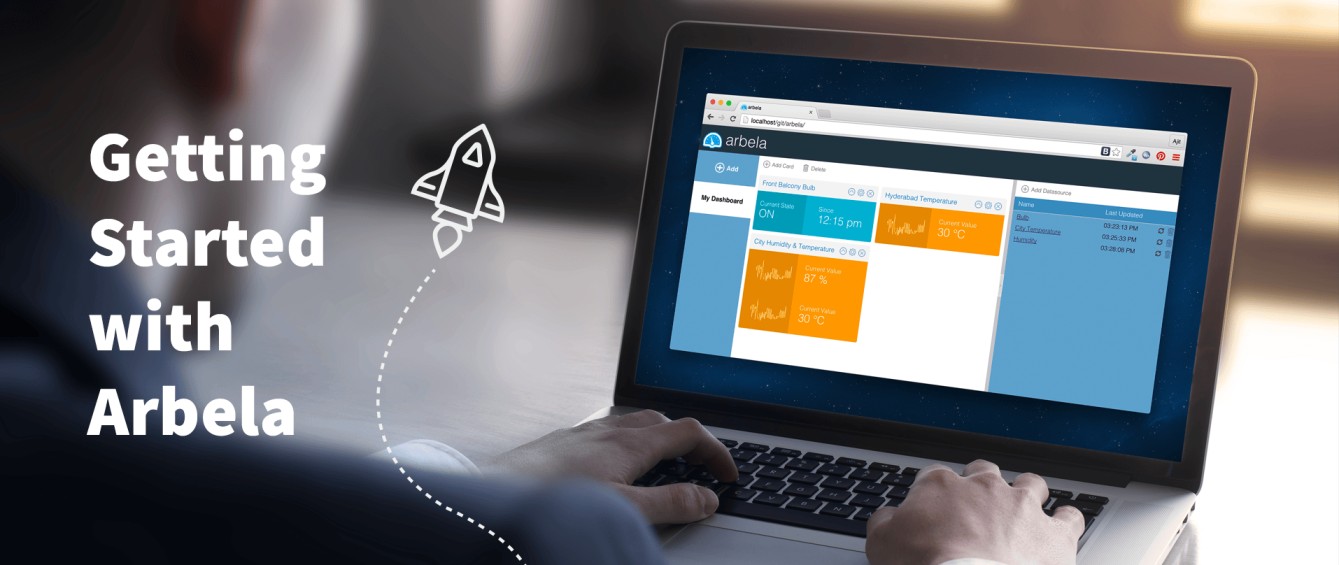
We announced the availability of Arbela. In this article, we will take you through the steps to get you started with Arbela so that you can get the first-hand feel of this IoT-ready dashboard and learn how you can monitor your “things”.
We will take the Dweet.io use case and see how you can connect your Dweet.io device and start receiving data. Dweet.io offers simple messaging (called dweets) for IoT. It offers REST API to send/read dweets.
Step 1: Get arbela ready
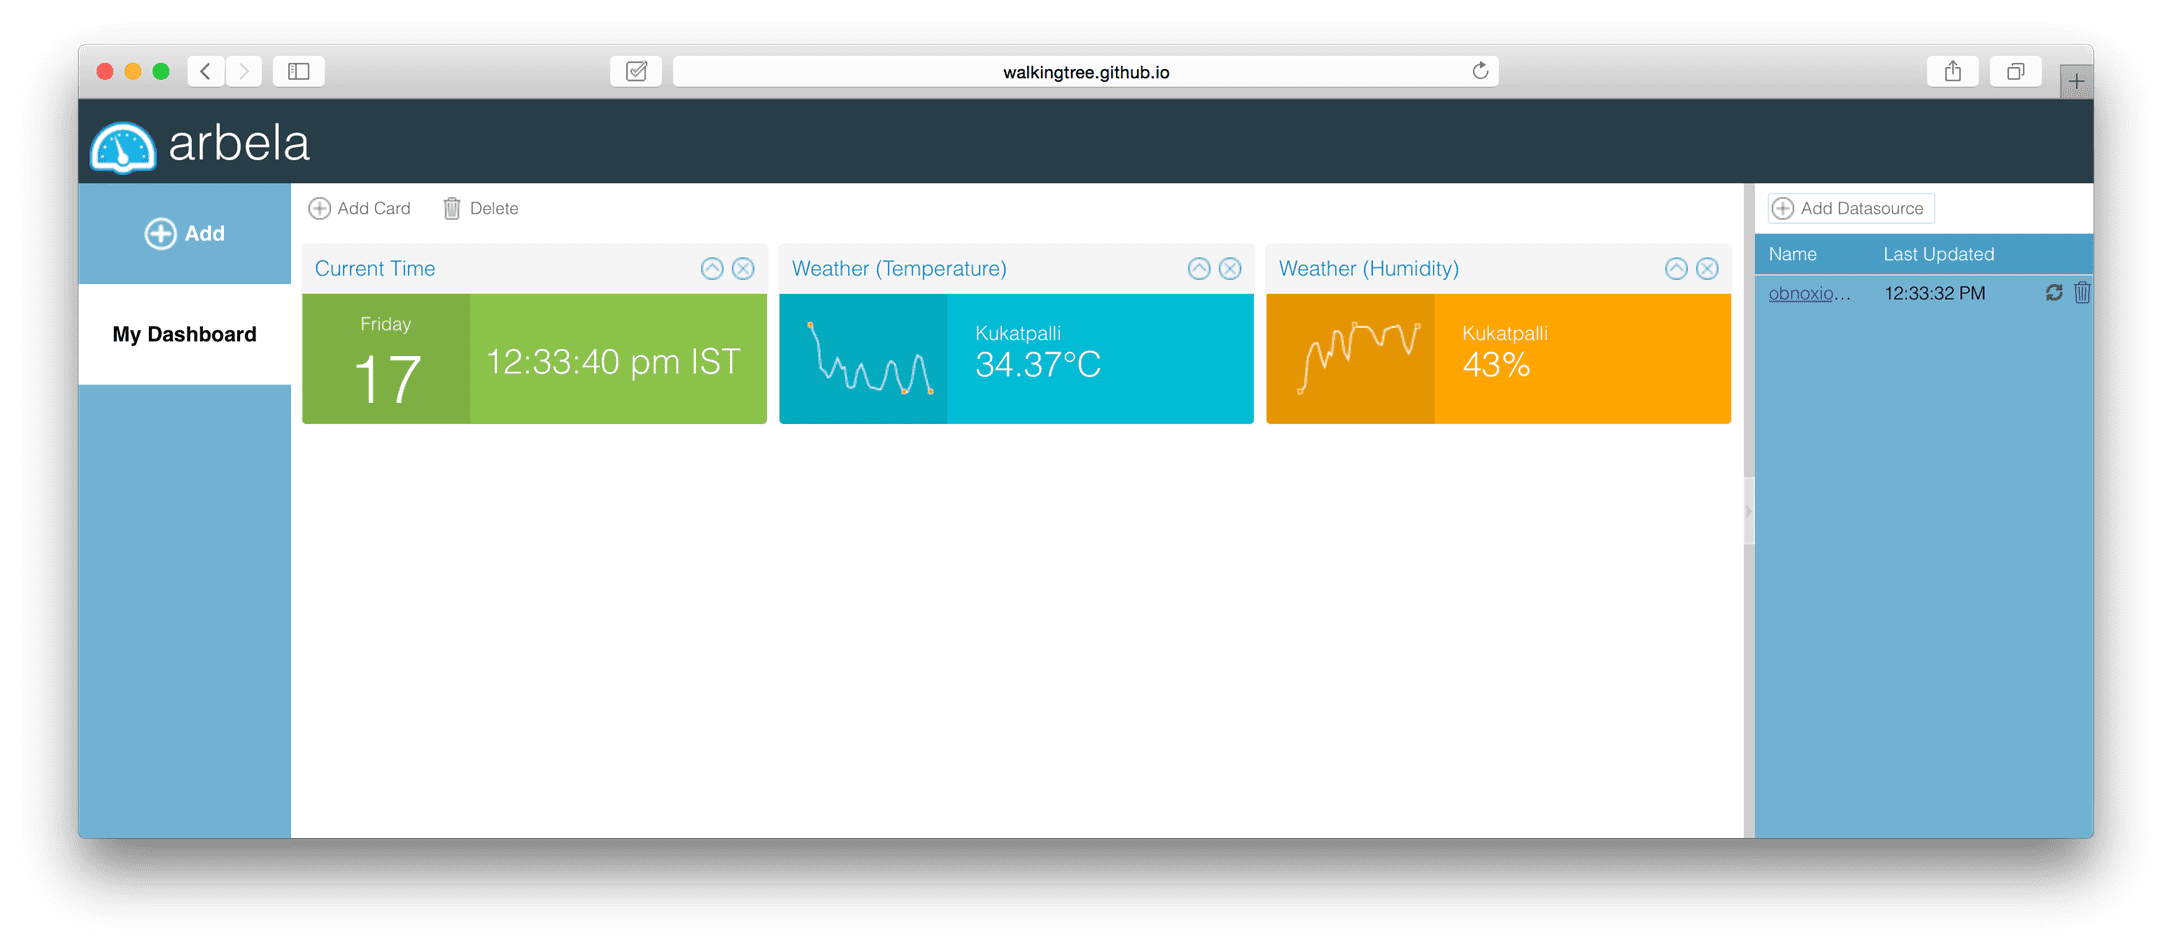
To test drive Arbela for this article, open Arbela demo site in a Safari/Firefox. When prompted, allow the application to receive the computer location. It is used to show the Weather data (temperature and humidity) on the dashboard.
 NOTE: The hosted demo will not work in Chrome and Opera as they do not allow a non-secure application (not running with HTTPS) to access the location/position. You will receive the following message in the browser console:
getCurrentPosition() and watchPosition() are deprecated on insecure origins. To use this feature, you should consider switching your application to a secure origin, such as HTTPS. See https://goo.gl/rStTGz for more details.
And, since the demo uses HTTP weather APIs, it has to be run with http:// rather than https://
Step 2: Get Dweet.io ready
Starting with Dweet.io is very simple and straight forward. You don’t need signup or any setup. Open Dweet.io website in a browser of your choice.
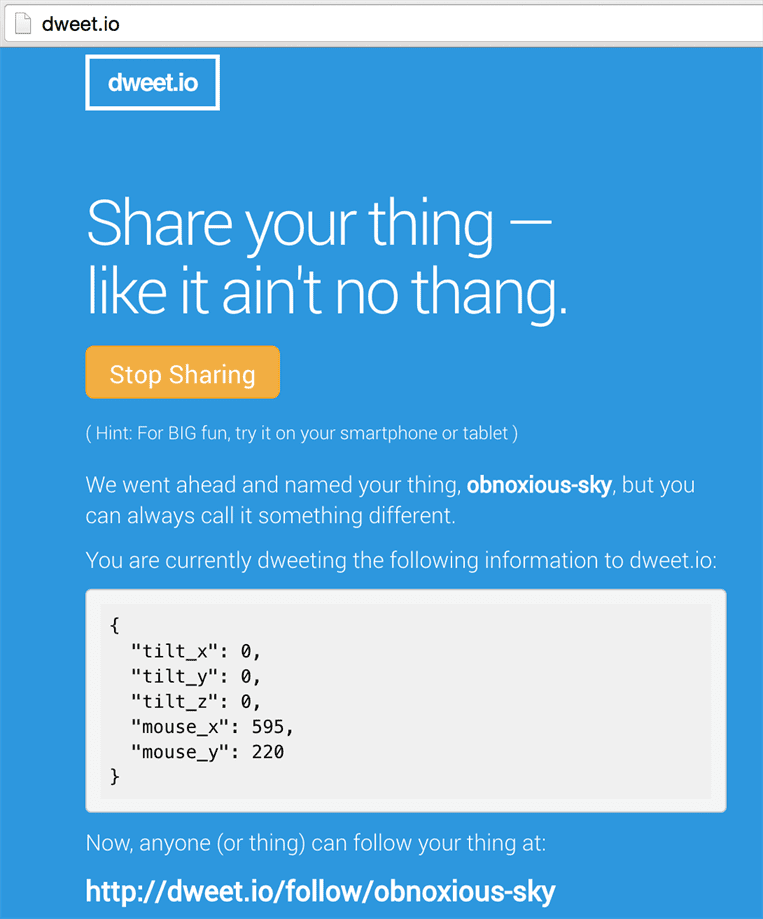
Click on Try It Now button which will start receiving the tilt and mouse position data.
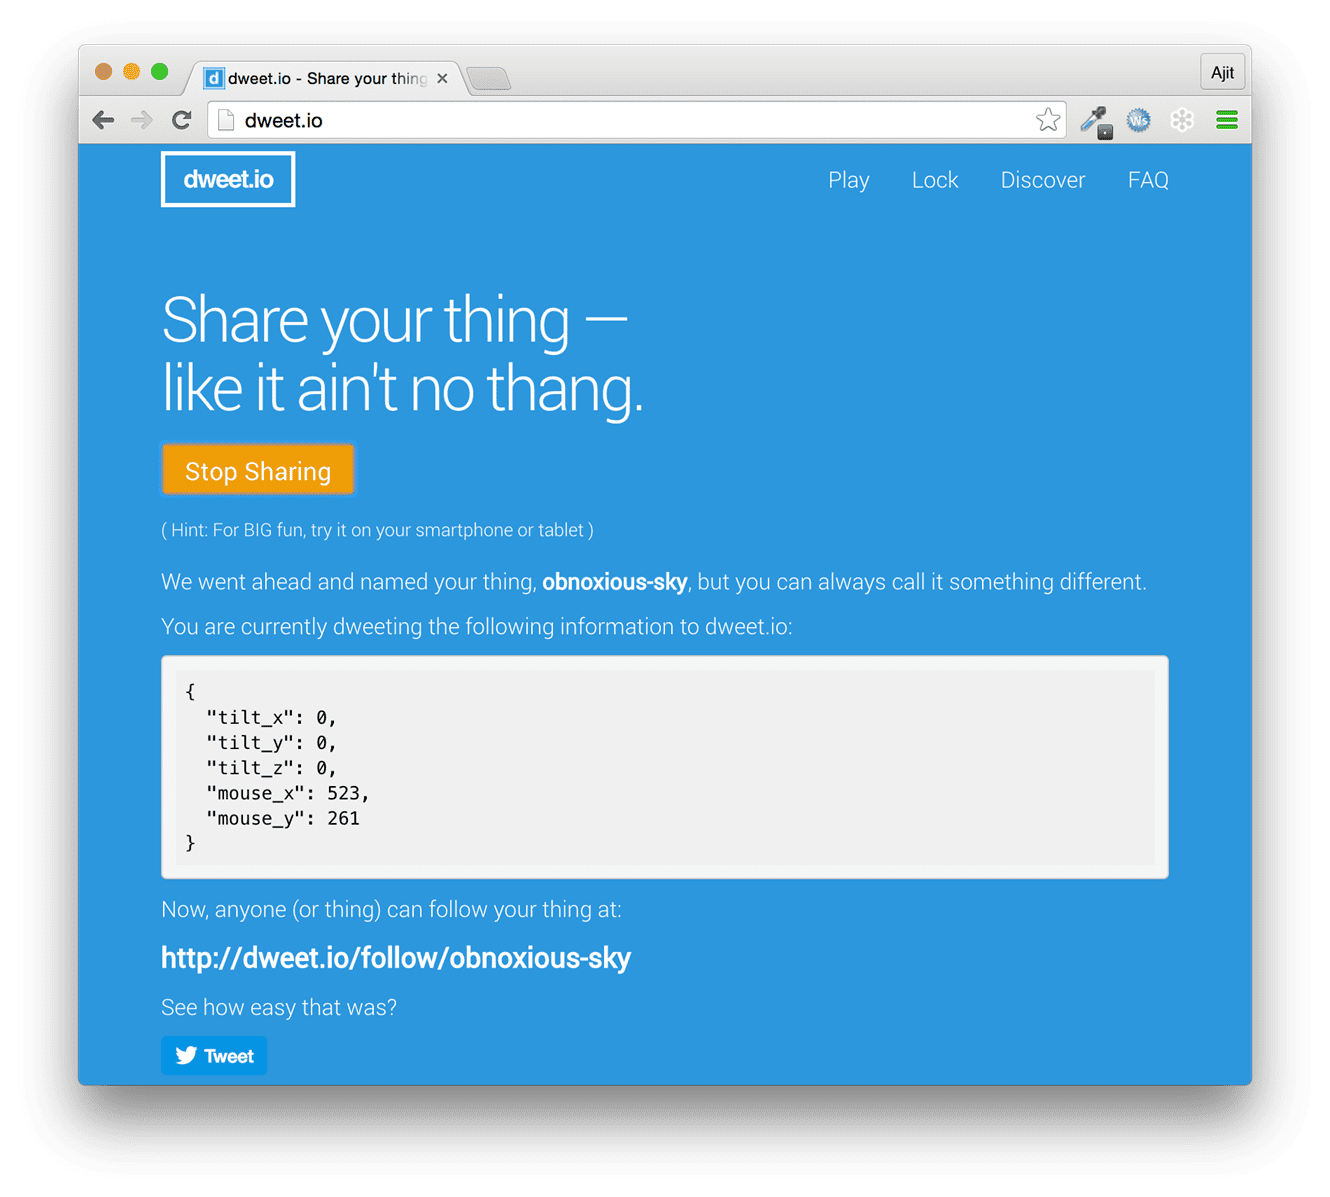
Note down the thing name – obnoxious-sky – as we will need it to configure this device in Arbela.
In case you want to use some other device. You may get started with these public (non-locked) devices.
Step 3: Add Datasource
Now, that we have a Dweet.io device in place which is reporting tilt and mouse position data, let us see how we can start receiving it in Arbela. To do this, we will have to create a Datasource in Arbela, which sets up a source from where data is coming. To create a Datasource, click on Add Datasource button. It prompts you for the datasource detail. For Dweet.io, set up the datasource as mentioned below:

Datasource name can be anything. Just to identify the device, I have used the same name as the Thing Name. Dweet.io requires data polling. So, we have set the Data refresh frequency, which is in seconds.
Key will be required when you have locked things.
Click on Save button to add the Dweet.io datasource to arbela.
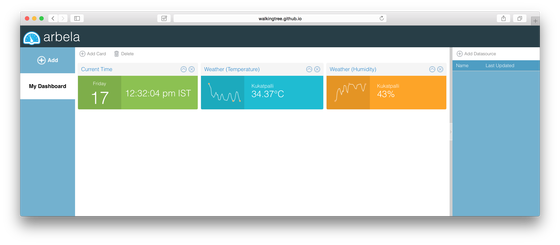
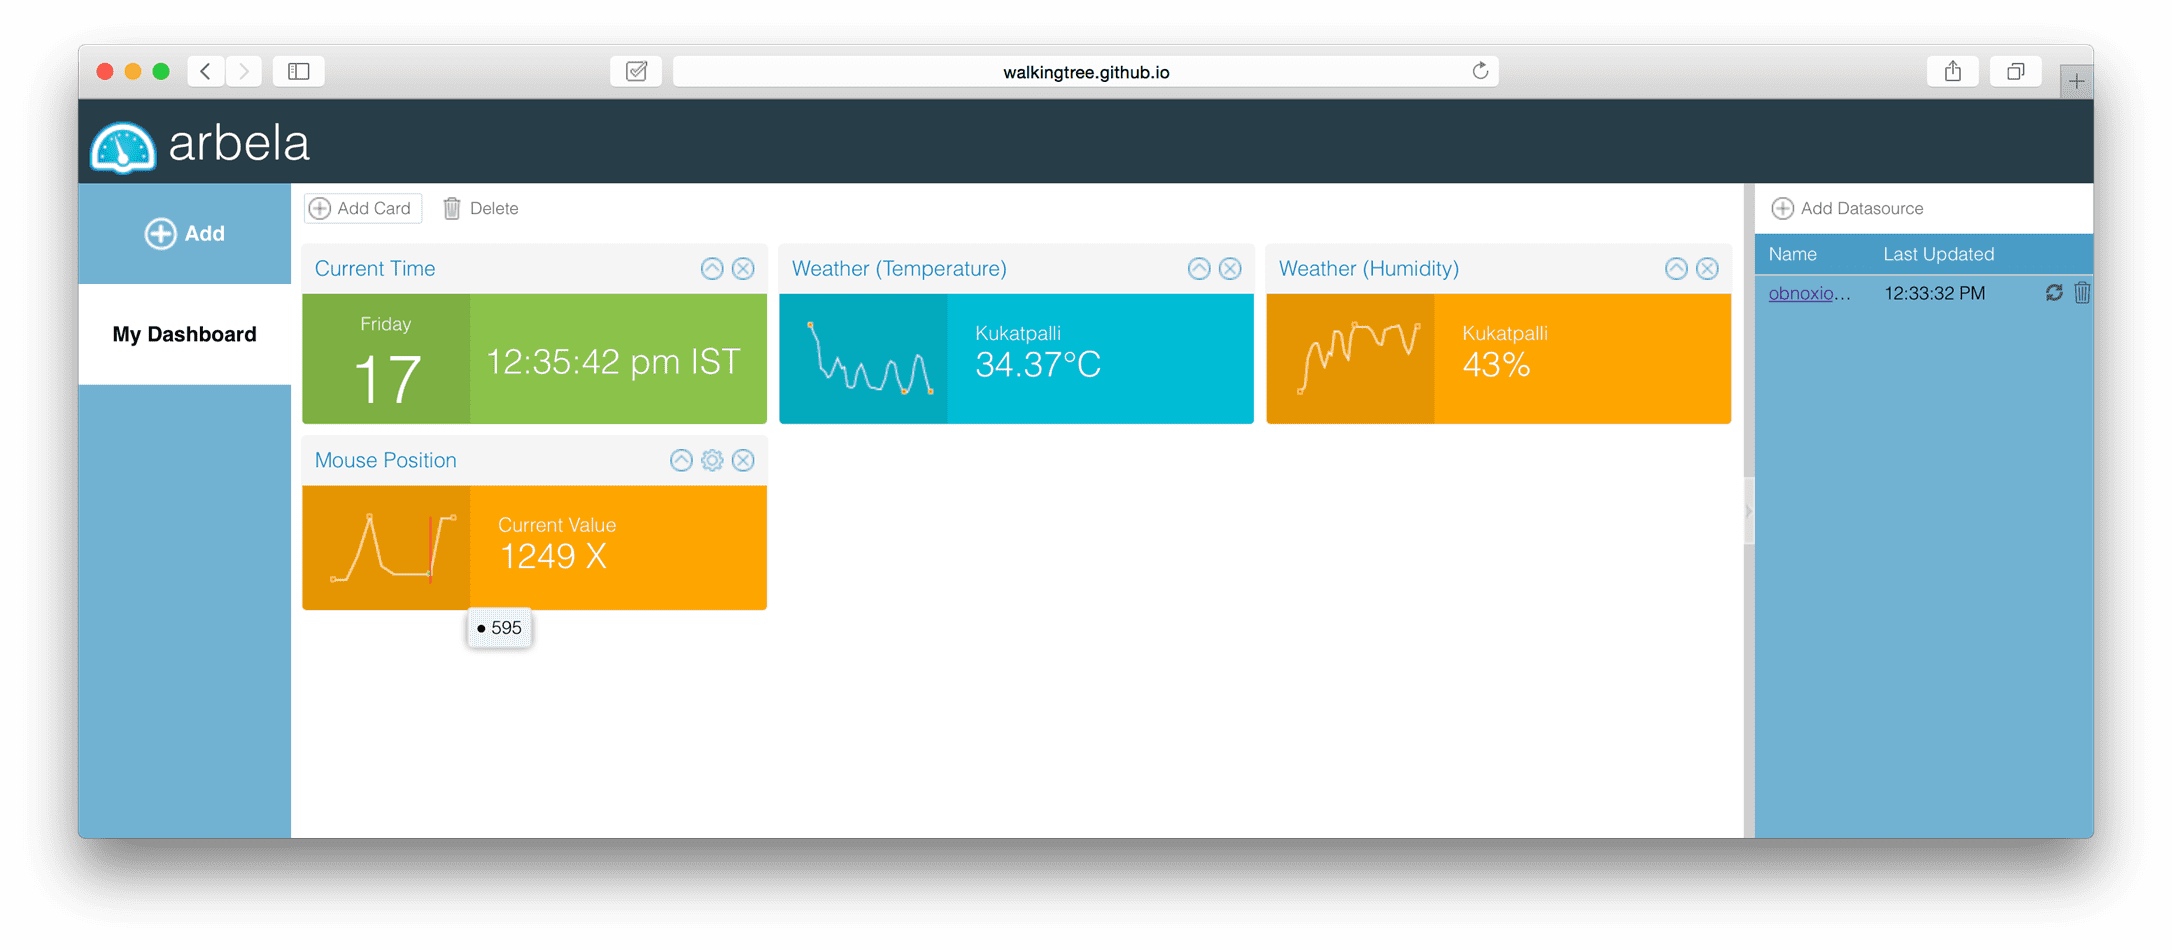
Step 4: Add a Card
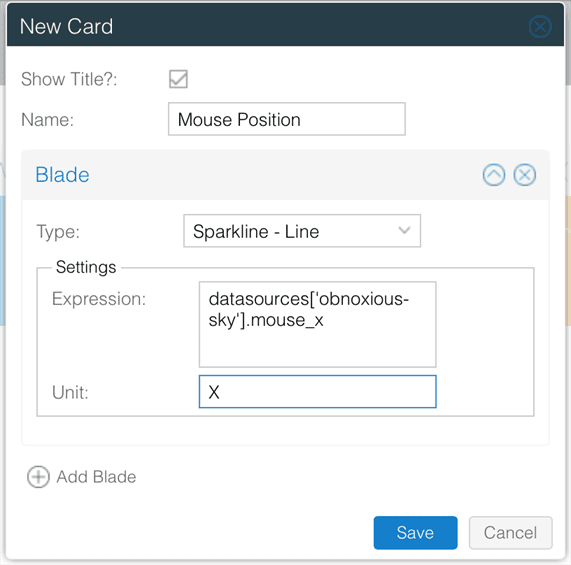
With the Datasource in place, now we can add a Card to present the data coming from the datasource. Say, we want to display the current mouse X position and how it has been changing over a period. For this presentation, we will select Sparkline – Line as the Type of Blade and set the expression so that mouse X position value is mapped, as shown below:
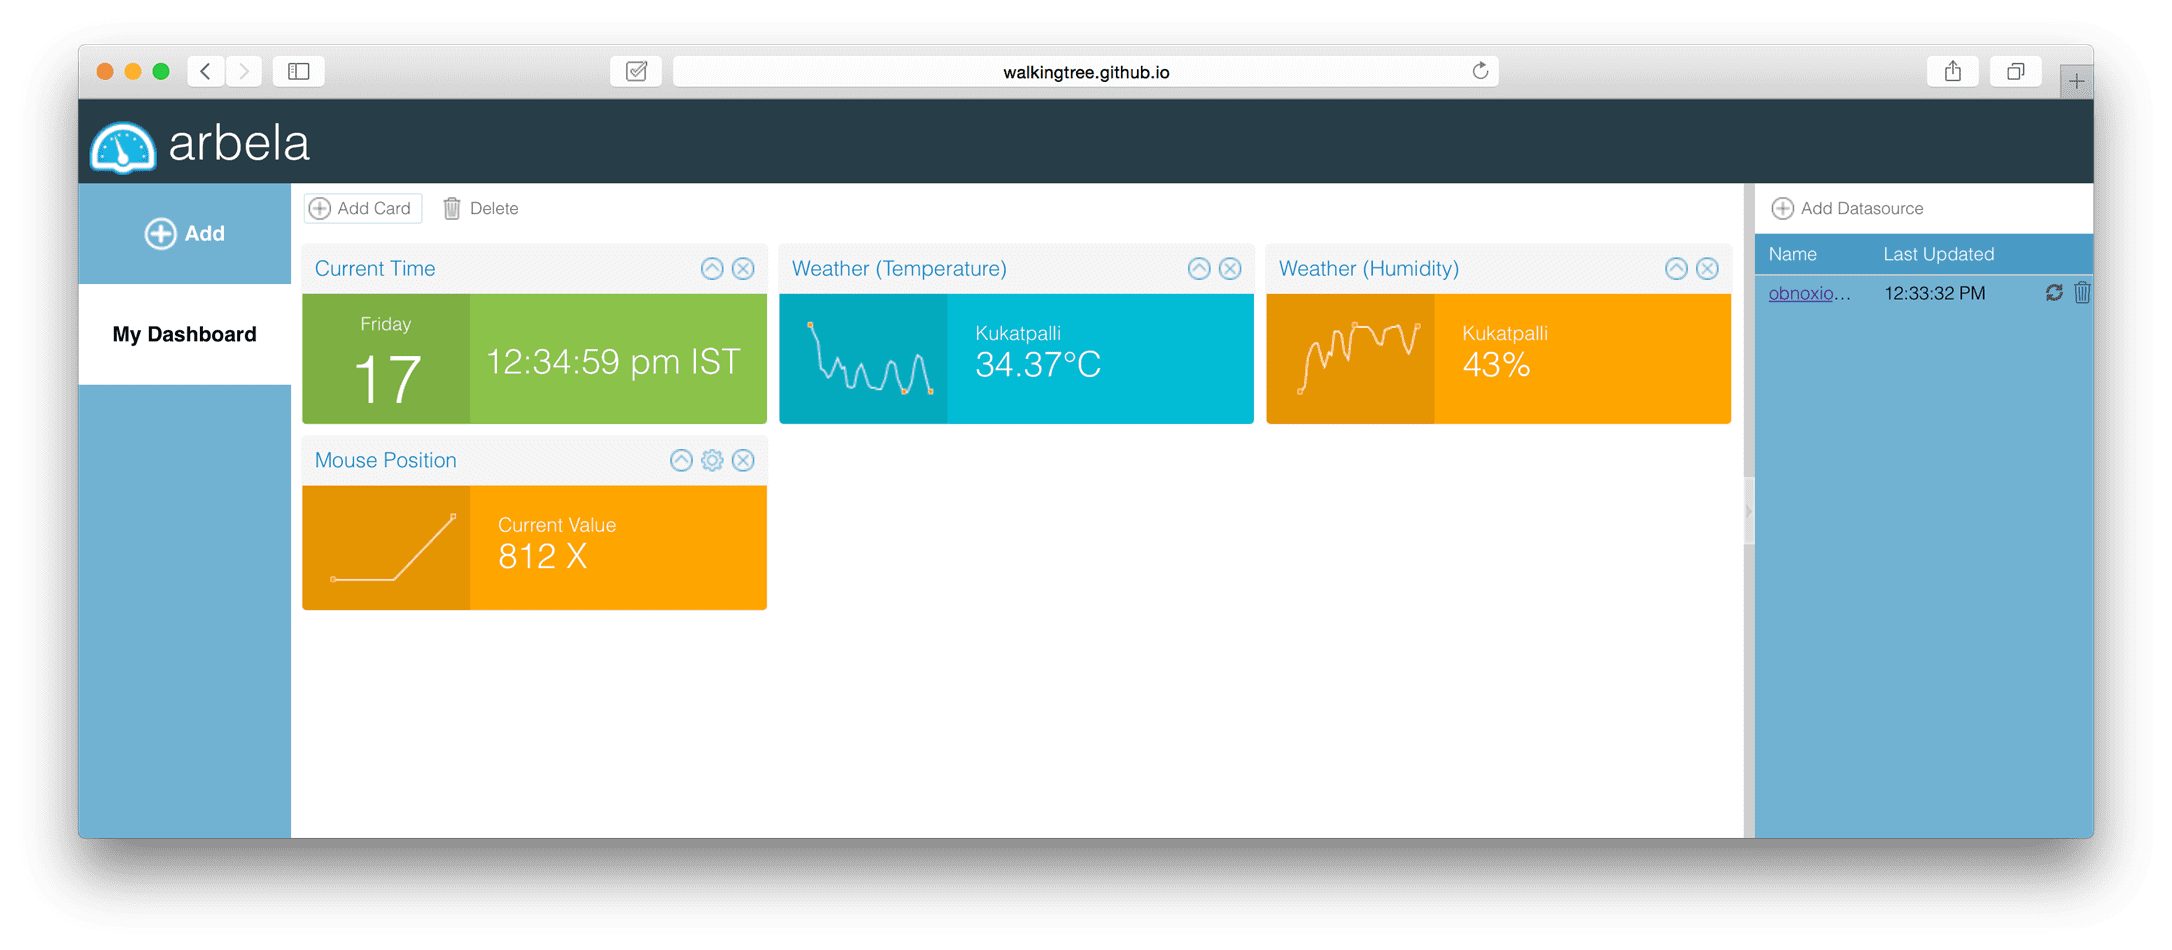
Click on Save button to add the Card with a single Blade to the dashboard, as shown below:
With this we are all set with our Dweet.io device. Go back to Dweet.io website and move the mouse around so that the value changes, as shown below:
Go back to Arbela and you shall see the new value appearing there, as shown below:
Give it a try and let me know how did it go!