
Blogs
A Detailed Guide to Securing React applications with Keycloak

Digital technology has presented us with a myriad of applications at our disposal, and you would almost always require proper authentication to gain authorized access to the application data by having login/logout capability. If you think from a user perspective, we have several different identities and credentials to manage for different applications we access. Having a single set of credentials for all of our applications would be so convenient, isn’t it? This is what the Single Sign-On (SSO) capability provides, and it is really important for the success of an Enterprise’s Identity and Access Management (IAM).
Keycloak is an open-source platform developed and maintained by the RedHat Community.This product makes the developer’s job easy by enabling SSO for applications and authorized access to services with less/no codes.

Some of the Keycloak features, such as Identity Brokering, User Federation, Client Adapters, Admin Console, Account Management Console, Standard Protocol, Authorization Services, Documentation and Clustering Support further enhance business applications.
In this blog, we will see how we can use Keycloak to setup identity and access management in a React application using Google as the identity provider.
GETTING STARTED WITH KEYCLOAK
In order to get started, we first need to setup Keycloak. You can follow the official getting started guide here to have this setup.
Quick steps to get started with Keycloak:
- Install and boot your keycloak server by downloading the server zip file, unzipping it and booting it using standalone.bat in windows and standalone.sh in Linux
- Once the server boots, you can open the server in your browser using http://localhost:8080/auth and see the welcome page which shows that the server is running.
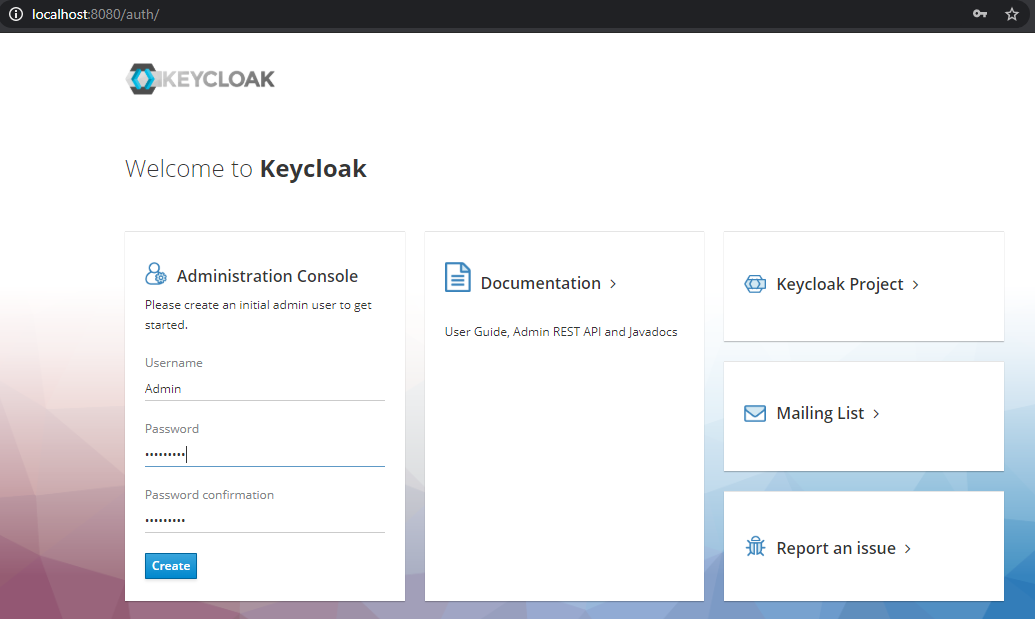
- First create the admin account, using which you can login to the master realm’s administration console, from which you can create other realms and users and also register your applications to be secured by Keycloak.
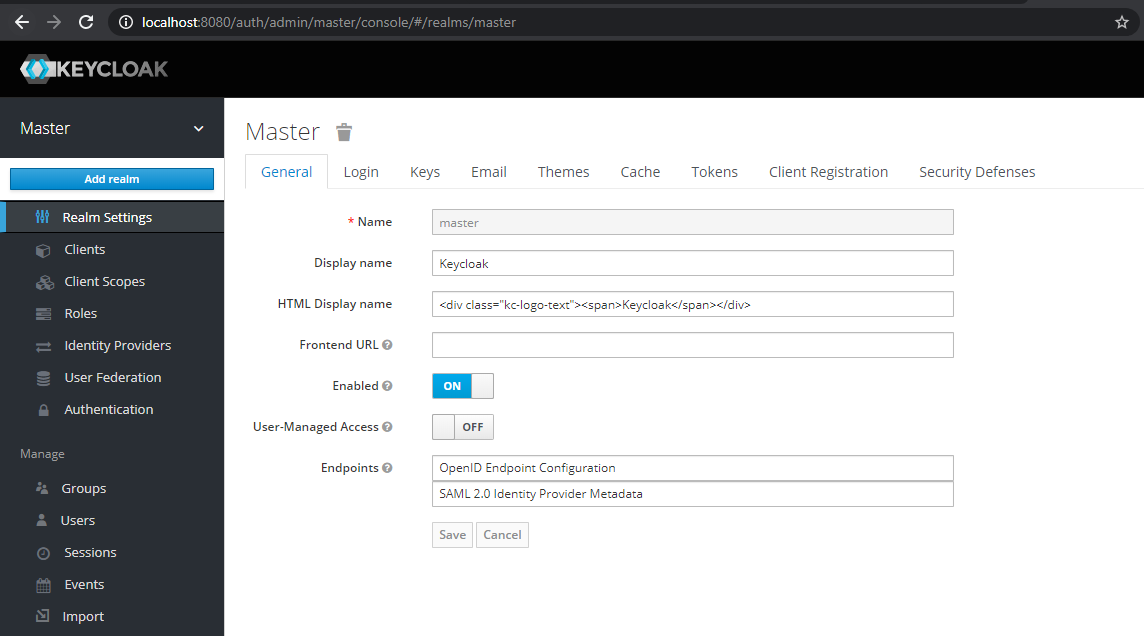
- The realm is like a namespace for the configuration that allows you to manage the entire metadata/configuration within different buckets called realms. By default you get the master realm, which should be used for administration purposes only, and you should avoid creating your configuration in the master. You can create multiple realms based on your requirement and create your users and register your applications within them.
- Next you can login to the admin console (http://localhost:8080/auth/admin/) using the admin account details you created in step 3.
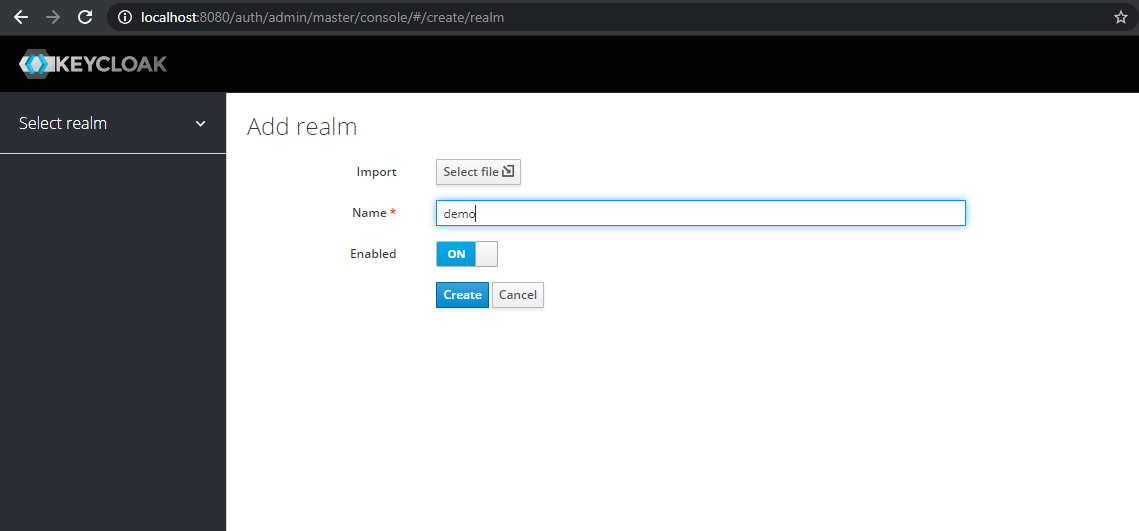
- In the admin console, you can create a new Realm called demo from the Master drop-down menu by clicking Add Realm option.
- Now select the newly created Realm from the drop-down, you can perform the other metadata setup.
- Next, create a Client for your React application which you want to secure with Keycloak
Client ID: demo
Protocol: ‘OpenID-Connect/SAML’
Root Url: Application Hostname
- Client configuration requires details like Protocol: SAML/OpenID, Resource Endpoint: https://localhost:3000/ (Your application host details for the React app), Redirect URI: After the auth completes where you want to redirect.
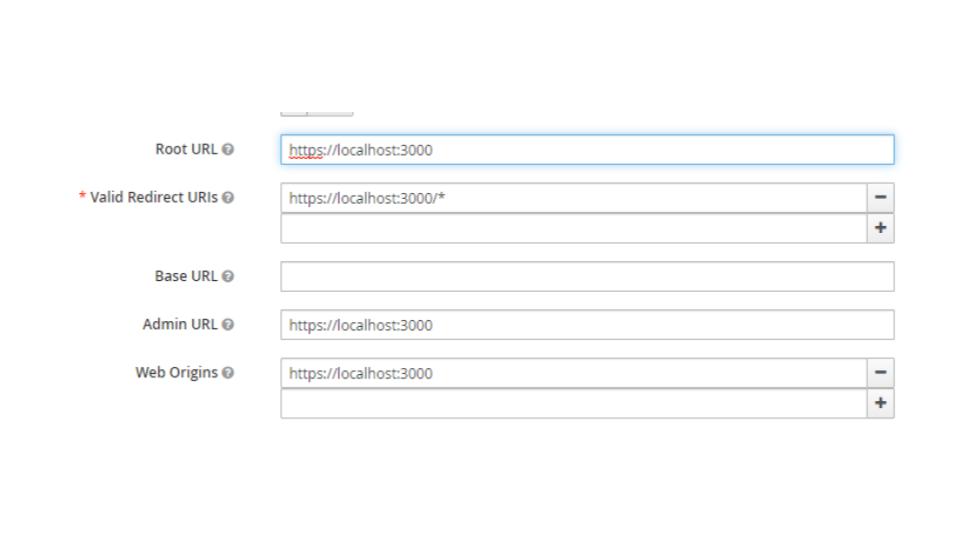
- Include the identity provider by adding social networks like Google, using which you want to facilitate sign-in by providing the google app client id and secret key.
- For this, you need to add your application in the google developers console(https://console.developers.google.com/).
- Create a new google project.
- Setup OAuth consent screen by selecting external/internal depending on the level of google authentication you wish to apply.
- Create credentials by providing the keycloak url(http://localhost:8080/auth/realms/demo/broker/google/endpoint) as the Authorised redirect URIs. This will give you the client id and secret key which you will use in the next step for adding identity providers
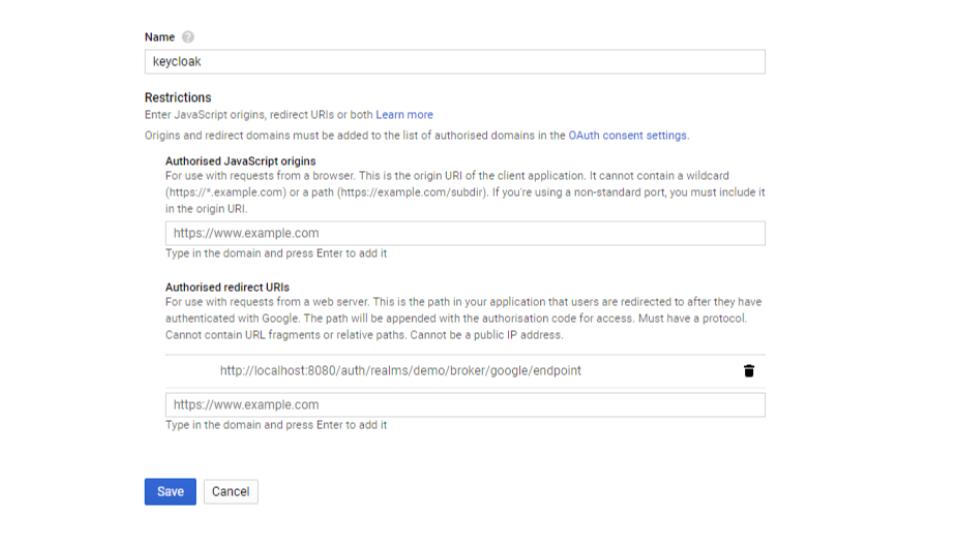
- Add identity provider by using the client id and client secret you got from google console for your new application
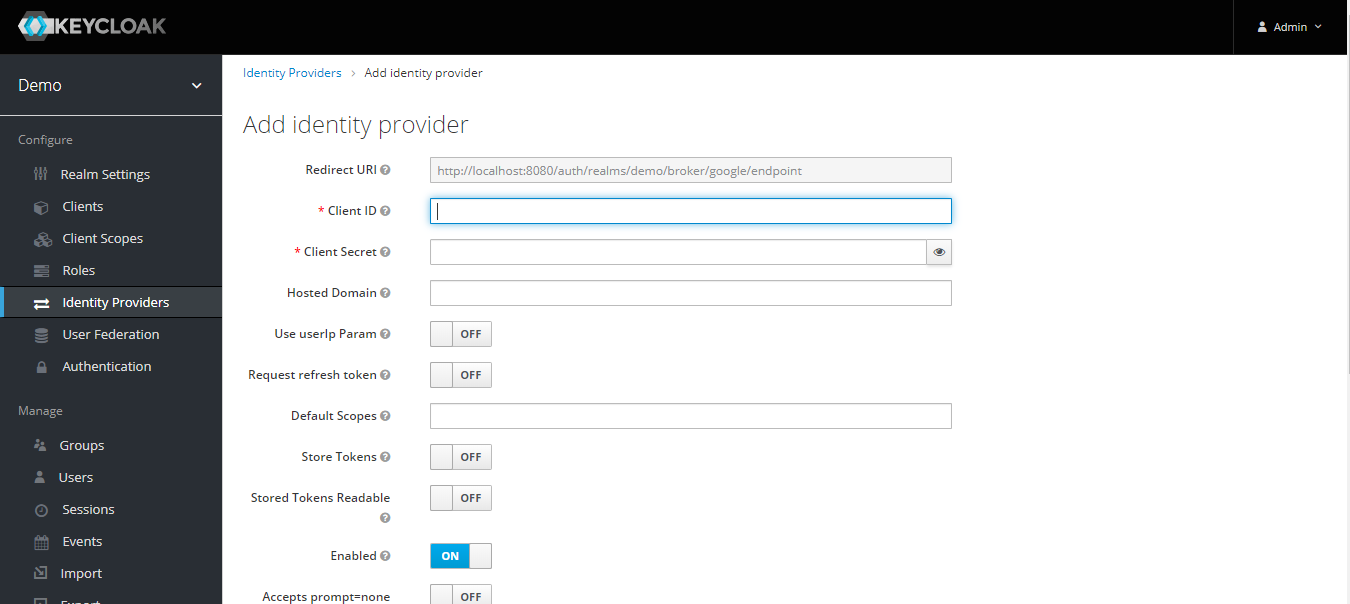
With the keycloak server setup up and running, we can start with our React application.
PROCESS TO SETUP REACT APPLICATION WITH KEYCLOAK
Now we will see the steps of setting up react application with keycloak.
- Let’s first create our application using the below command.
npx create-react-app react-keycloak-app - Install the keycloak-js dependency
npm install keycloak-js - The keycloak configuration can be saved as a json file under the public folder by creating a resources subfolder.
The keycloak.json is as follows:
{
   "realm": "demo",
   "auth-server-url": "http://localhost:8080/auth",
   "ssl-required": "none",
   "resource": "demo",
   "public-client": true,
   "verify-token-audience": true,
   "use-resource-role-mappings": true,
   "confidential-port": 0
  }
- The logic to include the keycloak validation can be included in index.js before rendering the application, or it can be included in a specific route when the user needs to be prompted for sign-in.
In this example, we will include the logic of keycloak initialization and refresh in the index.js as shown below:
import Keycloak from 'keycloak-js';

//Get the keycloak configuration
let keycloak = Keycloak('./resources/keycloak.json');

//Initialization of the keycloak instance
keycloak.init({ onLoad: 'login-required' }).success((authenticated) => {

   if (!authenticated) {
       window.location.reload();
   } else {
       console.info("Authenticated");
   }

   //React Render on authentication
 ReactDOM.render(, document.getElementById('root'));

   //store authentication tokens in sessionStorage for usage in app
   sessionStorage.setItem('authentication', keycloak.token);
   sessionStorage.setItem('refreshToken', keycloak.refreshToken);

//to regenerate token on expiry
setTimeout(() => {
       keycloak.updateToken(70).success((refreshed) => {
           if (refreshed) {
               console.debug('Token refreshed' + refreshed);
           } else {
               console.warn('Token not refreshed, valid for '
                   + Math.round(keycloak.tokenParsed.exp + keycloak.timeSkew - new Date().getTime() / 1000) + ' seconds');
           }
       }).error(() => {
           console.error('Failed to refresh token');
       });


   }, 60000)

}).error(() => {
   console.error("Authenticated Failed");
});
- The React application can now be started using the npm start command. Open browser and navigate to localhost:3000
- You will get redirected to the below login screen
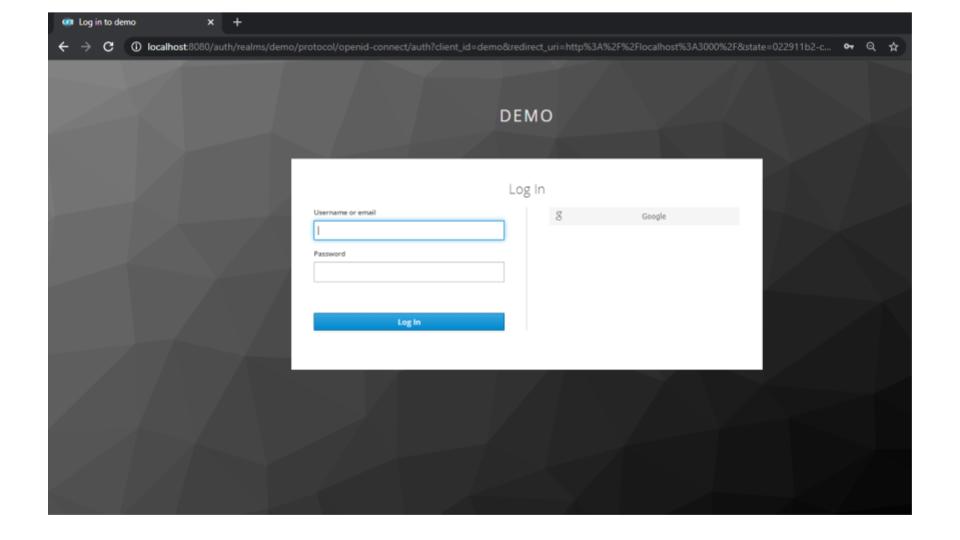
Click on the Google button and provide your Google credentials to be authenticated and taken to the application page as shown below:
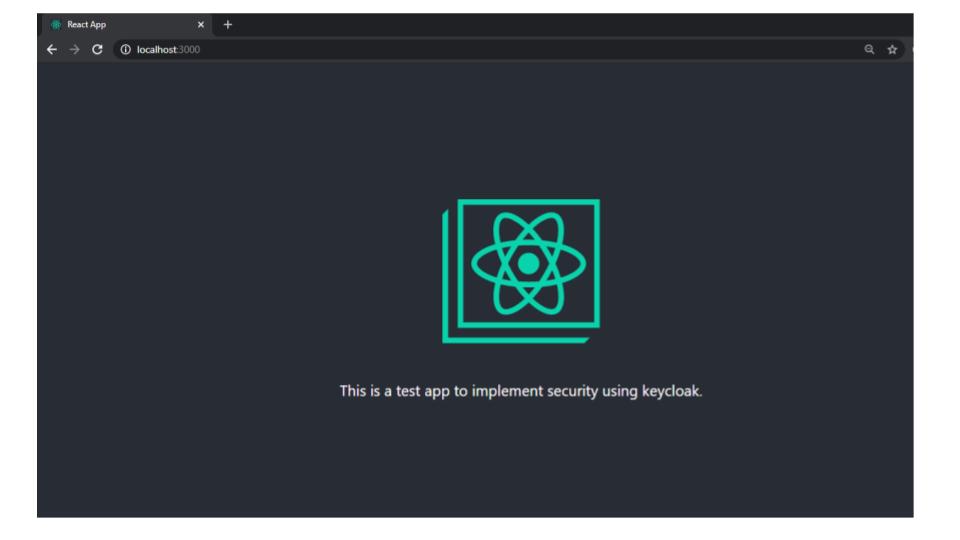
You can find the complete code on github
Conclusion
In this blog, we saw how to setup Keycloak server, configure it with Google as its identity provider and use it to secure a simple React application. With keycloak you can setup multiple identity providers from existing social networks or setup user defined authentication servers and use it to secure all your React applications with ease.



Hi Abhilasha Sinha,
Its very helpful doc, And thanks for the detail description.
I have a one query, Could you please tell me how we can call the KeyCloak in Server side instead of client.
Thanks Chetan. On server side, we can set up a middleware to get the token received from the client, validated by the keycloak server by sending the request to http:// ${keycloakHost}/auth/realms/${realmName}/protocol/openid-connect/userinfo along with the authentication token in the request header.
Hi Abhilasha,
Thanks for this example.
I tried to implement same as per steps you provided but I am getting server not found 404 error. Can you tell me what is the root cause of this error