Blogs
Visual Pipeline creation from BlueOcean
The BlueOcean editor is the simplest way to get started with creating Pipelines in Jenkins. It is also a great way for existing Jenkins users to start adopting Pipeline. BlueOcean allows users to create and edit Declarative Pipelines and add stages and tasks that can run at the same time. This blog will give you a detailed demonstration on how to get started with the BlueOcean editor.
We can create a Jenkins pipeline from the existing Jenkins file which is available in the source control or we can use the BlueOcean pipeline editor to create the new pipeline (Jenkinsfile) and commit the same to the source control.
Setup-
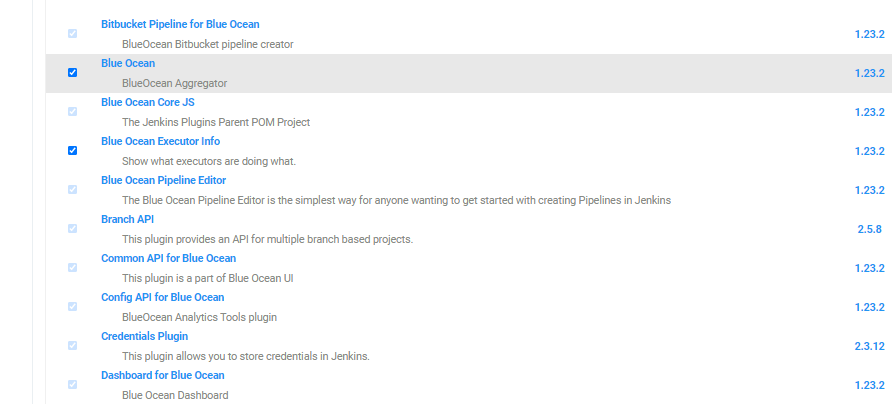
Firstly install the Blue Ocean plugins in Jenkins from Manage Plugins option of Jenkins.
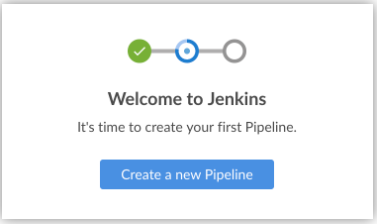
After the Plugins Installation and restarting Jenkins we can see the Blue Ocean option in Jenkins. Now click on the Open Blue Ocean from the left side menu of Jenkins which will navigate to the Blue Ocean DashBoard. If we don’t have any existing pipeline Jobs Jenkins will display the Welcome to Jenkins Message box with Create a new Pipeline button which will help us in starting the new pipeline Job for our project.
If You have already existing Jenkins Pipelines there will be a button on the top of Blue Ocean DashBoard as New Pipeline, On clicking it we have a choice to select the source control where our code exists. It can be a standard GIT repository, GitHub or GitHub Enterprise and Bitbucket Server or Cloud.
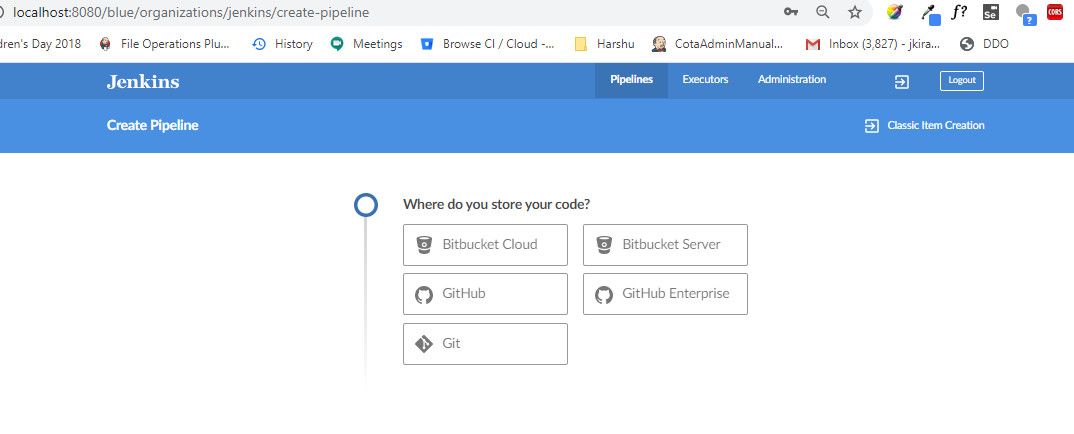
Here we select the option GitHub and now to connect your github enter the access token of your github or you can click on Create an access token here link to generate the token.

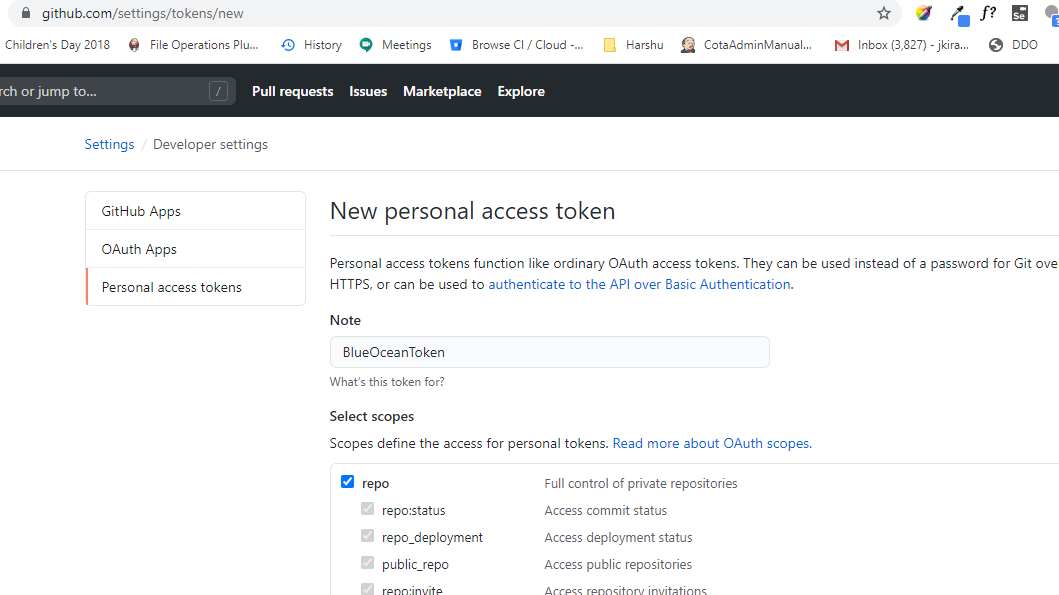
Enter the Note for creating the token and also select the scopes that this token will permit the access for the repos. Click on the Generate Token button which will be at the bottom.
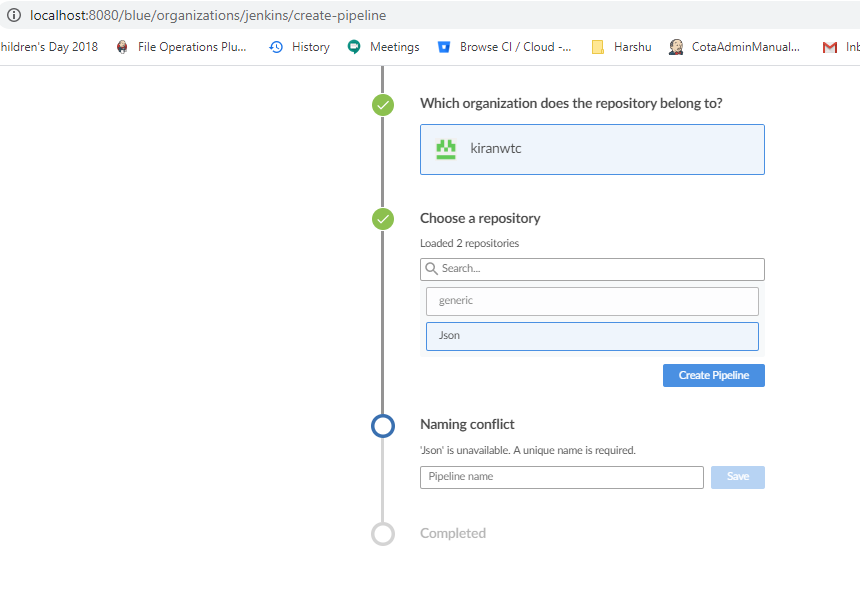
Copy the token and paste it into the Jenkins, after clicking the connect select the organization that has your repositories.
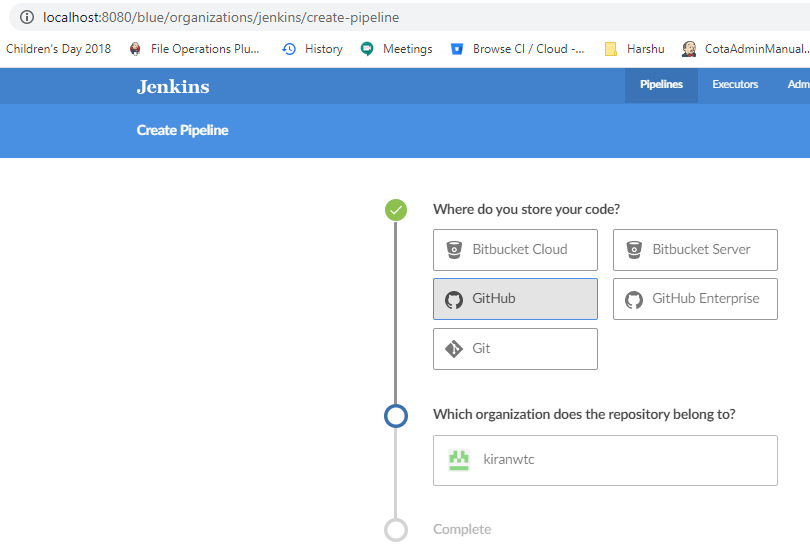
Select the organization (here kiranwtc) and it will display the list of repositories available in that organization. Now select the repository that requires the pipeline job. Here I have selected the repository generic and Click on the Create pipeline.
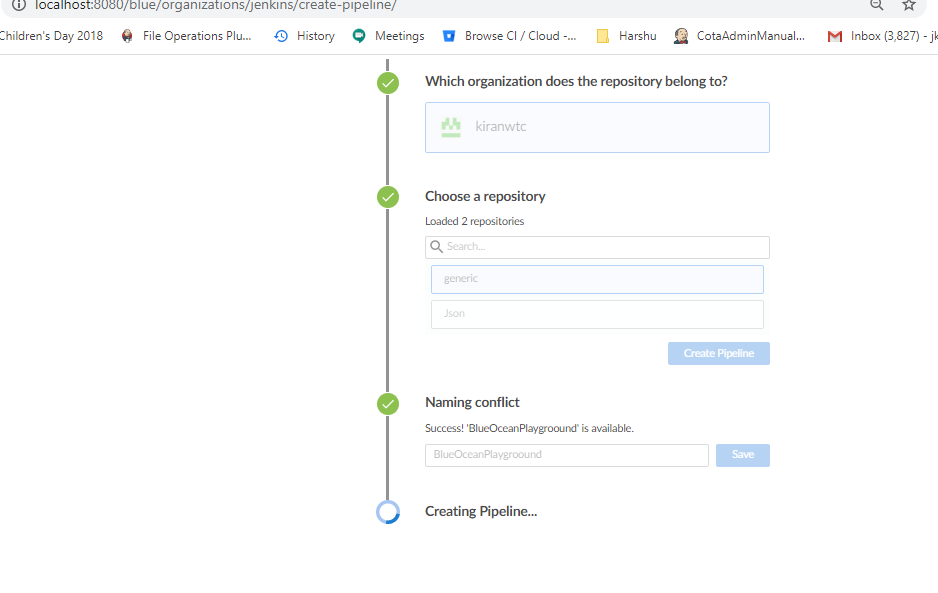
If there is already a pipeline with the same name as your repo name it will ask for the unique name for the pipeline job.
So on clicking the Create Pipeline it will create the Jenkins file, As said above we have to enter the unique and click on save to create the Jenkins file.
If the repo has existing Jenkinsfile it will create the job and trigger the job. If there is no Jenkins file in the repository it will navigate us to the BlueOcean Dashboard.
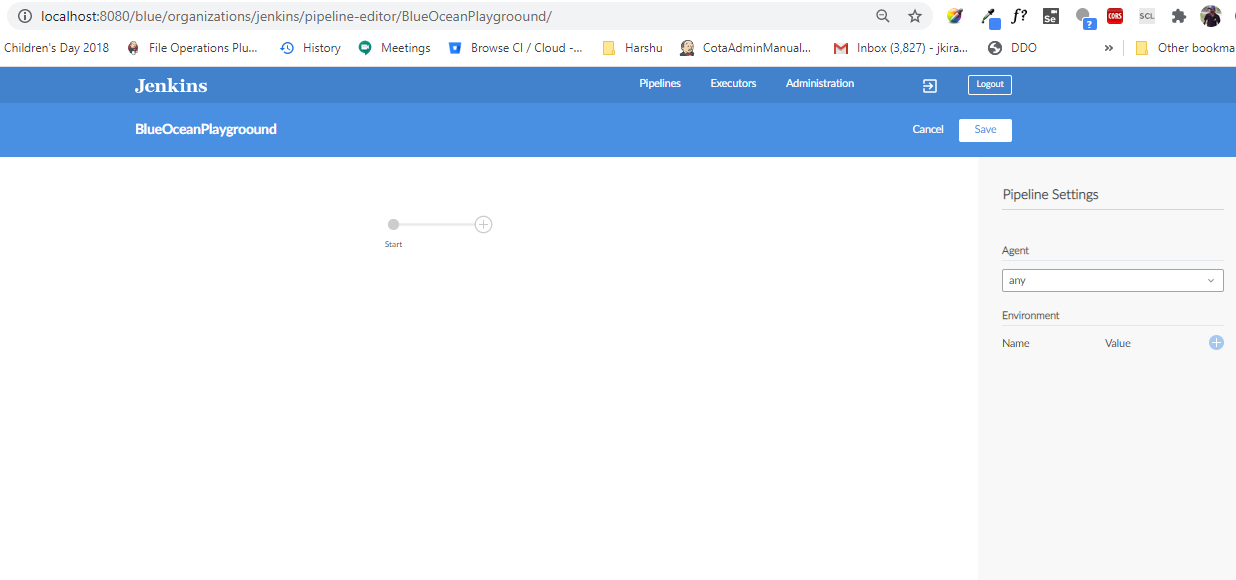
Steps to define the Jenkins file-
- Select the agent dropdown as node and enter the label if you want to build the job on any specific agent or You can keep any option in the dropdown to build on available agent/server.
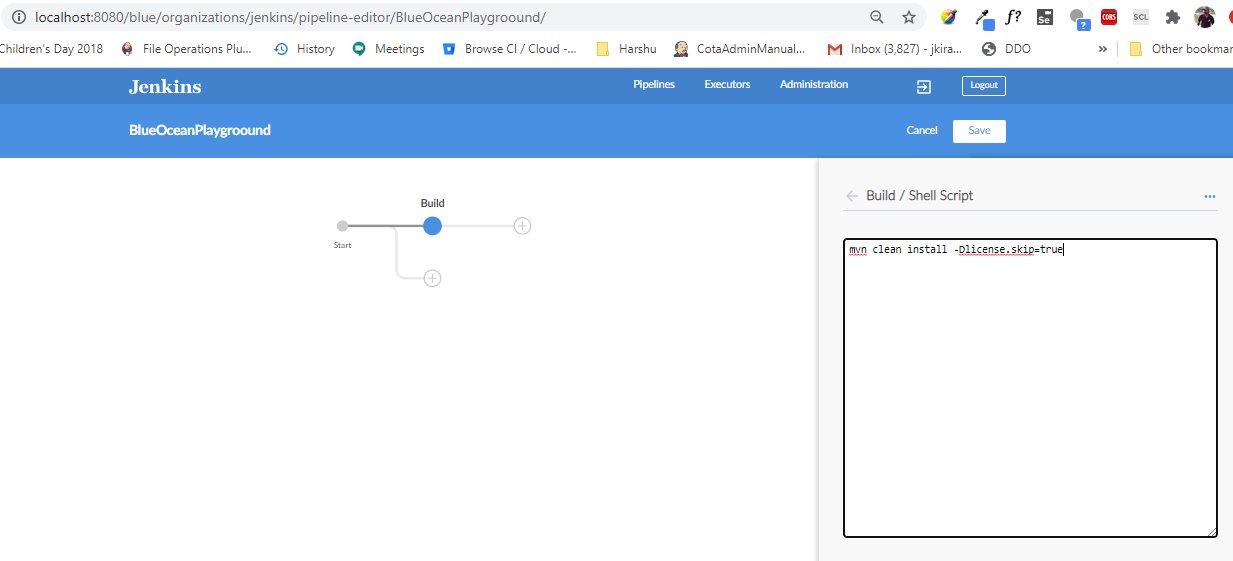
- Click on the + icon to add the stage and enter the name as Build.
- Click on the + Add Step button and choose the option Shell Script.
- Now enter the command mvn clean install -Dlicense.skip=true
- Click the back button on the stage and select another step if required, here i am selecting the print message step.
- To build the Tests we can create a new stage next to the Build stage or if you want to run the tests in parallel add the stage beneath to the Build stage.
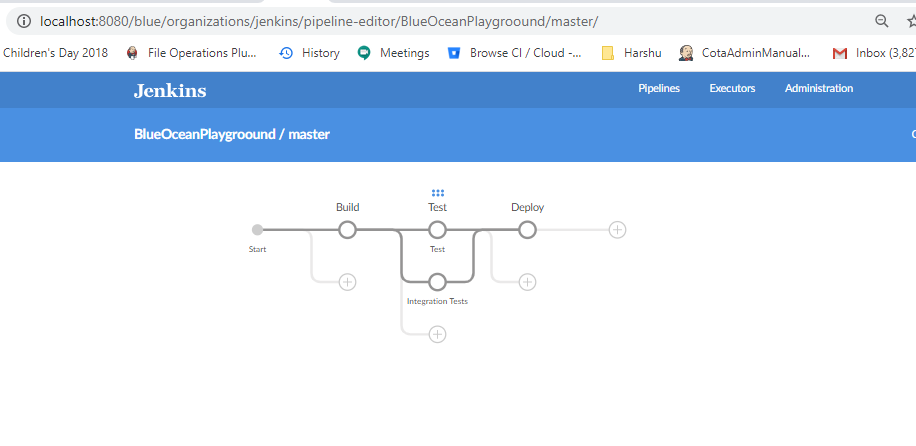
- Create the deploy stage and create the steps to deploy the latest build.
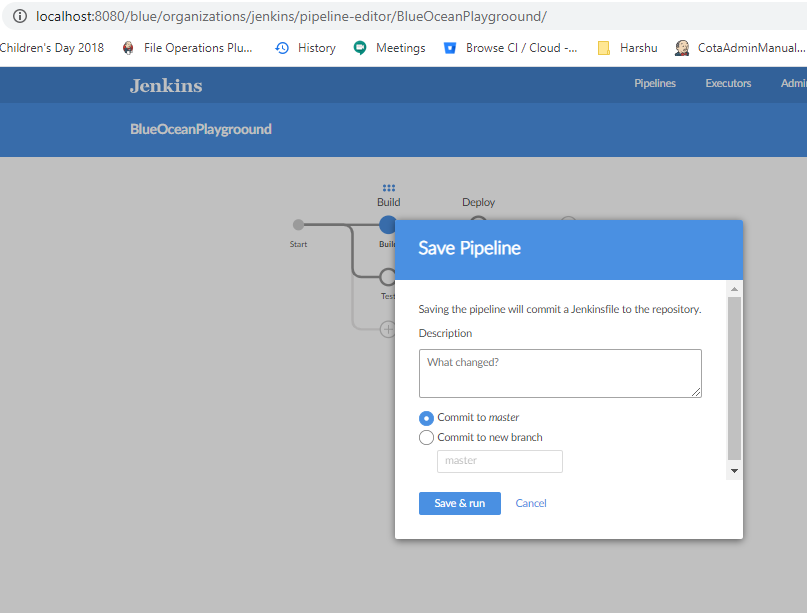
- Click on the save button which is on top right of the dashboard, it will allow the user to commit the Jenkins file to the master or to a new branch. User has to enter the commit message in the description field.
- Click on the Save & run button which will upload the file to github and trigger the build.
- It will create the Jenkins file in the git repository.
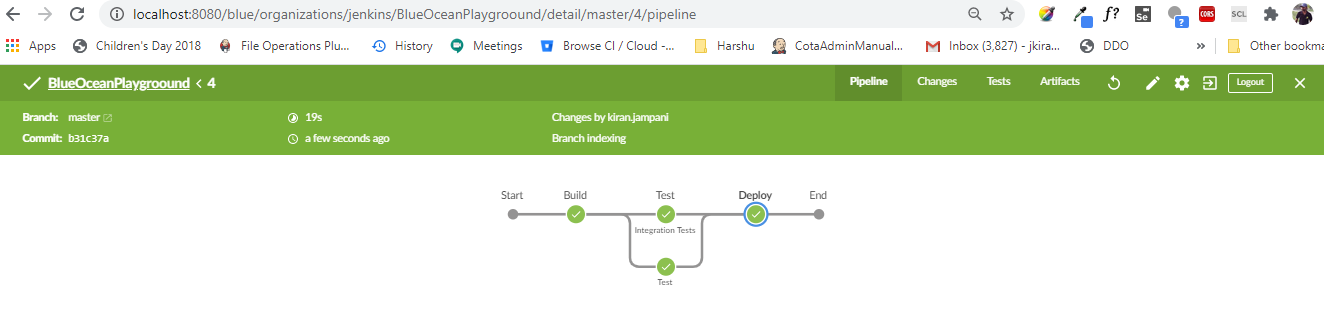
- In the build we can see that Integration tests and Functional Tests are running in parallel.
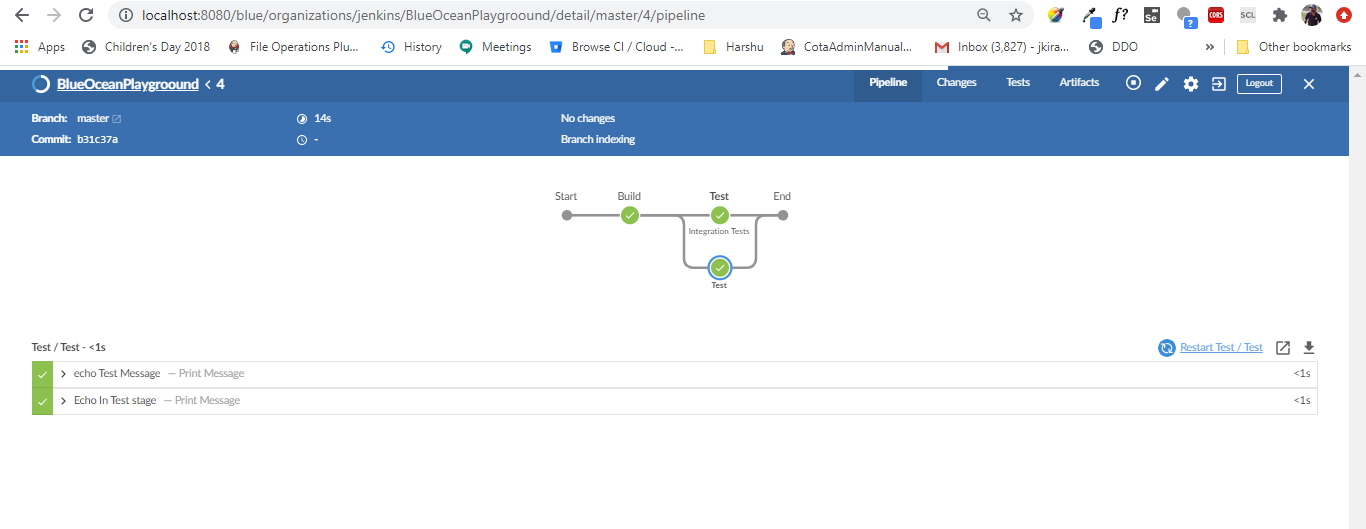
- After the Test completion Deploy stage is started and completed successfully.
Great!
We just created the Jenkins file for the java application that is using the maven.
Actually it creates a multibranch pipeline in Jenkins, so Jenkins looks for at least one jenkins file in all the branches of the repository and triggers the respective branch.
Build/Test/Deploy stages are added in this pipeline, we can follow the same as above and build the complex applications and combine multiple technology stacks together.
Jenkins is extremely powerful to configure the application and Build them automatically and do the required Orchestration.