
Jasper Reports and Adempiere Integration
Pre-requisite:
• JasperSoft’s iReport 2.0.5
• JasperReports
• Adempiere 342s
Step 1. Open iReport tool and follow these steps to create a report:
1. Click on File menu and select New Document menu option. Specify name of the report, say, “mycommreport”.
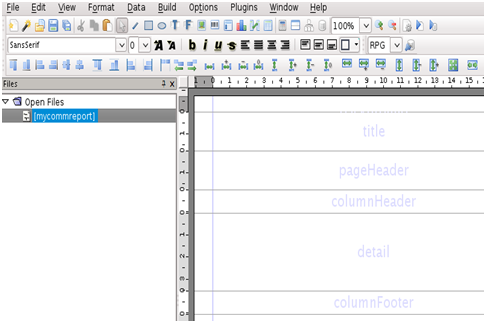
2. Click on Data menu and select Query Report menu option
3. In the Query Report window, click on Query Designer. This you will show you the query builder interface
4. Select the “schema” and “type filter”, then you will be displayed all the tables and views associated to the selection.
Note : Check that the iReport tool is connected to the Database. If not follow the steps as mentioned below :
Steps for establishing Database Connection :
a. Select the “Data” menu item from iReport tool and click on “Connections/DataSources”.
It will populate a window as shown below .
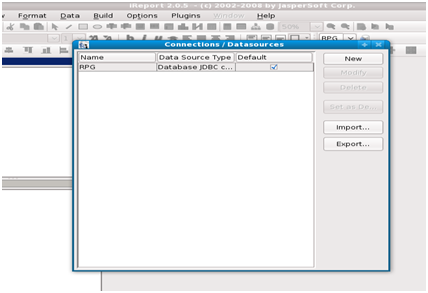
b. Click on New Button to establish the new datasource with the database. It will then populate another window “Connections Properties”
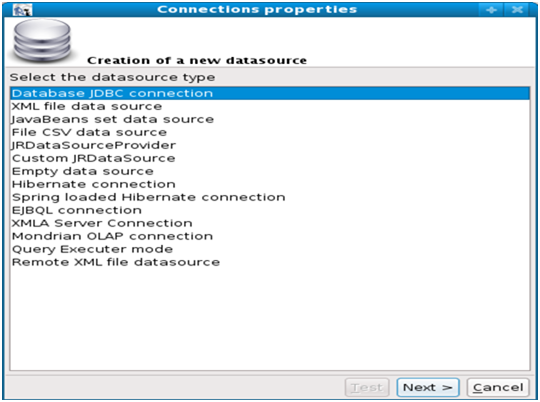
c. select “Database JDBC Connection” and click on “Next”. It will display the following screen, fill the details as follows :
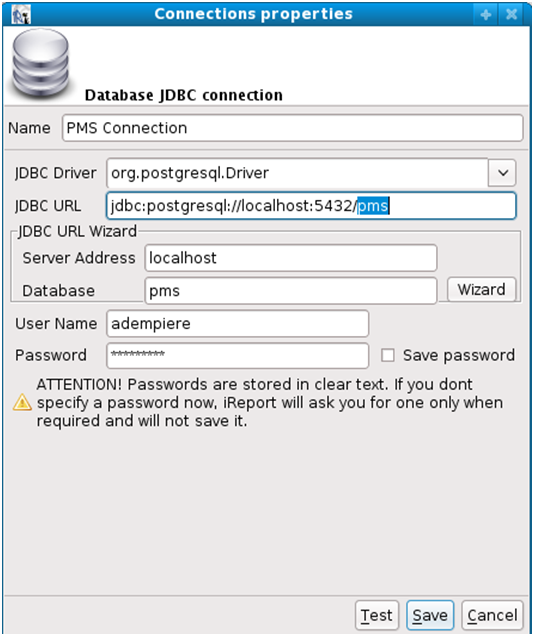
d. Specify name for the connection.(PMS Connection)
di. Select the JDBC Driver from the Drop Down. (there are many drivers, select as per your requirement)
dii. here we are working with PostgreSql, so select the driver as “org.postgresql.Driver”
diii. In JDBC URL , change the database from MYDATABASE to your working database on PSQL.
div. Specify Server Address . (localhost or any other IPAddress where the database is residing )
dv. Specify the Database name as specified in the JDBC URL.(PMS)
dvi. provide the User for the database (adempiere)
dvii. provide the password for the user (adempiere)
dviii. click on Test.
dix. Click on Save.
dx. Also set the postgresql Jar file in the class Path ( postgresql-8.2-504.jdbc4.jar ).
(Options ———> Classpath ——–> Add Jar ——–> postgresql-8.2-504.jdbc4.jar )
Once database is set, then proceed with furthen steps :
5. Select the table(s) from which you want to retrieve the columns and you can view the following screen:
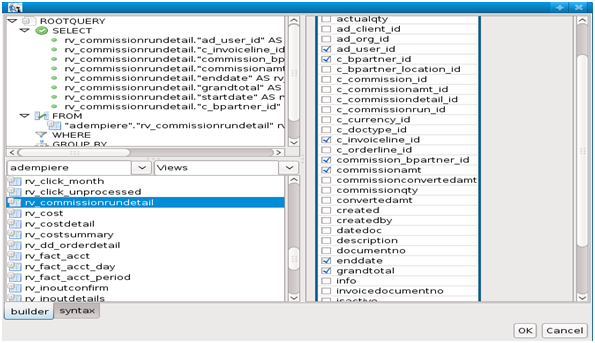
Now you can check the columns, which you want to use in your report.When you are done, click Ok button. iReport will build the query based on your table and columns selections.
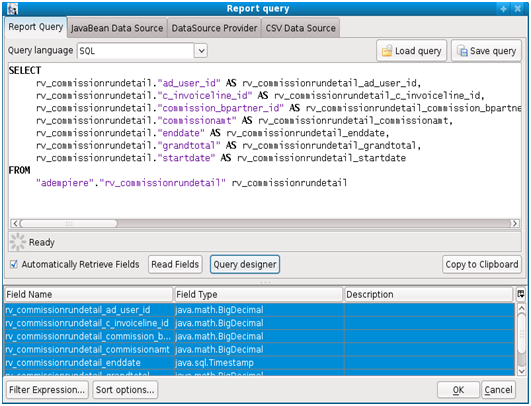
Make any changes needed to the generated query and when done, Click OK button
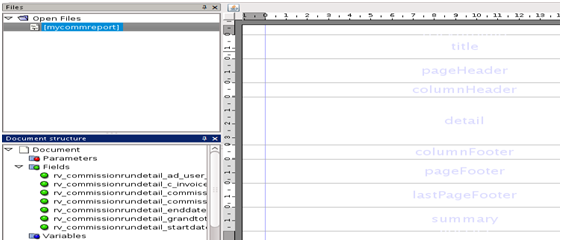
7. Now under Document Structure under Fields, you can view the columns you had selected while you were building the report query (as shown in the figure below).
Now, say, our report uses variables in the query, which will be passed by the user when he/she runs the report. To achieve this, we need to have parameters defined in the report and used in the report query.
For that we need to create parameters in iReport. To do so, select Parameters under Document Structure. Right click on Parameters and select Add option
8. Add a parameter, say, by name commid
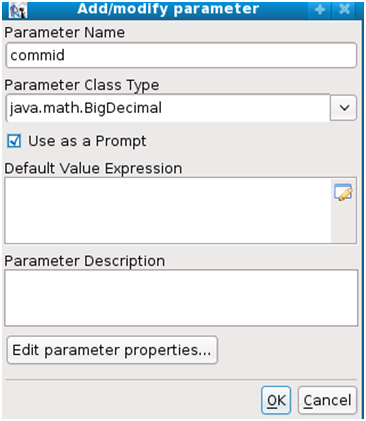
a. Specify the Parameter Name as parameter which you want to pass to the query.
b. Select the Parameter Class Type based on the column data type. Please note that this is the Java data type corresponding to the database column type. You can learn about the appropriate type on the Report Query screen
c. Check the Use as a Prompt check box. This will tell the iReport to prompt the user for input for the parameter when the user runs the report from iReport
d. Click OK.
If you have more than one parameter, then repeat the above steps (a,b,c,d)
9. After Adding the Parameters, You shall be able to view the parameters under the Document Structure as shown in the below screen: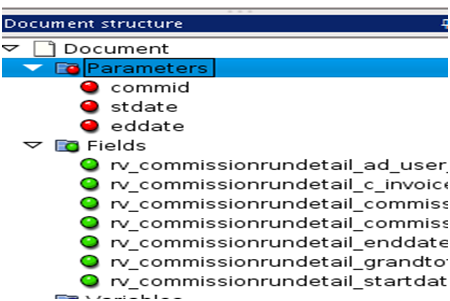
10. To make use of the newly added parameter, again go to Report Query window and add the following to the SQL query by editing it,
WHERE
rv_commissionrundetail.”c_commission_id” = $P!{commid}
and
rv_commissionrundetail.”startdate” < ‘$P!{stdate}’
and
rv_commissionrundetail.”enddate” Fields
to the details band of the report design area. To the Column Header, add the column headers by adding the “static text” fields corresponding to the columns. Similarly, add the “Static text” to the “Title” and specify the Title for the report and also to the column header.

12. Now Click Execute (With active Connection) button to run the report. It prompts you to save the report. Save it. (this will create a file with .jrxml extension)
13. Once you click on execute and you have parameters in your report, you will be prompted to input the parameters. Now you can view the Jasper Report as specified in the below figure
Now we need to integrate this Jasper Report with Adempiere….
1. Login as System/System
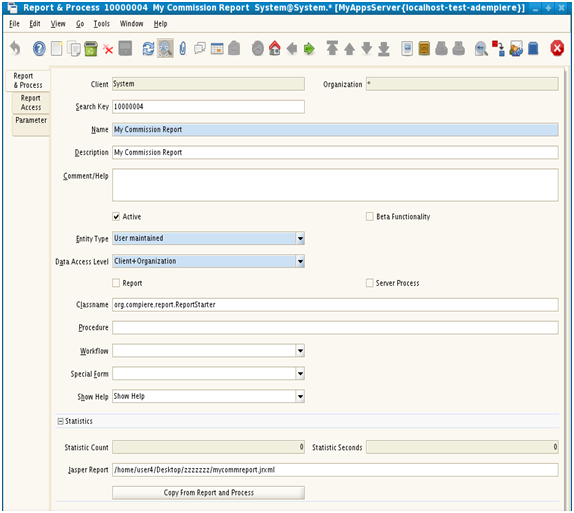
2. “Select Report & Process” click on “New Report”
3. Input the Name and Description as you wish to assign to the report (My commission report)
4. select Data Access Level as “Client + Organization”
5. Specify class Name as : “org.compiere.report.ReportStarter”
6. Specify the path of Jasper Report which we had created,
(“/opt/Adempiere/jrxml/ mycommreport.jrxml”)
for our example,the path is
“ /home/user4/Desktop/zzzzzzz/mycommreport.jrxml “
7. Now select “parameter” Tab and click on “New”, click on Grid Toggle
8. Specify the Name and description of the parameter.
9. Specify the “DB Column Name” widget value as name of the parameter we have specified for Jasper Report.
10. Also specify the reference corresponding to the Column. (Number,String, etc..)
11. Continue this for all the parameters you have specified as input.
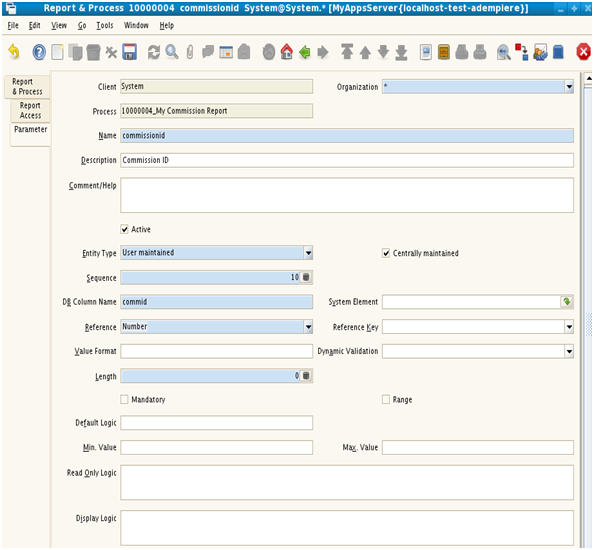
Note :
“Make sure that the parameter names in the Jasper Report and the “DB Column Name” widget value are exactly the same.”
12. Once process is done,
Go to “Menu” :
a. Specify the Name and Description as you want to assign to the menu.
b. Select “Action” as “Process” and
c. “Process” as the process which we have defined earlier.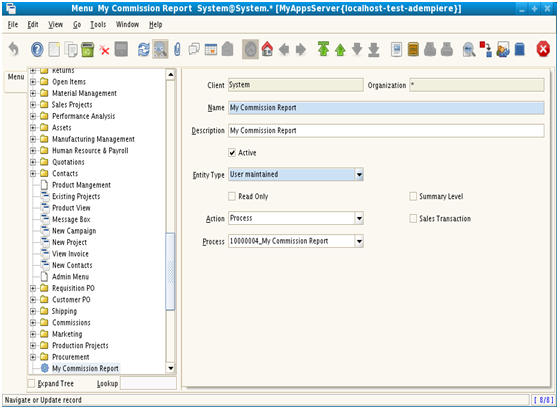
13. Save it, Log out and again login as System.
14. Search for the menu which you have created (My Commission Report)
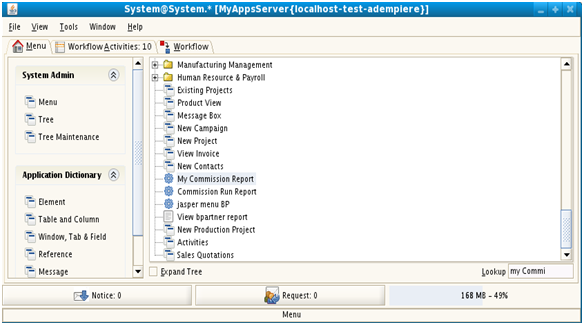
15. Click on the process (My Commission Report)
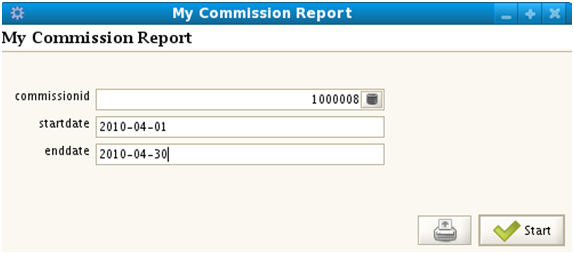
16. It prompts you to specify the parameters , specify the parameters and click “Start”
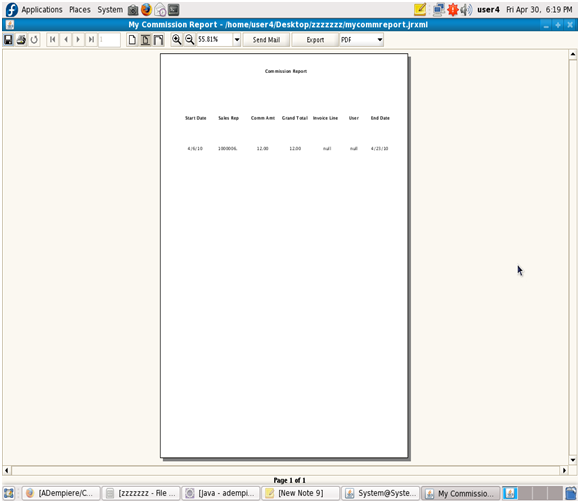
17. Now You can view the Jasper Report as shown in the below figure :
Jasper Report with Web Version
1. Start the server, login as System/ System
2. Search for “My Commision Report” menu. Click on it. The following screen will appear:
3. Input the details as shown above and click on start botton.
4. Now a pop up will appear prompting us to Open or Save the Jasper Report.
It is up to the User to Save or Open. This shown in below screen. Select the mode and click ok.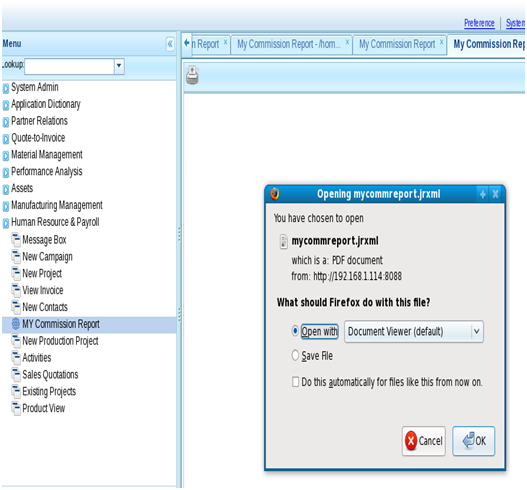
5. Now, the Jasper Report will open or saved. The Jasper Report will appear as follows, which will generate the desired report.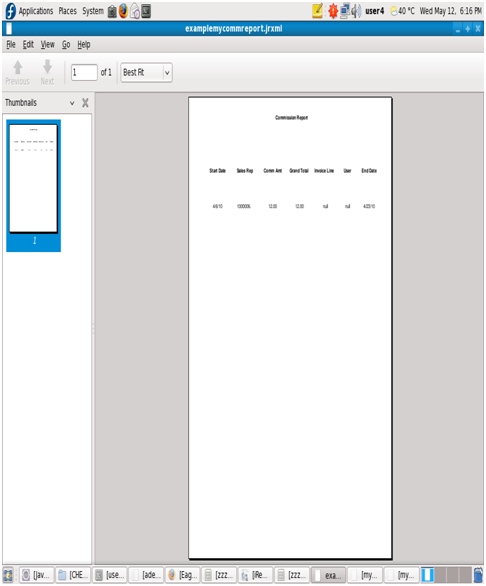
In this article – Walking Tree has explained how to work with Jasper reports and how to integrate jasper reports with Adempiere. In case you need any professional assistance, you can always find our contact details at our company website.
Walking Tree has huge experience in implementing Adempiere for its customer and we will be happy to assist you in taking advantage of Adempiere as well.


how to use sub report along with main report in idempiere