Blogs
Transforming raw data into datasets using Airbyte with dbt
Raw data should be consolidated from multiple sources and transformed for better organization and insights. Transformed data is easier to consume for humans and machines alike. However, the data pipelines built using ETL processes have been known to present businesses with unique challenges. In fact, a small defect in one step of the ETL process can result in hours of intervention that will affect the quality of data, shake the confidence of your customer, and make maintenance difficult.
Airbyte was developed to address the problem of moving data from applications, databases, and APIs to data warehouses and data lakes.
Behind the scenes, Data Build Tool (or dbt) is in charge of transforming your data.
What is Airbyte?
Airbyte is an open-source data pipeline platform that performs data integration. It syncs data from different applications, APIs, and databases into data warehouses and data lakes. We can build and maintain custom connectors using Airbyte to support applications, refresh them, and schedule updates. Since existing ETL platforms are becoming difficult to maintain, an increasing number of companies are turning to Airbyte. Also, currently, the ETLs have a volume-based pricing model which is driving the cost up. The other concerns with the existing ETL platforms are security, lack of visibility into ETL systems,etc. The need of the hour is an open-source model that increases the efficiency across the board.
What is Dbt?
Dbt (data build tool) helps data analytics engineers transform data in their warehouses by simply writing select statements. Dbt turns these select statements into tables and views. However, dbt doesn’t perform any extractions or loads (as in ELT) and is only responsible for transformations.
A dbt project is a directory of .sql and .yml files. The directory must contain at a minimum:
- Models: A model is a single .sql file. Each model contains a single select statement that either transforms raw data into a dataset that is ready for analytics or, more often, is an intermediate step in such a transformation.
- A project file: It is a dbt_project.yml file that configures and defines your dbt project.
Why use dbt with Airbyte for data transformation?
While Airbyte can help us with the data ingestion, dbt is used for transforming that data, validating the data loaded into an SQL-speaking data warehouse. Airbyte sets up a dbt docker instance and automatically generates a dbt project for us.
Together they form a dream team ready to solve your varied data integration needs and help in building a single source of truth bringing data from multiple sources.
Database connections
Dbt connects to your data warehouse to run data transformation queries. As such, you’ll need a data warehouse with source data loaded in it to use dbt. Dbt natively supports connections to Snowflake, BigQuery, Redshift, and Postgres data warehouses, and there are a number of community-supported adapters for other warehouses.
In this blog, we will see how we can use dbt in conjunction with Airbyte and make use of their capabilities. The steps are organized as follows:
- dbt project setup/installation
- Initialize a dbt project (sample files) using dbt CLI
- Set up a Git repository
- Setting up the source & destination, sync and study the logs
- Profile configuration
- Create or update models
- Check the connection
- Add project to Github
- Add created transformation to the Airbyte connector
- Verify models in the destination database
Step 1: Dbt project setup/installation
As dbt core is written in Python, it should be installed with PIP
>pip install dbt-<adapter>
The required adapters are:
pip install \
dbt-core \
dbt-postgres \
dbt-redshift \
dbt-snowflake \
Dbt-bigquery
We can use the following command if we use Postgres:
>pip install dbt-postgres
The above command will install dbt-core and dbt-postgres only.
To check the version:
>dbt --version
A successful installation will lead to the following screen:

Step 2: Initialize a dbt project (sample files) using dbt CLI
You can use dbt init to generate sample files/folders. In particular, dbt init project_name will create the following:
- .dbt/profiles.yml file if one does not already exist
- new folder called [project_name]
- directories and sample files necessary to get started with dbt
Caution: Since dbt init generates a directory named project_name, and in order to avoid any conflict, you should not have any existing folder with an identical name.
>dbt init <project_name>

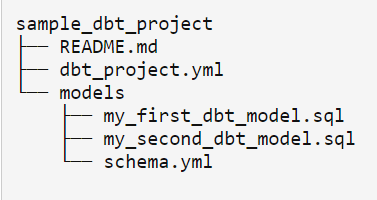
The result is a directory with the following sample files.

For now, we are going to work with the below-mentioned files
Also, it will create (or update) the file ~/.dbt/profiles.yml, where database connection settings are stored.
As we can see, most of the project is just empty directories. This lets us understand what the most important parts are:
- dbt_project.yml is the description of the project’s global settings.
- models: It is a directory with the description of models we will work with.
Step 3: Set Up a Git Repository
You can use any existing repo or create a new repository from within the newly created directory.
You can do that as below:
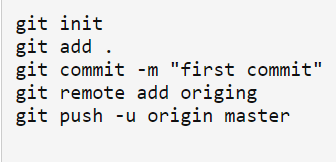
This will commit your code to Git Hub.
Step 4: Setting up the source & destination to trigger the sync and study the logs:
For the purpose of this blog, we will be using a sample COVID data source available in the form of a csv file as given below.
Here are some examples of public API CSV:
https://storage.googleapis.com/covid19-open-data/v2/latest/epidemiology.csv

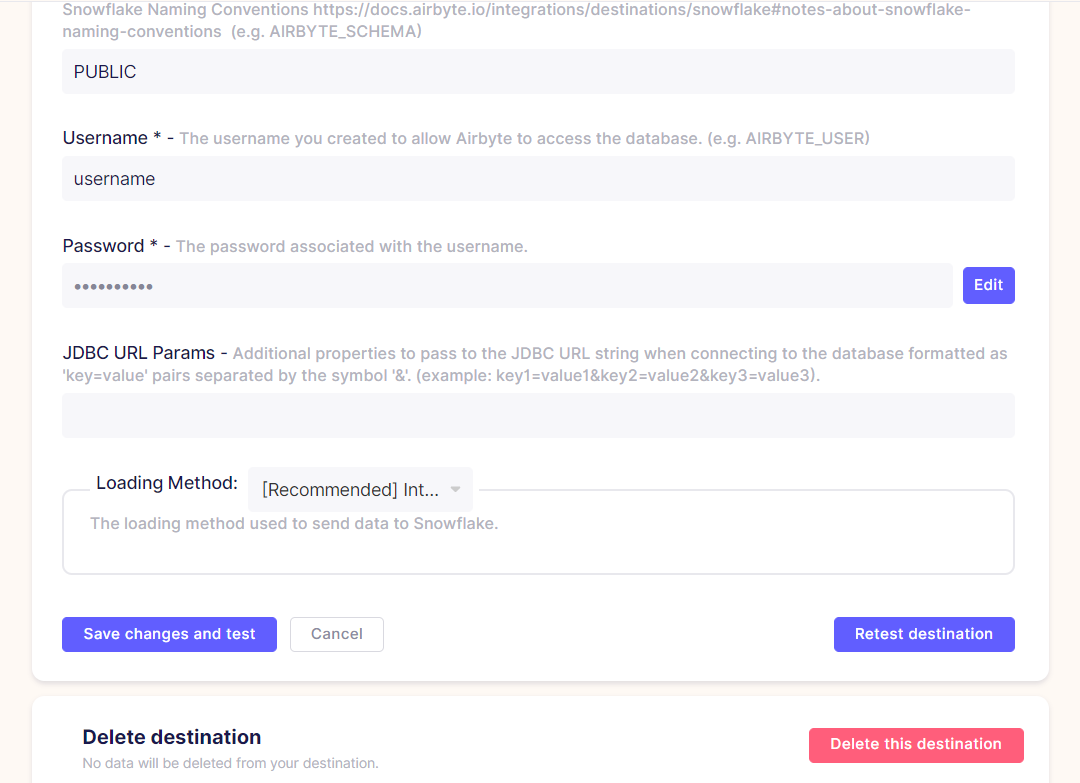
For the destination, we are using a local Snowflake database.
Add a local Snowflake database as the airbyte destination as shown below, making sure that the “Basic normalization” option is enabled.
After setting up the connectors, we can trigger the sync and study the logs:
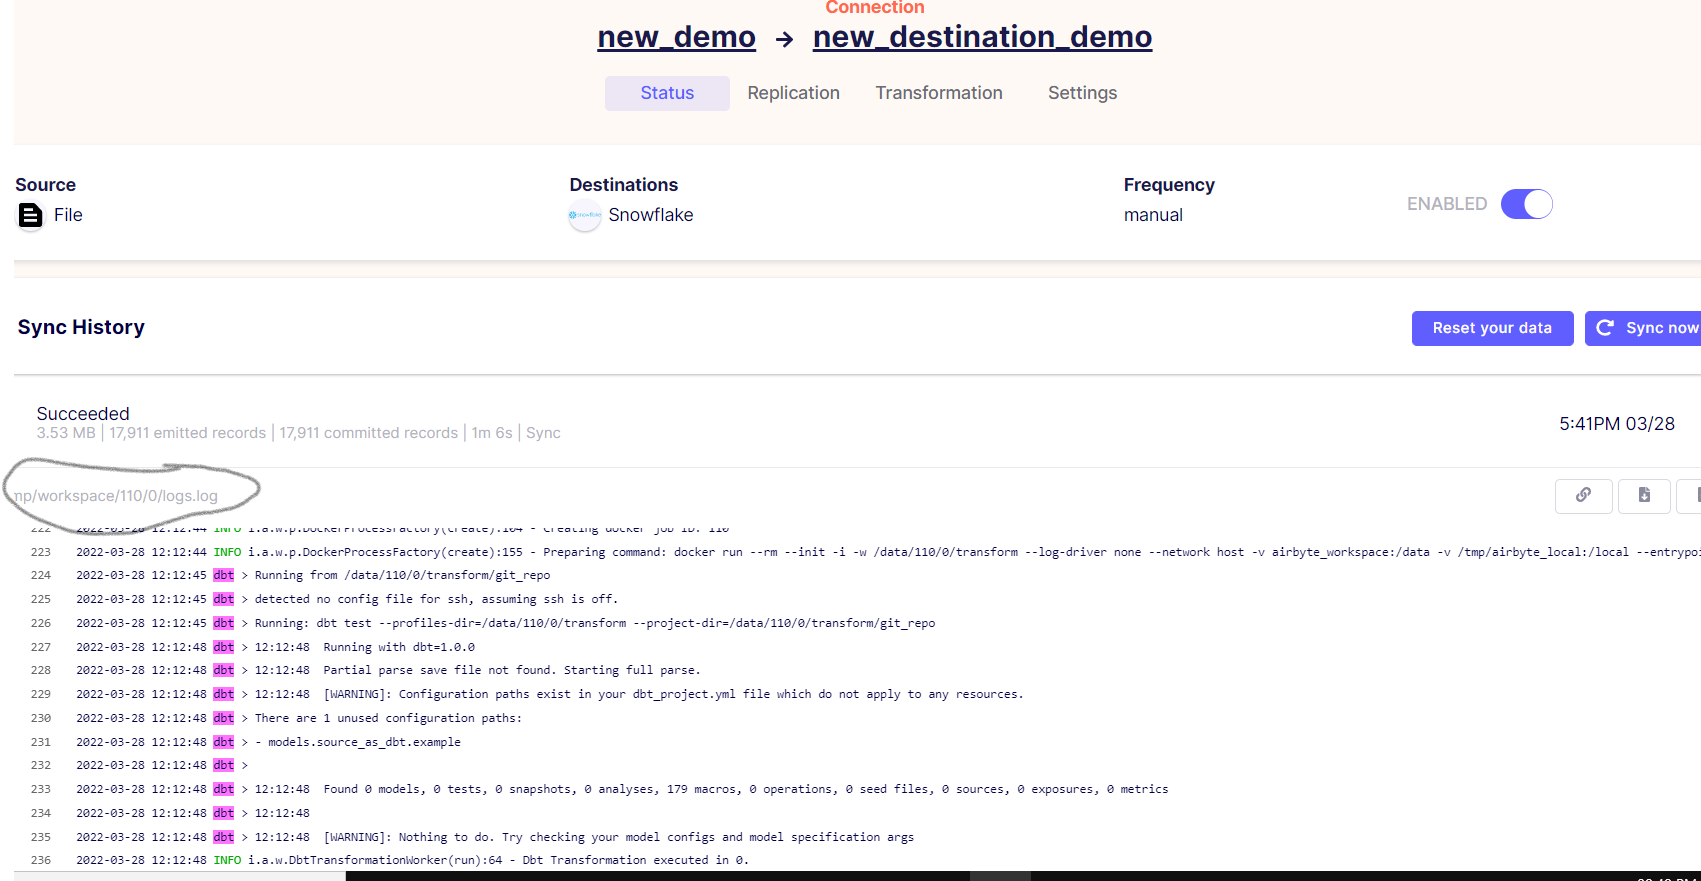
Notice that the process ran in the /tmp/workspace/110/0 folder.
Note this log file # (110/0) for future reference.
Extract these SQL files, modify them and run it yourself manually outside Airbyte!
By using the below command run these commands in Ubuntu/Linux terminal.
>docker cp airbyte-server:/tmp/workspace/${NORMALIZE_WORKSPACE}/build/run/airbyte_utils/models/generated/ models/
>find models
Note:- Replace ${NORMALIZE_WORKSPACE} ————–> 110/0 the file number obtained in the previous step.
Next, run the below command to see the created SQL files.
Example Output:
models/airbyte_tables/quarantine/covid_epidemiology_f11.sql
Let’s inspect the generated SQL file by running:
cat models/airbyte_tables/quarantine/covid_epidemiology_f11.sql
Example Output:
Remove ‘create statement’ from the generated SQL file and add this statement:
{{ config (
    materialized="table"
)}}
The strategy of materialization is used for persisting dbt models in the warehouse. When using the table materialization, the model is rebuilt as a table on each run, via a create table as statement. You can also use other options like incremental which allow dbt to insert or update records into a table since the last time it was run.
Step 5: Profile configuration
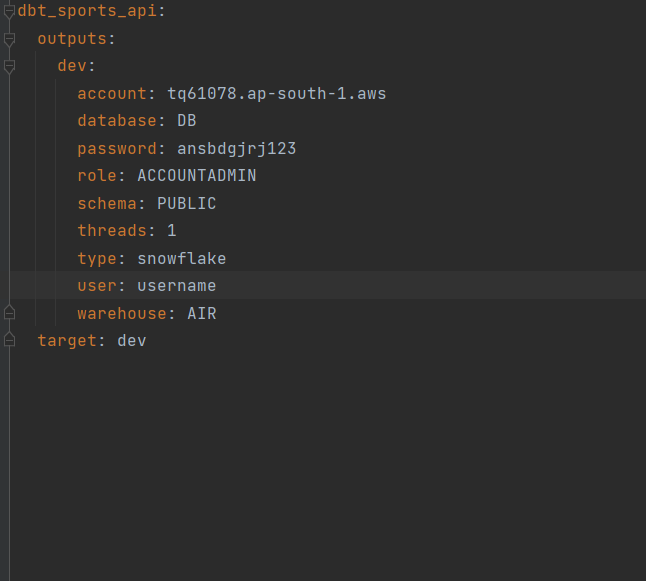
Open profiles.yml in the .dbt folder. We need to update this with our current database choice which is Snowflake.
Update the profile configuration details using the following link:
https://docs.getdbt.com/reference/warehouse-profiles/snowflake-profile
Open it and copy the code, paste it into the profiles.yml file, and update the credentials of your snowflake_db credentials in profiles.yml
Step 6: Models
Now open the created project folder in IDE (here, it is pycharm).
Update the names as shown in the above image.
Next, open the model’s folder, and open the examples folder within it. Now, create a .sql file.
Paste the previously generated SQL file into this .sql file. Then, save it.
Step 7: Check the connection
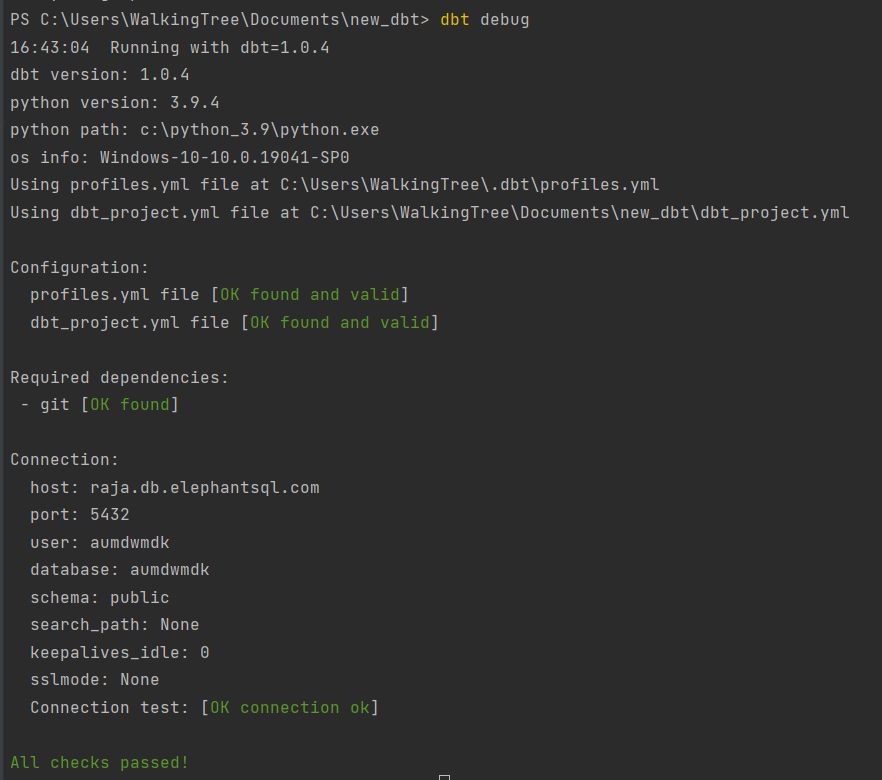
Now, check the connections using the (dbt debug) command.
If everything goes well, you can see the below output:
Step 8: Add this project to Github
Open Github and project Repository, commit your changes and refresh it. Now, you can see the created project on Github. Copy the repository link.
Step 9: Adding created transformation to the Airbyte connector
Open the Airbyte connecter which we previously used for extracting log files and add transformations as shown below:
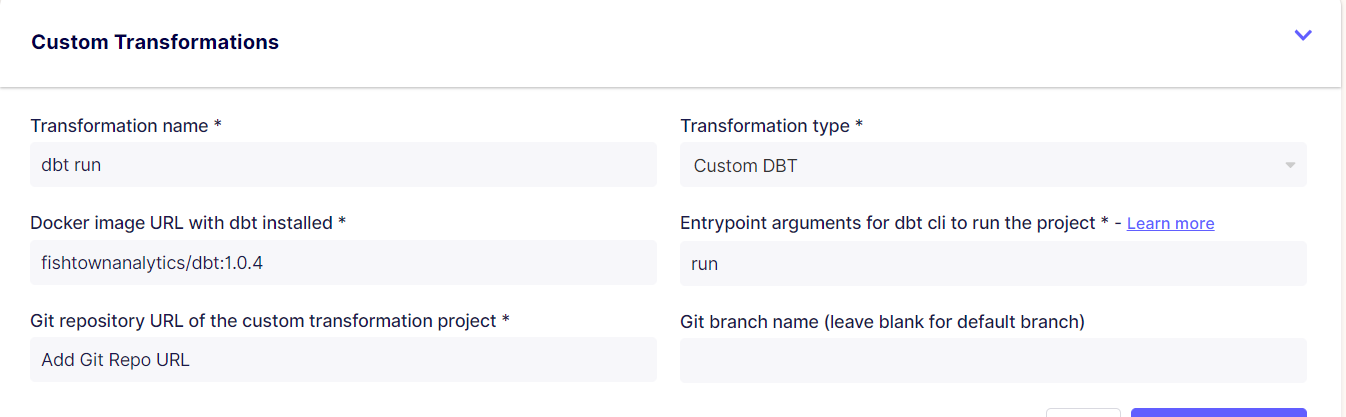
After entering the details including the git repo url, we copied earlier , click save transformations. Also verify the dbt version being used. Next, click ‘Sync Now’.
If it is successful, then check the destination database for the newly added dataset/tables.
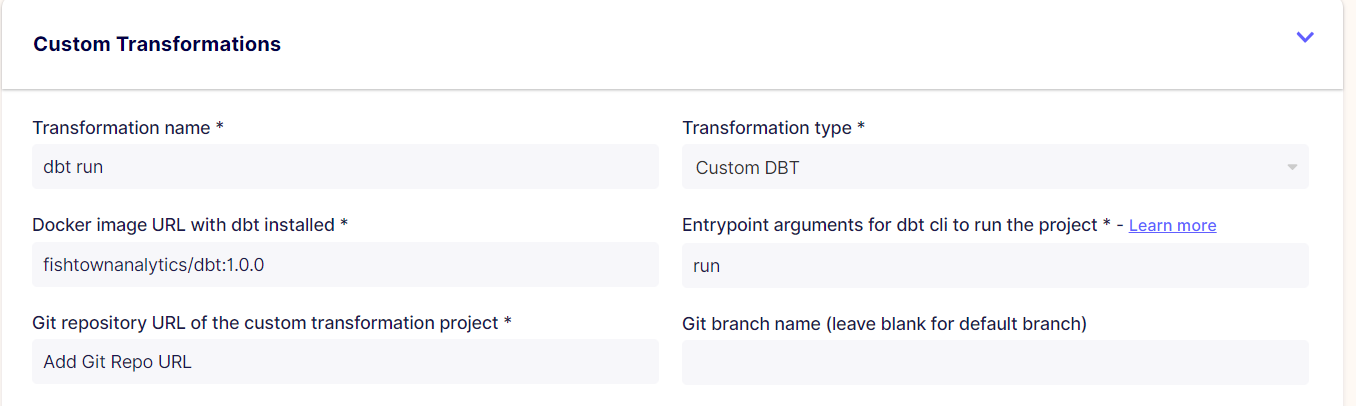
If it is not successful check log files, if the error is about the docker image URL as shown below

Update Docker image URL with dbt installed in custom transformations as shown below
(fishtownanalytics/dbt:1.0.4) → (fishtownanalytics/dbt:1.0.0)
Step 10: Verify models in the destination database
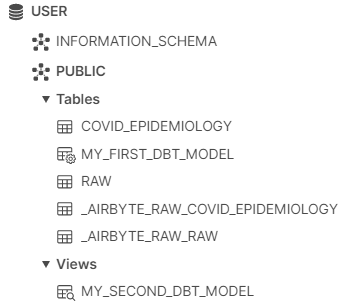
You can see the data created in the destination database.
Airbyte provides the most straightforward way to ingest data from different sources. The biggest benefit is you can skip writing custom ETL code for different data sources.
The last few years have witnessed unprecedented digital transformation in all industries, and all companies are accumulating more data than ever before. However, only those companies that are able to use this data optimally will have the competitive advantage and win.
That said, the more the data, the more difficult it is to manage data portability, data accuracy, and data security. But, with Airbyte (used along with dbt), you will be able to collect and move data seamlessly irrespective of the tools you use.