
iOS Application with Polymer 1.0
In this article, we will go through the steps to create first Polymer 1.0 iOS application using Polymer Starter Kit. This shall help us create applications in Polymer and package them as iOS application, which can be installed and run on iOS devices, such as, iPhone, iPad, etc.
Getting Started
There are couple of things that we need in place to be able to embark on our journey. So, let us get started.
Installing Cordova CLI
First, we are going to use Cordova to build and package our iOS application. It offers Command Line Interface (CLI) to help us with project setup, build, and test.
Install Cordova CLI by running the following:
npm install -g cordova
Verify that the installation is complete, run the following command to print the Cordova version:
cordova -v
At the time of writing this article, Cordova version is 5.1.1.
For more detail about Cordova CLI, refer to this page.
Creating Polymer Starter Kit based project
Create a folder, say, polymerstarterkit, and generate the application inside it by following the steps mentioned here.
Installing iOS Simulator
We may want to test the application in a simulator using the Cordova CLI. To install the iOS Simulator, run the following command:
npm install -g ios-sim
Creating iOS Application
With the basic setup in place, let us create a cordova application by running the following command:
cordova create starterapp com.wtc.polymer.starterapp StarterApp
Go inside the newly created directory – starterapp – and add iOS platform support to it by running the following command:
cordova platform add ios
This creates a project which can be built for iOS and tested on an iOS device or simulator. Let us see, how?
Building the application
To build the application, we will have to do couple of things, which are described below:
- Go to polymerstarterkit folder and run the following command to build the application:
gulp
This will build the project and create the built artefacts under dist folder
- Copy the content of the dist folder to starterapp/www folder
- Build the application for iOS by running the following command:
cordova build ios
The built artefacts will be located under starterapp/platforms/ios/build folder. Well, this is manual and error prone. We will automate this soon.
Running the application
We can either run the application inside the simulator or on a real device. Based on the need, the steps would differ. Let us see what does it take to run our application.
Using Simulator
To run the application inside the iOS Simulator, run the following command:
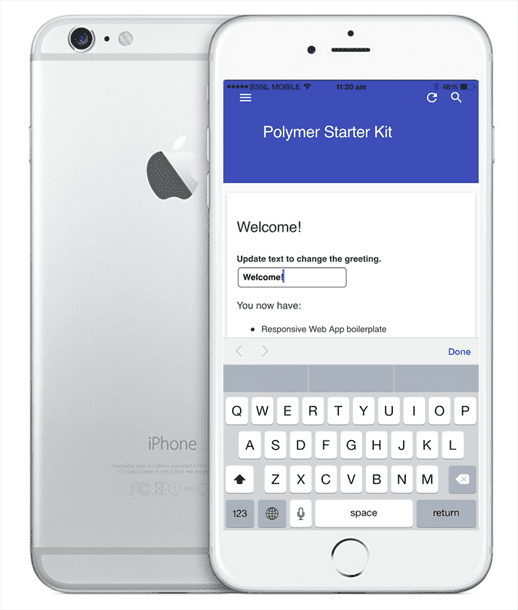
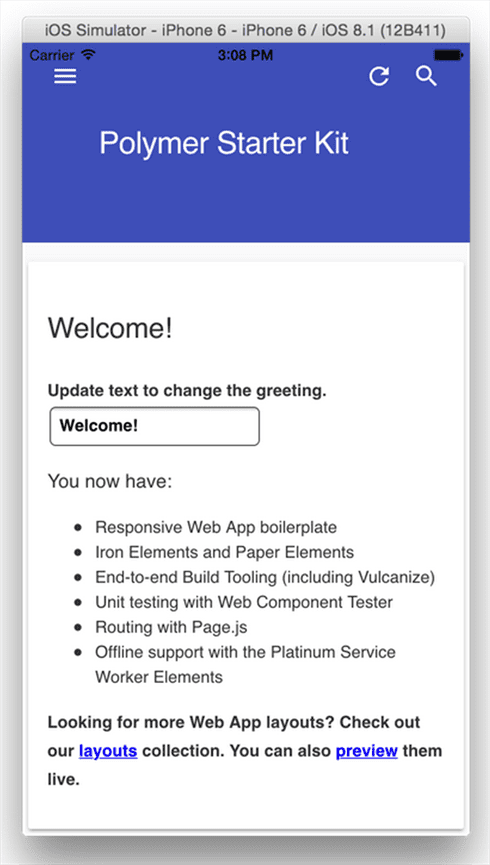
cordova emulate ios
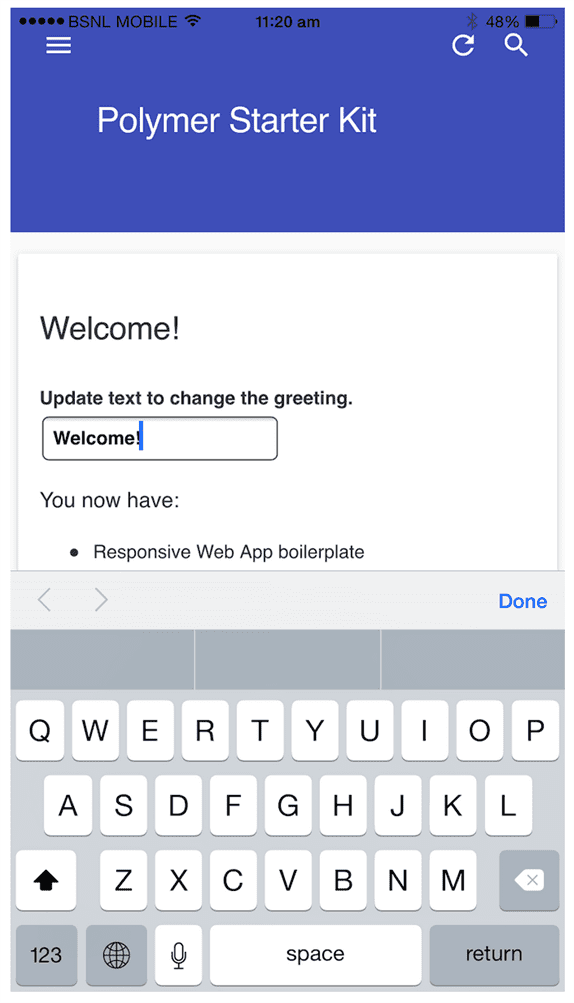
This will build the iOS application(as described in the previous section), launch iOS Simulator and run the application inside it, as shown below:
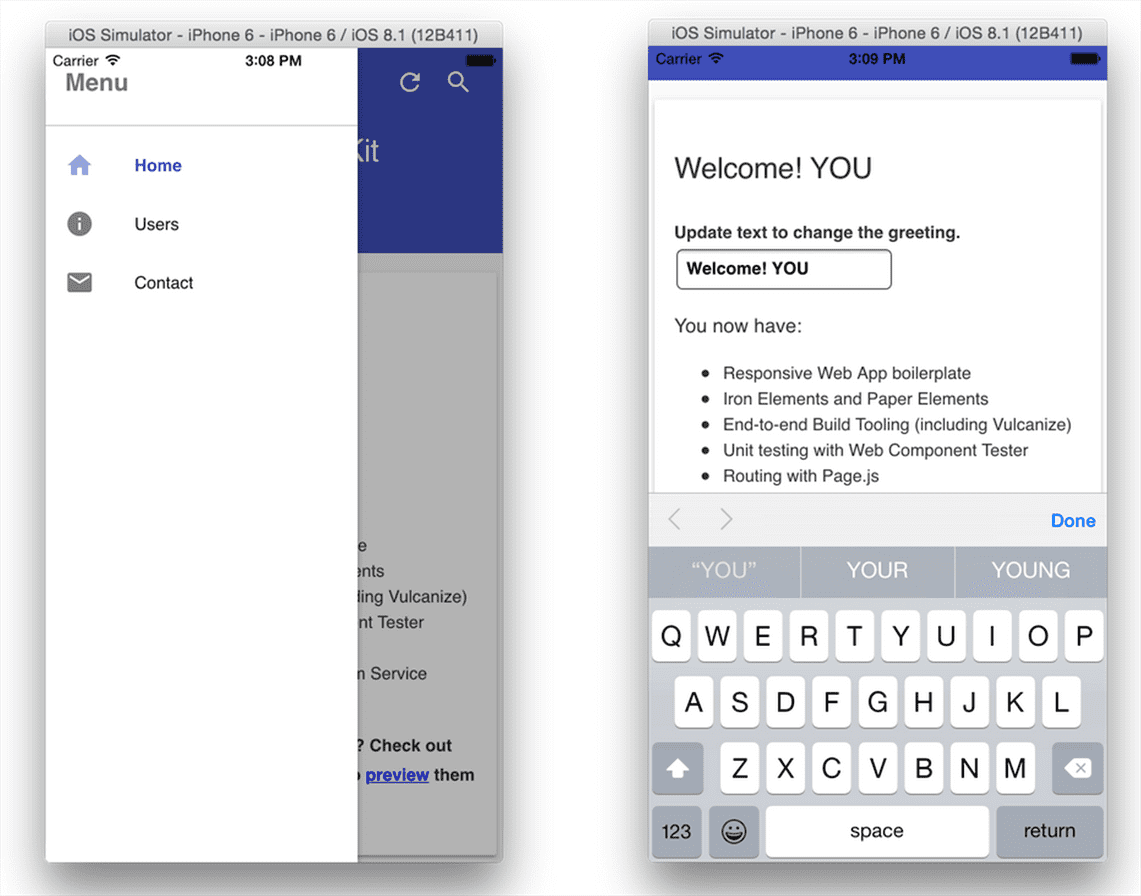
You shall be able to switch between menu items and also edit the Welcome! message, as shown below:
Using real device
To run the application on a real device, say, iPhone 6 Plus:
- Connect your phone to your computer, where you have the application, using the USB connector
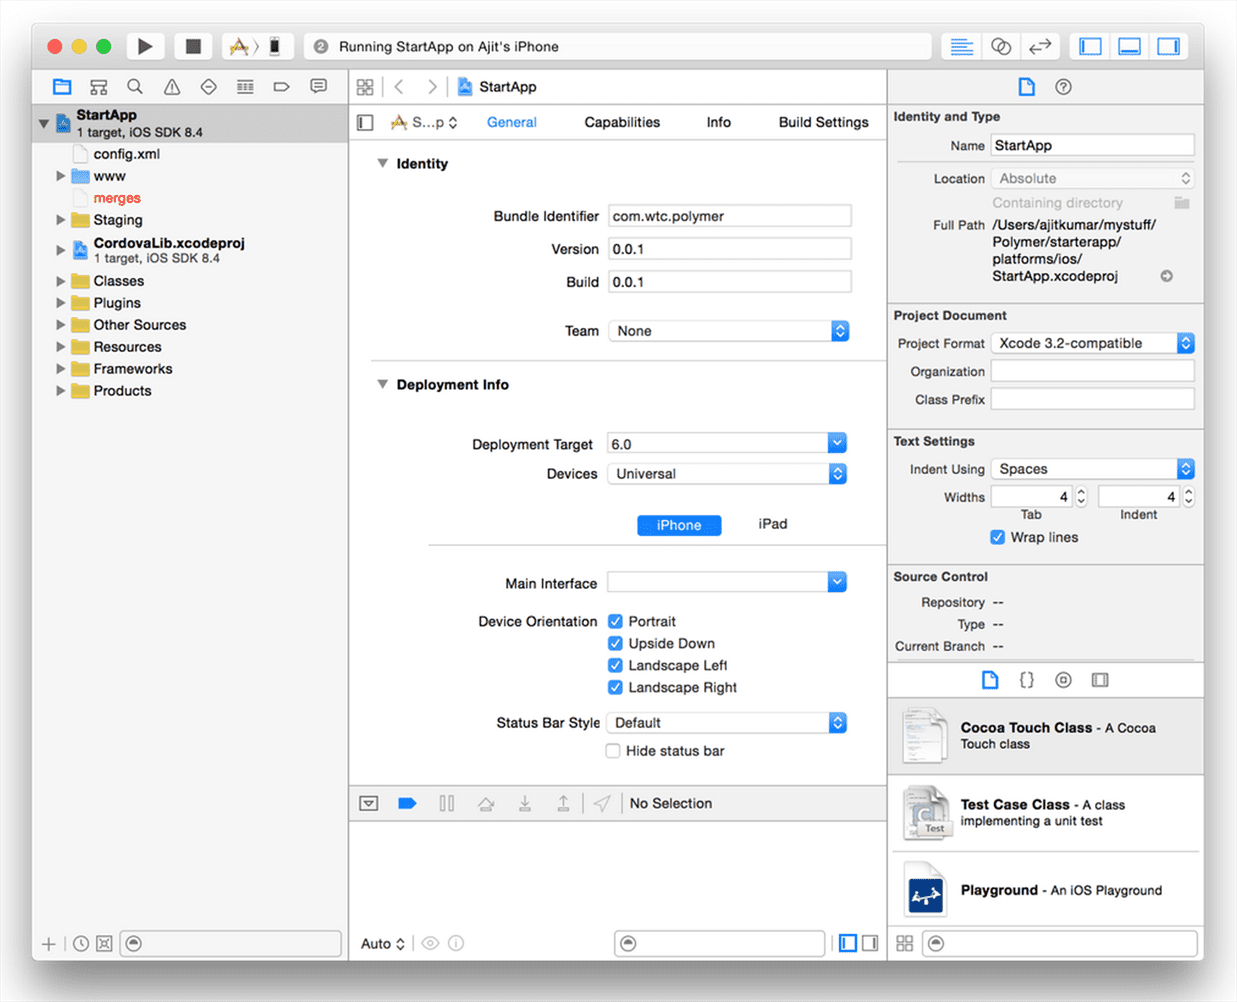
- Open Xcode application
- Open your application Xcode project – starterapp/platforms/ios/StartApp.xcodeproj
- Select the device and run the project (you might have to add an appropriate Apple Developer Account with properly setup Provisioning Profiles):
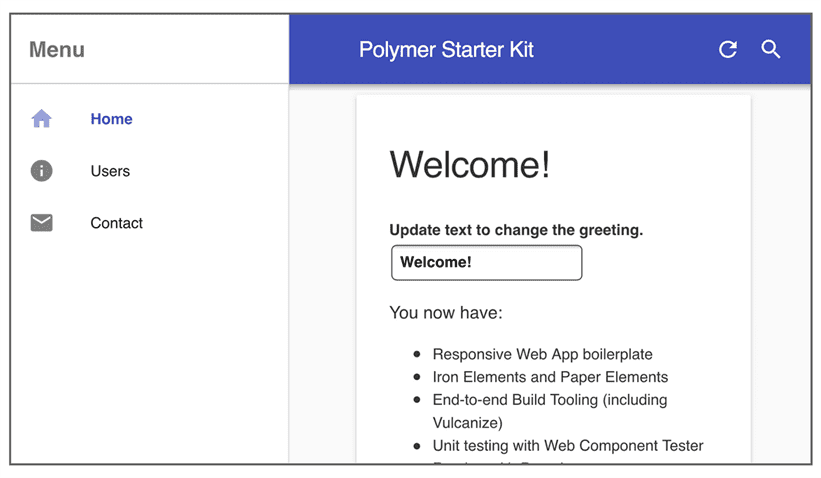
This will build the application, install it on the attached phone/device, and run the application on the phone/device, as shown below:
Notice that we had enabled the Device Orientation options in Xcode, as shown below:
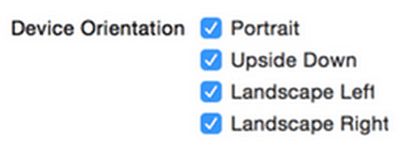
Try changing the device orientation to landscape and you shall see the following view of the application:
That’s all! We are now ready to make changes to our starter application. build cool features, and package it for iOS devices.
One last thing that we would like to setup is to integrate the Polymer application build with the cordova build process so that we don’t have to, manually, run gulp and copy the files from dist folder to www. Let us fine finish that part and automate it.
Integrating Polymer App build with Cordova build
To kick off the build of the Polymer application as part of Cordova build process, we need to write a Cordova hook. There are different ways a hook can be written, which are outlined on Cordova Hooks Guide. We will develop our hook in Node.js to ensure its portability across different operating systems.
Our hook shall do the following, in the mentioned sequence:
- Build the Polymer project by running the gulp command
- Clean up the www folder of our Cordova project
- Copy the content of the dist folder of the Polymer project to the www folder
For task#1, we will use child_process API to execute the gulp command. Tasks #2 & 3 require file operations. Node.js has File System APIs that can help us implement these tasks. However, we shall use fs-extra module as it offers convenient methods to clean a directory and copy files/folders from one directory to another. Install the module by running the following command:
npm install -g fs-extra
Now, let us create the hook. Create a scripts folder under the project root folder and save the following hook definition code:
module.exports = function(ctx) {
 var fs = ctx.requireCordovaModule('fs-extra');
 var childProcess = ctx.requireCordovaModule('child_process');
var polymerAppPath = '/Users/ajitkumar/mystuff/Polymer/first-app';
 var destDir = ctx.opts.projectRoot + "/www";
//first - build the Polymer project
 console.log('Building Polymer project located in: ' + polymerAppPath);
 childProcess.execSync("gulp", {cwd: polymerAppPath});
//second - clear the www folder content of cordova app
 console.log('Cleaning up www folder');
 fs.removeSync(destDir);
//third - copy the content from dist to www folder
console.log('Copying built artefacts....');
 fs.mkdirSync(destDir);
 fs.copySync(polymerAppPath + "/dist", destDir);
 console.log("Done!");
};
Name the hook file – buildPolymerApp.js. Notice that we have used the Sync version of the APIs to make sure that we move to the next task only when the previous one is done.
This is not production ready implementation. So, your must review the code and make the required changes (e.g. error handling) before considering it for production.
Next, we will register this hook as a before_prepare type hook so that it prepares the www folder for the Cordova build. To register, add the following entry to the config.xml file located under your Cordova project’s root folder:
<hook type="before_prepare" src="scripts/buildPolymerApp.js" />
Our hook is ready, now! Run the cordova build by running:
cordova emulate ios
You shall see the following output messages from the hook:

And, once the build is over, you shall see the application running, as expected, in your iOS Simulator.
I hope this helps you in building Polymer based iOS applications! Share your experience, thoughts, suggestions….


I did all the procedures you said, but in time to test the app on the emulator it gives this error http://i.imgur.com/LIzkpXk.png
Hi Richard,
Are you testing it using the cordova command or Xcode? Also, are you able to run the polymerstarterkit application by running “gulp serve” command? Do you see the desired output?
hi thank you for the tutorial! i really like Polymer but people say web components are not supported by browsers except for Chrome and Opera. do u recommend to use Polymer and Cordova to make a cross-platform app? Of course the starter kit iOS app worked fine as illustrated in this article, but am still wondering…
Hello Ching!
Glad that you found the article useful!
Polymer implements WebComponents, which is the way forward for the Web applications. There shall be increased support. E.g. you may visit https://dev.windows.com/en-us/microsoft-edge/platform/status/ to check the support that Microsoft has been building and its current status.
So, if you choose to build your mobile application using HTML5/JS then Polymer could be a good library to componentise your application. Alternatively, you may use Polymer web components with frameworks like AngularJS to build bigger cross-platform applications, faster!
thank you for the reply! great help!
Welcome!
Hi great article!
I have one question:
Do I need Cordova? Or why not just use Xcode & Swift with a Webview?
Hi!
I’ve found both of your apps in the iPhone App store,
Ezfy
Little Tales
Are both of these created with Polymer 1.0 ?
@Justin
Ezfy is Polymer based.