Blogs
Generating ML Workflows using Amazon SageMaker Pipelines
MLOps is a set of practices that pertains to deploying and maintaining machine learning models in production. Not only does MLOps focus on increasing automation and improving the quality of production models but it also takes business and regulatory requirements into full consideration.
In this post, we discuss one of the core components of MLOps on AWS – Amazon SageMaker Pipelines. AWS has a comprehensive MLOps Framework which helps in the enforcement of architecture best practices for deployment of machine learning models, and Pipelines are part and parcel of the same.
SageMaker Pipelines, the AWS CI/CD service for machine learning, helps in the creation, automation and management of end-to-end ML Workflows at scale. The workflows created can be re-used for recreating or optimizing ML models, thus making ML scalable throughout one’s organization.
The purpose of this blog is to understand the deployment process of a machine learning model using SageMaker Pipelines. The model being deployed in this case is meant for Customer Churn prediction.
In this blog, we shall see :
- The Customer Churn Use Case
- Getting Connected with AWS SageMaker Studio
- Notebook Implementation of SageMaker Pipelines
- Conclusion
-
The Customer Churn Use Case
Customer Churn Prediction using Machine Learning is the automated identification of unhappy customers in the context of a given business. Retaining existing customers is absolutely important for any business, and hence all businesses will see great value in predictions from churn models. This will enable them to plan and roll out incentives well in advance!
The dataset and the machine learning logic being used are discussed in detail here.
-
Getting Connected with AWS SageMaker Studio
- Open Amazon SageMaker Console, and choose your region from the dropdown in the top right corner of the page (this one has N. Virginia selected).
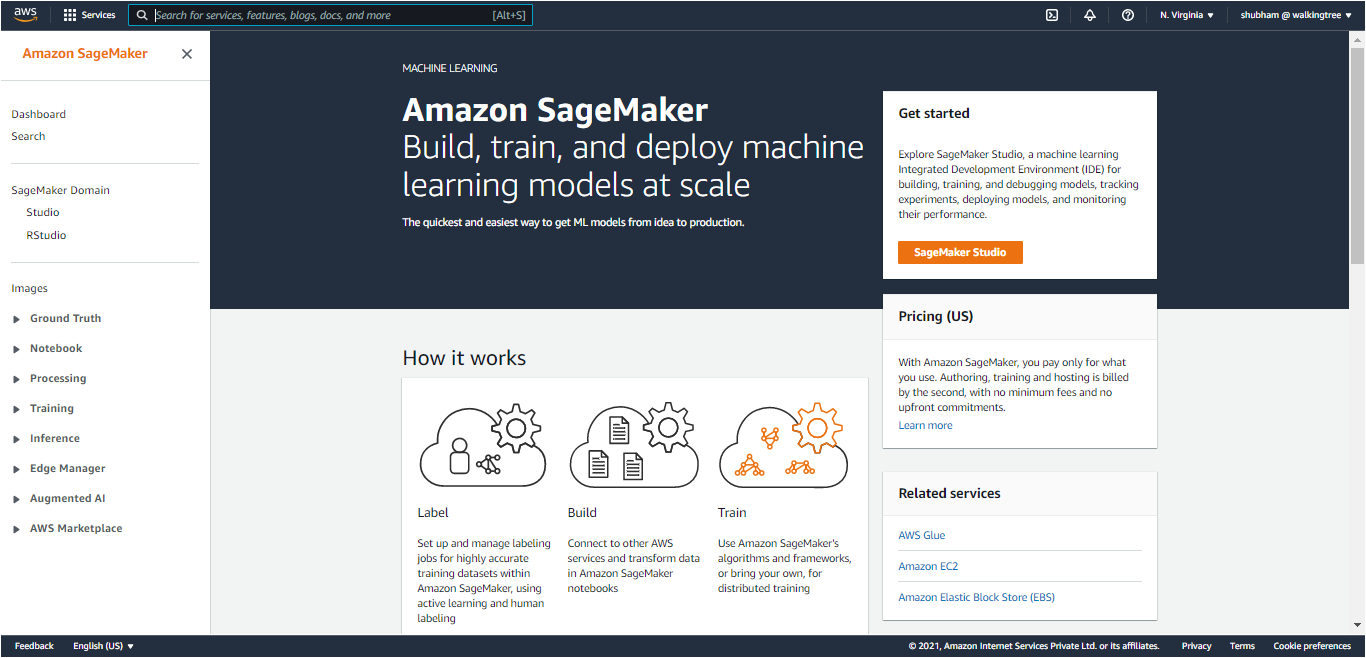
- Under ‘Get started’, choose ‘Sagemaker Studio’.
- Under ‘Setup Sagemaker Domain’, choose ‘Quick setup’ and enter the user name of your preference. The upper limit on the number of characters is 63.. Valid characters include A-Z, a-z, 0-9, and – (hyphen).
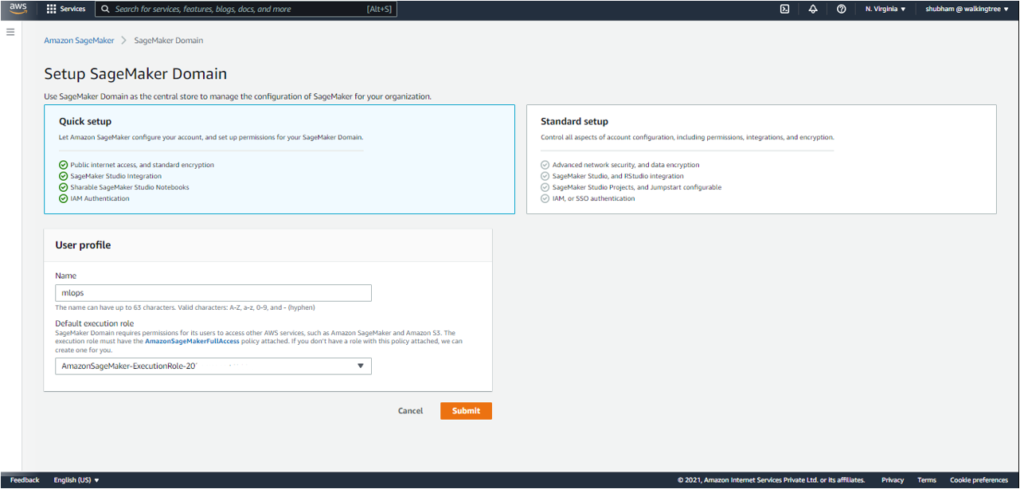
- Under Execution Role, choose an IAM role if there is one, or else create an IAM role.
Doing this will grant permissions described by the AmazonSageMakerFullAccess IAM policy to the created role.
- Please note that the user should have required IAM privileges; otherwise, he/she will get the following error:
‘not authorized to perform iam:CreateRole’ on resource.
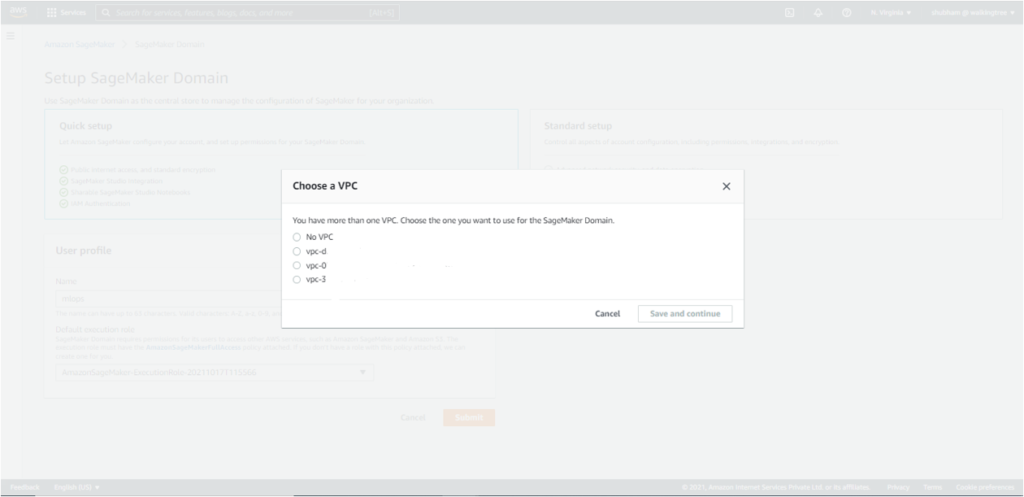
- The next option allows you to choose the VPC, if any, you want to use for SageMaker Studio. Choose one of the options and click on ‘Save and Continue’.
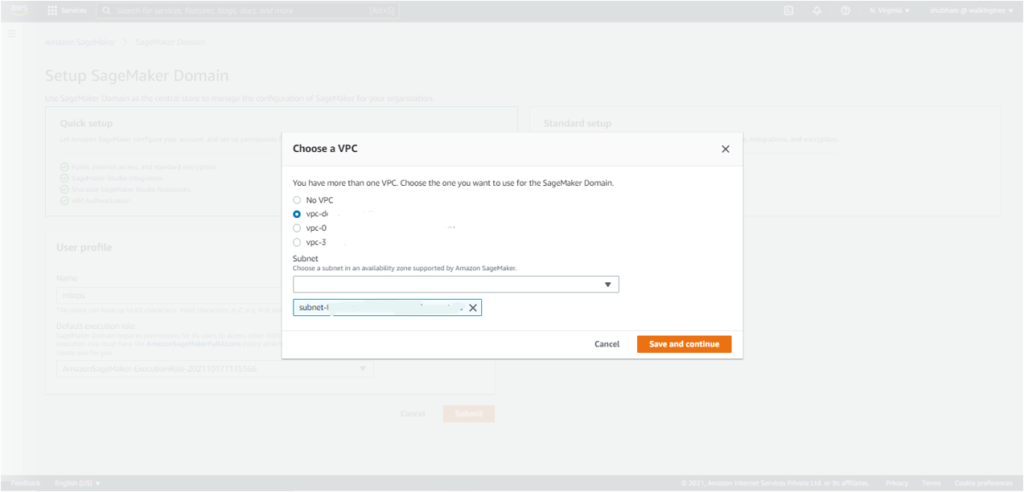
- From the list of subnets belonging to the VPC chosen in the previous step, choose one of the subnets in an availability zone supported by SageMaker. Click on ‘Save and Continue’.
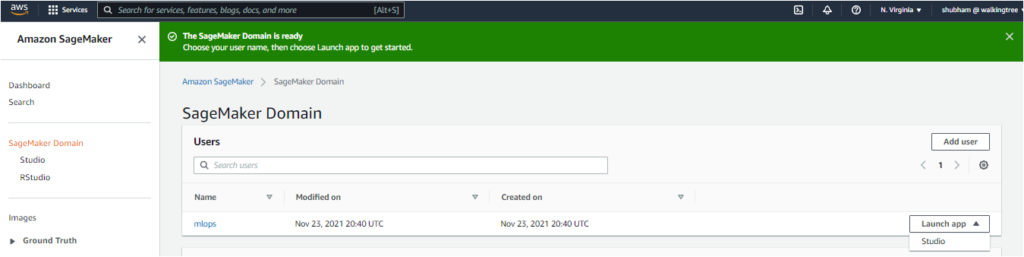
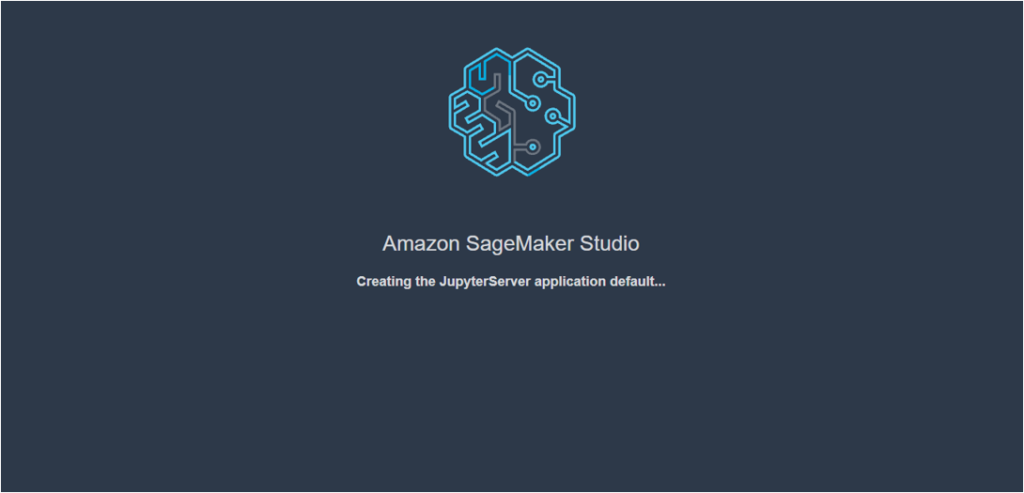
- This creates the desired SageMaker Domain. When the SageMaker Studio is ready, choose your user name and Open Studio to get started. This starts the creation of the JupyterServer application default, and the ‘Get Started’ page gets loaded on Studio.

- Notebook Implementation of SageMaker Pipelines
SageMaker Pipelines help in the automation of different steps of the ML workflow, including data loading, preprocessing, training and tuning, and deployment.
These workflows can be created with Python SDK, and then visualized and managed using Amazon SageMaker Studio.
The implementation of SageMaker Pipelines within a notebook using the Python SDK is discussed below. The use case implemented is Customer Churn prediction, as mentioned above.
- Open Amazon SageMaker Studio as described above.
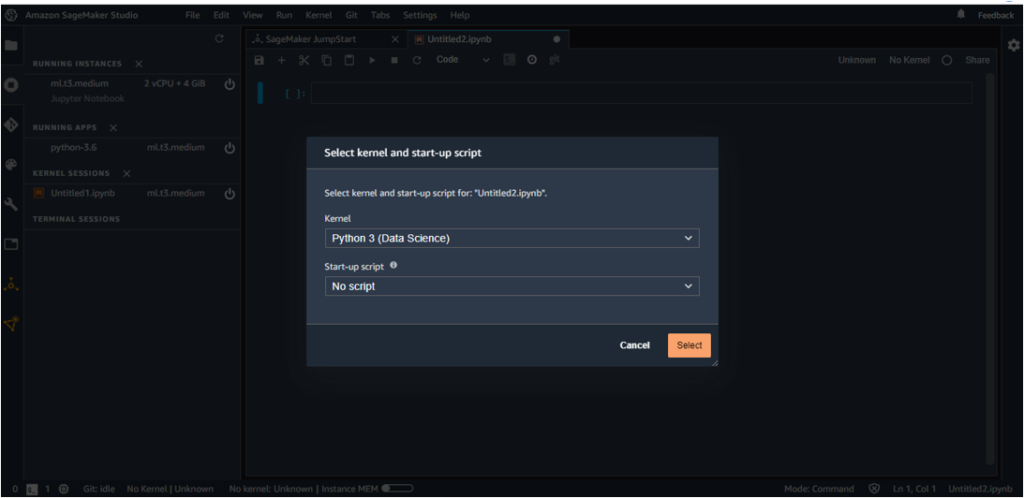
- Under File -> New, choose Notebook.
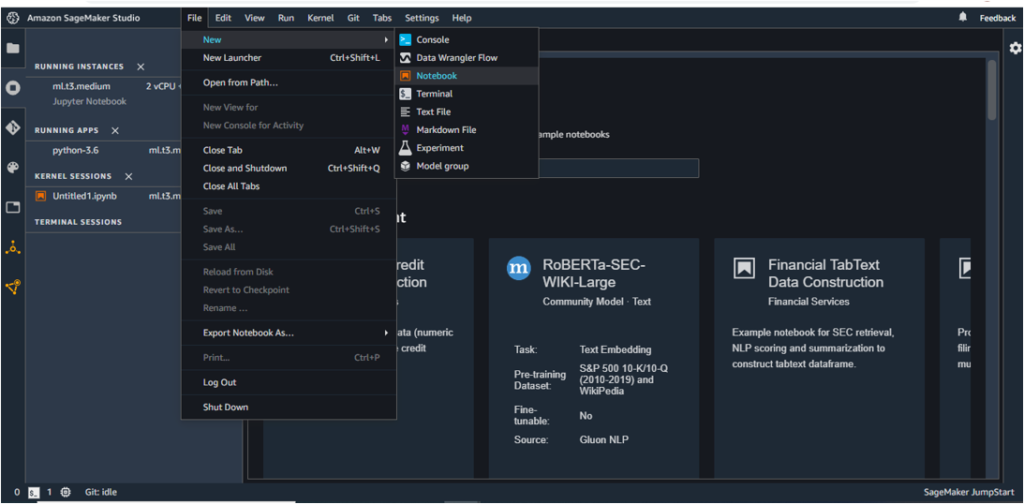
- Choose Python 3 (Data Science) as the Kernel. ‘Python 3 (Base Python)’ may also be a good choice as the Kernel since it is relatively less costly but this requires installation of a large number of packages (pandas, numpy, boto3, s3fs, fsspec, etc) whereas these packages are already a part of the Data Science based Kernel.
- Please follow the steps delineated here (upto execution.wait()) to implement the Customer Churn use case through SageMaker Pipelines. This code is adapted from [2], [3] and [4].
At the end of this tutorial, you should be able to execute the pipeline with the model getting pushed to the Model Registry. - To view the pipeline, click on the SageMaker resources option on the bottom of the left menu, choose the Pipelines option from the dropdown and click on the new pipeline with the ‘CustomerChurnDemo’ prefix.
Under Executions, the pipeline is shown as succeeded.
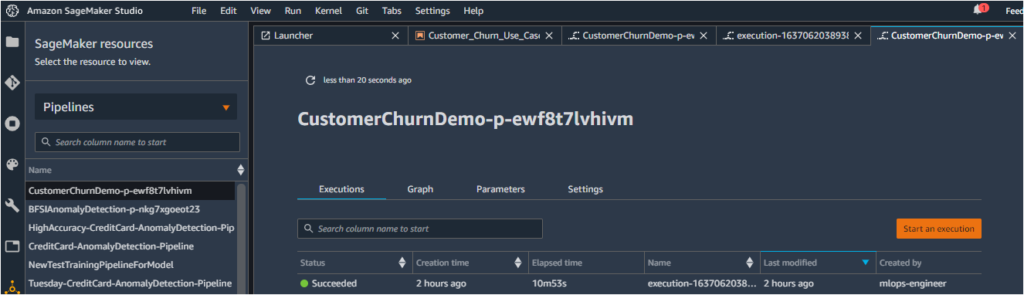
- Click on the name of the pipeline (or other options in the same row). This opens the flowchart of the pipeline execution, with the different steps clearly delineated.
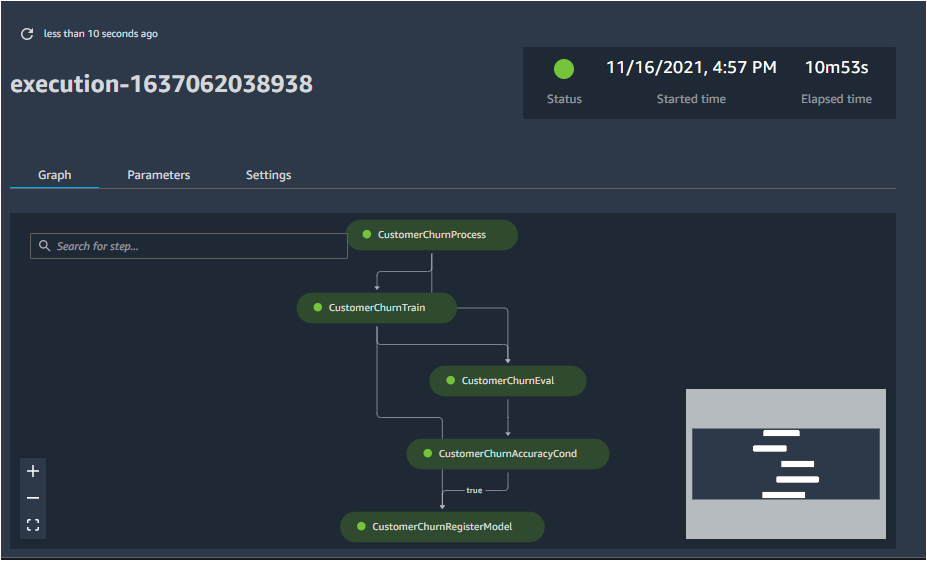
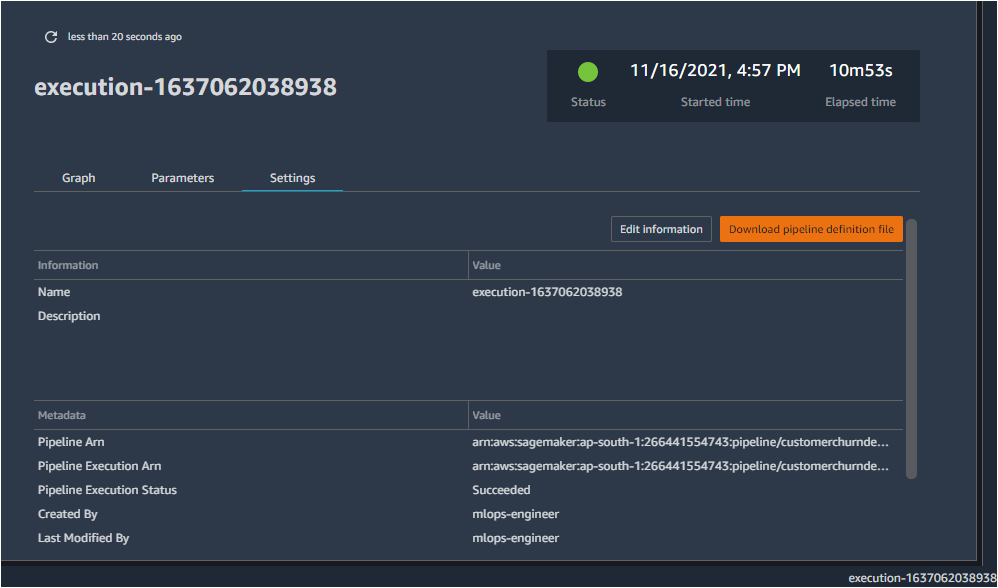
- To view detailed information regarding any step, double click it. Information related to the input, output, logs and other aspects (step type, Arn, start time, end time) is accessible from here.
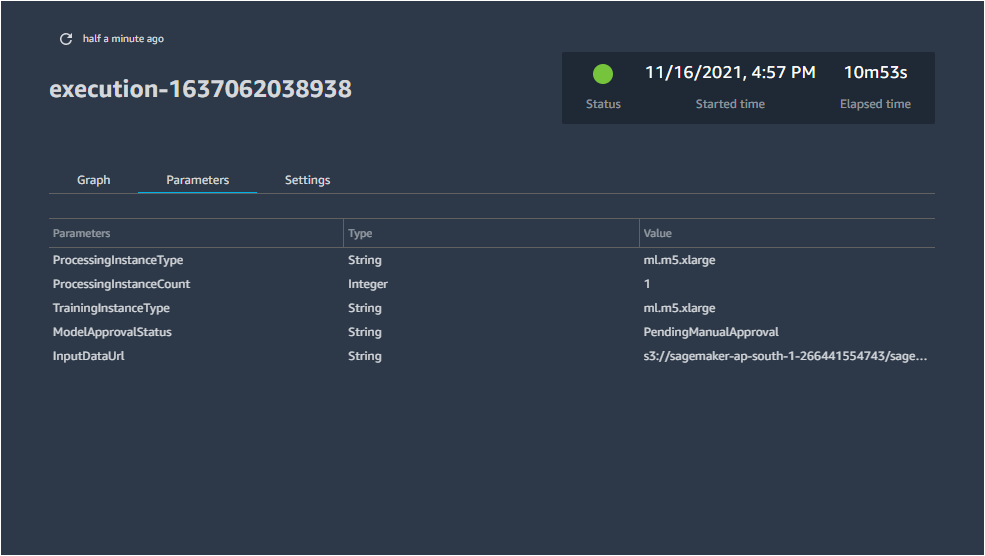
The Parameters and Settings associated with the pipeline are accessible through the respective options.
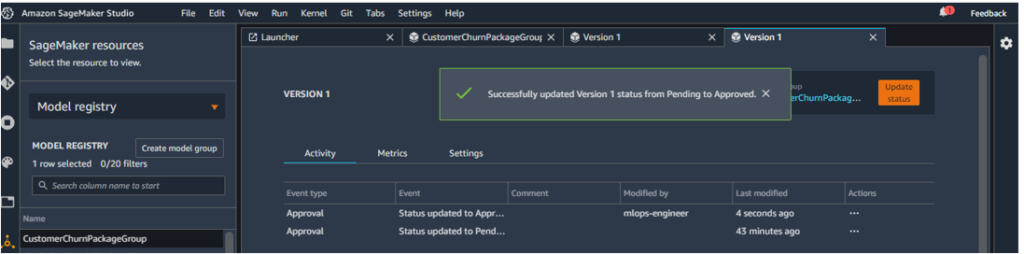
- To view the details of the model that has been created, under SageMaker Resources, click on Model Registry. This will show up the CustomerPackageGroup that has been created recently.
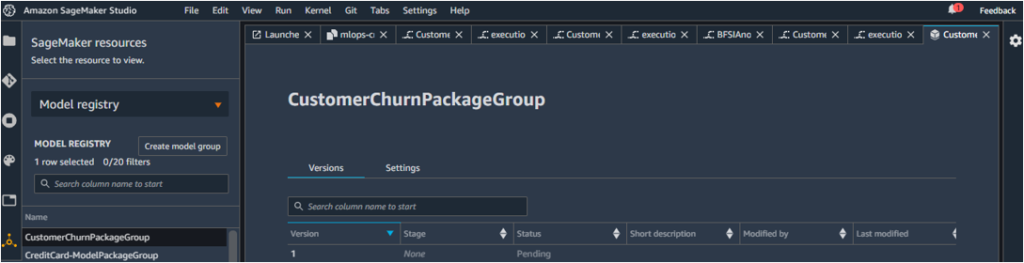
The model on the display is marked as Version 1. As of now, the approval is shown as Pending.

This is because the model approval status was set to be PendingManualApproval.
To approve/change the status of the approval, click on the orange button which shows ‘Update status’.
Change the status from Pending to Approved.
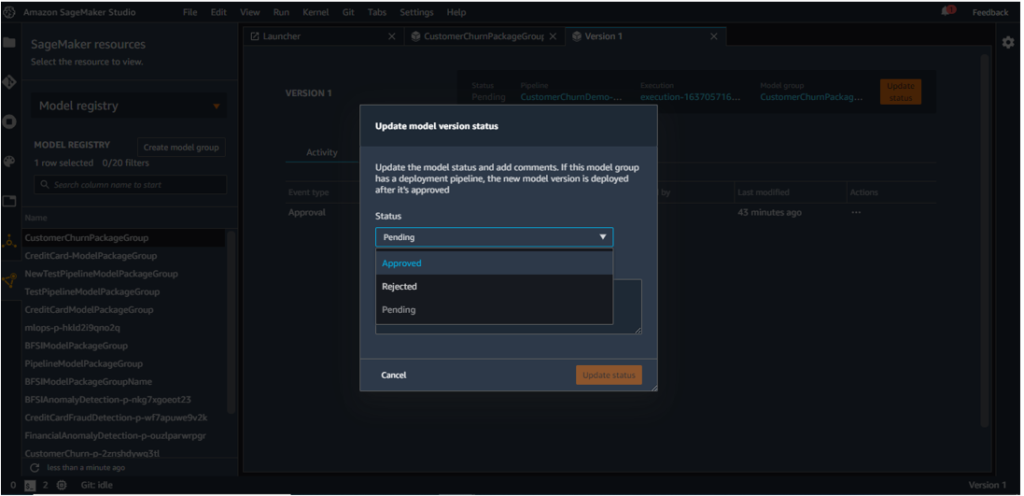
This changes version 1 status from Pending to Approved.
- Create the endpoint for the model and test the same using the predictor package, as discussed in the Notebook.
Conclusion
SageMaker Pipelines play a significant role in MLOps by enabling creation, automation and management of ML Workflows at scale. In this blog, we have discussed how we can deploy a customer churn prediction model using the notebook implementation of pipelines.
In our next blog, we will illustrate how SageMaker Projects can be used with pipelines to ensure code consistency, better team collaboration and CI/CD. All this makes for a more streamlined set of practices, resulting in faster delivery of ML models in production.
If you’d like to learn more about these services or need assistance, let us know and we’ll reach out to you. Know More
References