Blogs
Create great looking Enterprise Dashboards using Sencha Ext JS 6
Introduction
Every enterprise produces some or other dashboard for their people, their partners, and their customers. Dashboards have become standard and powerful tool to present information in one place. And, many applications provide a dashboard, as the starting place, to their users where they get the quick view of their relevant data and plan their action.
Sencha Ext JS offers classes that can be used to develop Dashboards. In this article, we will look at the process and classes involved in creating an Enterprise dashboard usingthe upcoming Sencha Ext JS 6.
Getting Started
First, get the following in place:
- Download and install Sencha Cmd 6.x – so that we can create Ext JS 6 based project and build
- Download and extract Sencha Ext JS 6 – I have used the Ext JS 6 Early Access version
- Download and install WebStorm – the IDE from JetBrains
- Download and install Sencha Ext JS JetBrains Plugin inside your WebStorm
Now, go ahead and generate the project by running the following command on your terminal or command prompt:
sencha generate app AppsBoard path/to/project/folder
AppsBoard is the application name, which will act as the namespace for classes, as well.
This will generate a fully functional Ext JS 6 application with Neptune theme. When you open that project in WebStorm, you shall see the structure, as shown below:
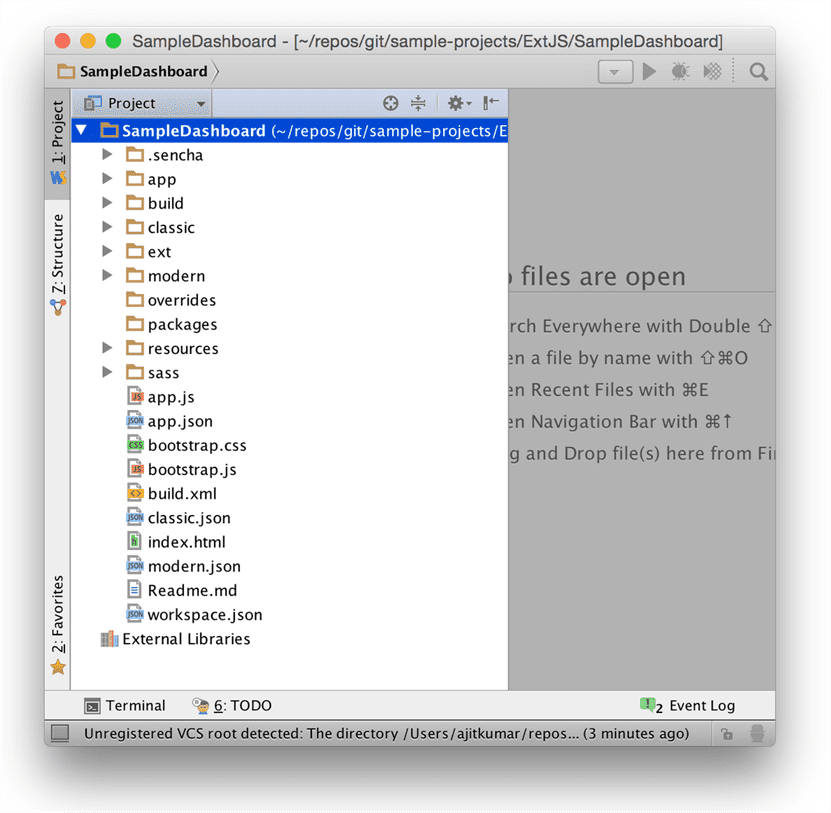
Notice that the following folders:
- app – universal application code goes here
- classic – desktop related code goes here. It mostly contains view related code, but may contain View Model and View Controller, as well
- modern – touch/mobile related code goes here. It mostly contains view related code, but may contain View Model and View Controller, as well
You may read more about this structure on What’s New in Ext JS 6.
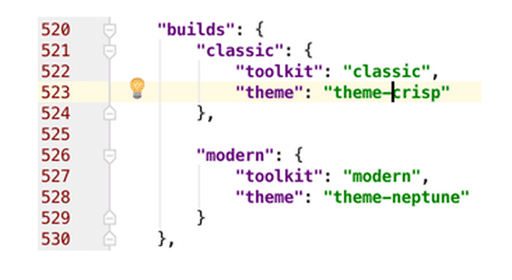
Ok, I said, the generated application is fully functional. So, can we open it in browser and see how it looks like? Surely, but before that I want to show you – how to change to theme from Neptune to, say, Crisp. To do this, we will have to edit the app.json file and change the theme to theme-crisp for the classic toolkit, as shown below:
Save the changes, and run the following command so that app.json changes are effective:
sencha app refresh
I noticed that with the Early Access version of Sencha Cmd – 6.0.0.92, the refresh fails as it fails to recognise the “theme”: “theme-neptune” in app.json. If you are getting the same problem, you will have to comment this line of code in app.json.
If all goes well, run the following command:
sencha app watch
This will start the application on port 1841 and would, indefinitely, watch for changes to the project and build them, automatically.
Now, open http://localhost:1841/ in your browser and you shall see the following output:
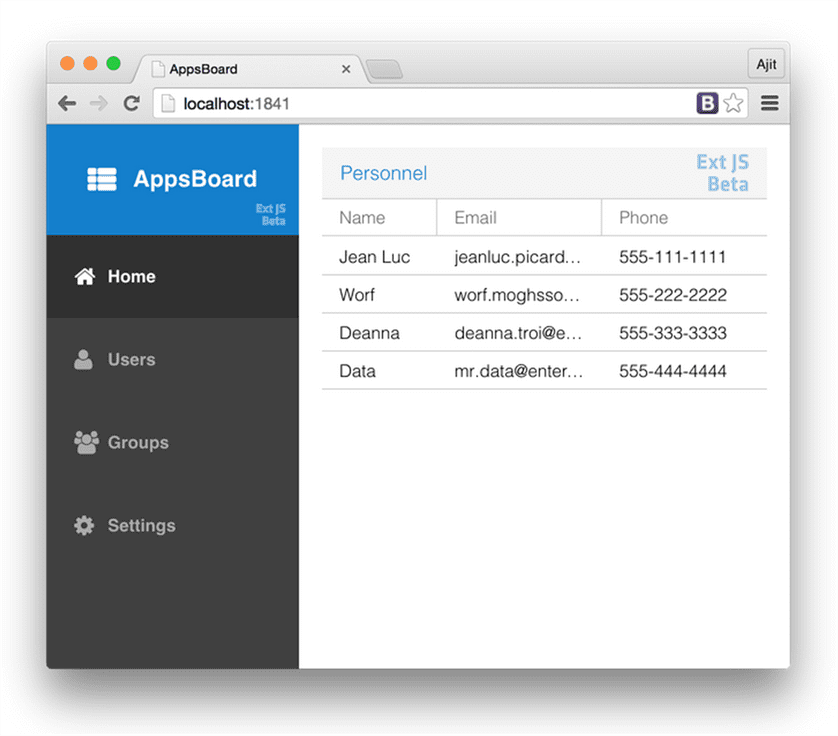
See, I told you that it generates a fully functional application, didn’t I? You may be seeing Ext JS Beta in all the headers because of the obvious reason that I am using a beta version of the framework.
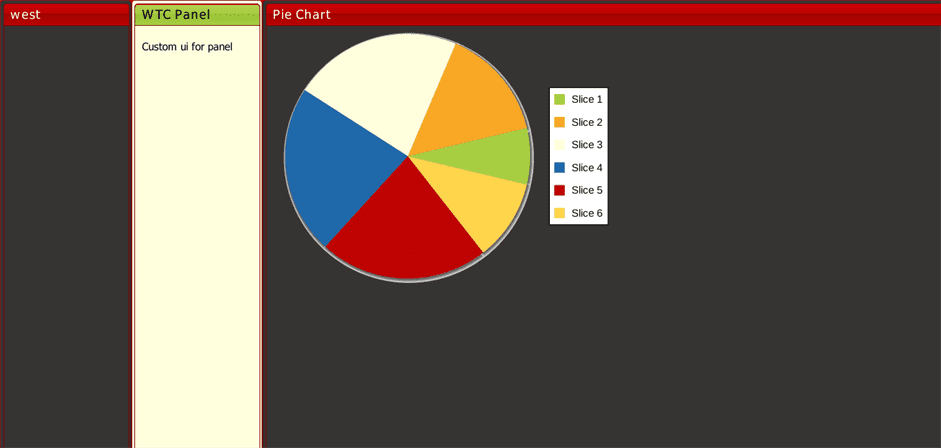
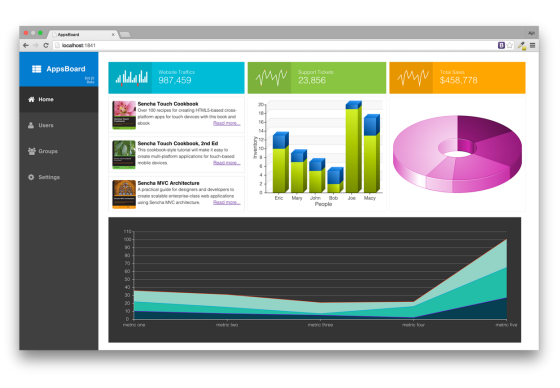
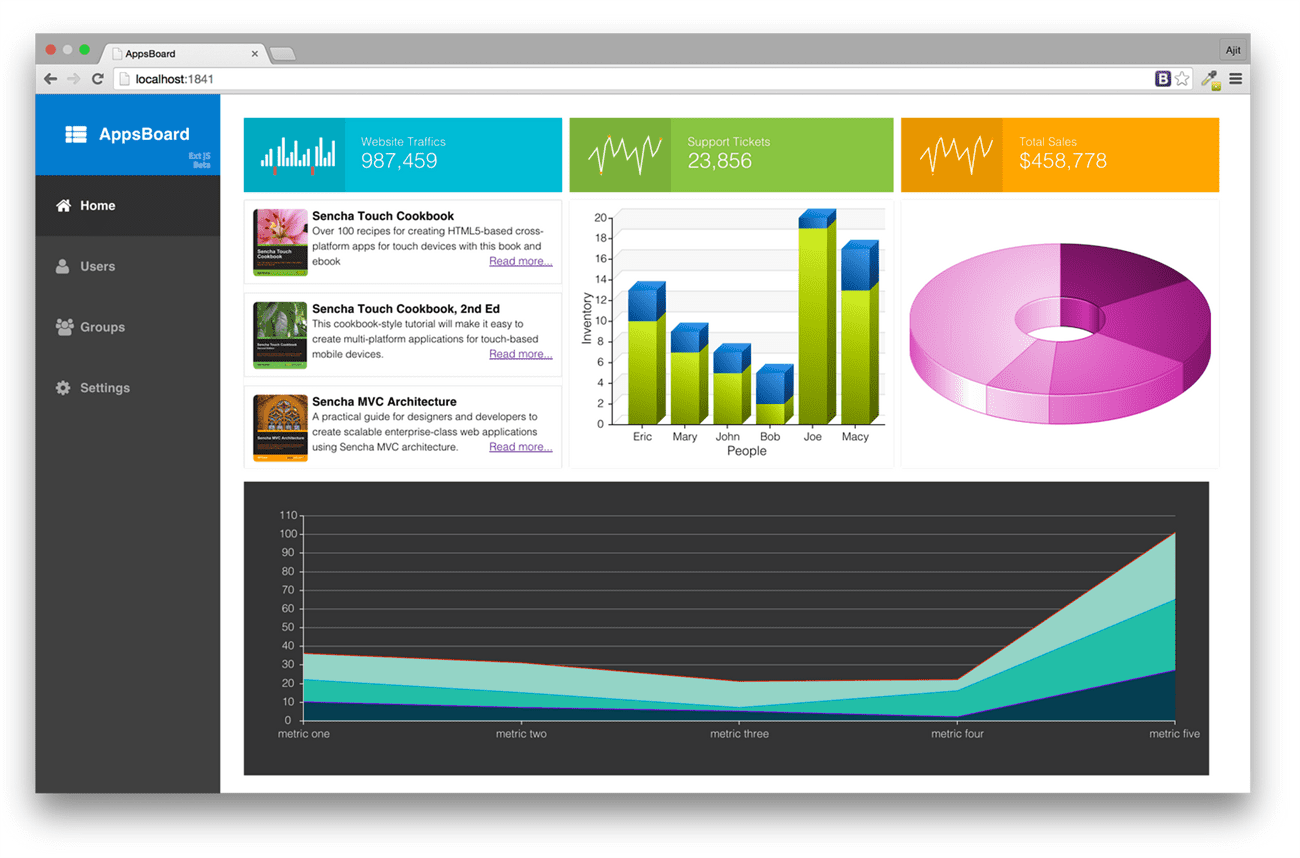
Wonderful! Now that we have the starter application with navigation items on the left hand side and pages for each of these items, it is not a dashboard, yet. So, let us start making the changes to the Home page and convert it into a dashboard that may look something like this:
 Defining a Part

Sencha Ext JS offers the following classes for creating dashboard:
- Part – To define a dashboard part or widget or an item. E.g. a widget showing books suggestion could be a “part” of a dashboard. The base class is Ext.dashboard.Part
- Panel – Each part is a panel. It is used internally by the framework
- Column – Represents a column in a Dashboard. This is used internally by the framework
- Dashboard – The main dashboard class – Ext.dashboard.Dashboard – that contains one or more parts.
The Dashboard layout is managed by a new layout – dashboard. Refer to Ext.layout.container.Dashboard class documentation to learn more about the layout and how it functions.
In this section, we will define a Part to show User-wise Inventory. This would be a 3D Bar chart that has been introduced in Ext JS 6.
Let us define AppsBoard.view.dashboard.parts.InventoryChart class and add the following code to it:
Ext.define('AppsBoard.view.dashboard.parts.InventoryChart', {
    requires: [
        'Ext.chart.CartesianChart'
    ],
    extend: 'Ext.dashboard.Part',
    alias: 'part.inventorychart',

    viewTemplate: {
        layout: 'fit',
        title: 'Inventory',
        header: false,
        items: [{
            xtype: 'cartesian',
            ,
            height: 400,
            innerPadding: '0 10 0 10',
            //background: '#F1495B',
            store: {
                fields: ['name', 'apples', 'oranges'],
                data: [
                    {name: 'Eric', apples: 10, oranges: 3},
                    {name: 'Mary', apples: 7, oranges: 2},
                    {name: 'John', apples: 5,oranges: 2},
                    {name: 'Bob', apples: 2, oranges: 3},
                    {name: 'Joe', apples: 19, oranges: 1},
                    {name: 'Macy', apples: 13, oranges: 4}
                ]
            },
            axes: [{
                type: 'numeric3d',
                position: 'left',
                fields: ['apples', 'oranges'],
                title: {
                    text: 'Inventory',
                    fontSize: 15
                },
                grid: {
                    odd: {
                        fillStyle: 'rgba(255, 255, 255, 0.06)'
                    },
                    even: {
                        fillStyle: 'rgba(0, 0, 0, 0.03)'
                    }
                }
            }, {
                type: 'category3d',
                position: 'bottom',
                title: {
                    text: 'People',
                    fontSize: 15
                },
                fields: 'name'
            }],
            series: {
                type: 'bar3d',
                xField: 'name',
                yField: ['apples', 'oranges']
            }
        }]
    }
});
In the above code, we are defining a part by extending the base Ext.dashboard.Part. Every part requires viewTemplate config to be specified. This value for viewTemplateconfiguration must be a valid Ext JS component configuration. The dashboard renders the part using the viewTemplate configuration. Our viewTemplate is a panel component with fit layout that contains a Cartesian chart with 3D Bar series.
Alias name for a part class must have part. as a prefix.
That’s all. Our first Part is ready. Now we will define a Dashboard and use this part.
Defining a Dashboard
To define a Dashboard, we will be extending Ext.dashboard.Dashboard class. Following is our AppsBoard.view.dashboard.Dashboard class:
Ext.define('AppsBoard.view.dashboard.Dashboard', {
    extend: 'Ext.dashboard.Dashboard',

    requires: [
        'AppsBoard.view.dashboard.parts.InventoryChart'
    ],

    xtype: 'home-bashboard',

    defaultContent: [{
        type: 'inventorychart',
        columnIndex: 0,
        height: 320
    }, {
        type: 'inventorychart',
        columnIndex: 1,
        height: 320
    }],

    config: {
        parts: {
            'inventorychart': 'inventorychart'
        }
    }
});
In the above code, we have defined our dashboard class with two instances of the inventorychart part. defaultContent configuration tells the Dashboard class that the mentioned parts need to be shown when the dashboard renders.
parts configuration is very important, as well. Usage of it might not look so intuitive but it is required. It is basically, a map with part alias. For each part that we add to the dashboard, we will have to add an entry to the parts map.
There is a bug in the Dashboard class of Ext JS where it fails to find the part from the parts map using its type/alias. The following override is required to fix it:
Ext.define('Ext.overrides.dashboard.Dashboard', {
    override: 'Ext.dashboard.Dashboard',

    getPart: function (type) {
        var parts = this.getParts();
        return parts.findBy(function(item, key) {
            if (key === type) {
                if (item.getId() === key) {
                    return item;
                }
            }
        });
    }
});
Putting things together
We are done with our Dashboard definition. So, let us go back to our starter application and make changes to it so that our Dashboard renders on the Home page.
Let us edit the classic/src/view/main/Main.js file and use home-dashboard as the child item of Home tab, as shown below:
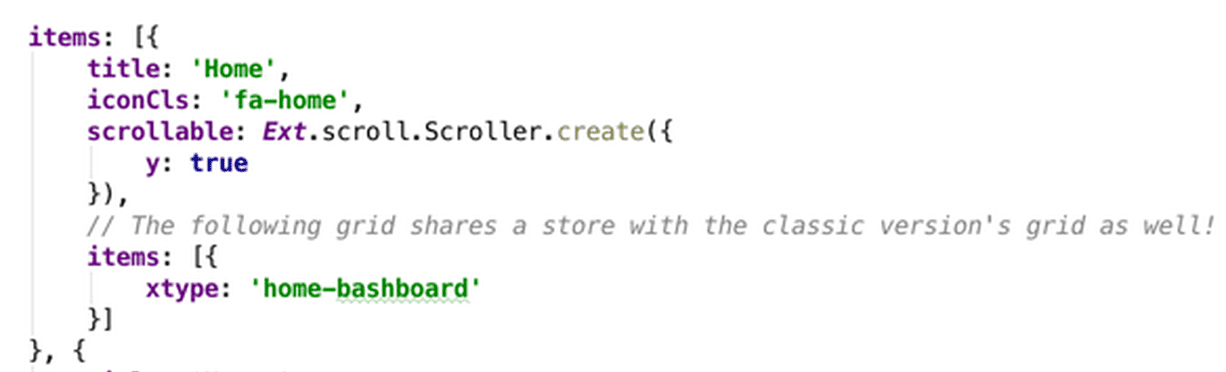
Now we are done! Since, Sencha Cmd is already watching the changes, go directly to the browser, refresh the page and you shall see the dashboard with two charts (just to show that you can have any number of instances of the same part), as shown below:

Couple of things that we shall notice are:
- Each part has a header with Collapse and Close tools
- Each part is resizable but they can be resized from the bottom. In the previous screenshot, I have increased the parts height using the resize handler
- There is a column splitter between the two parts using which you can modify the column sizes
- You can move a part to a different column/row by dragging its header
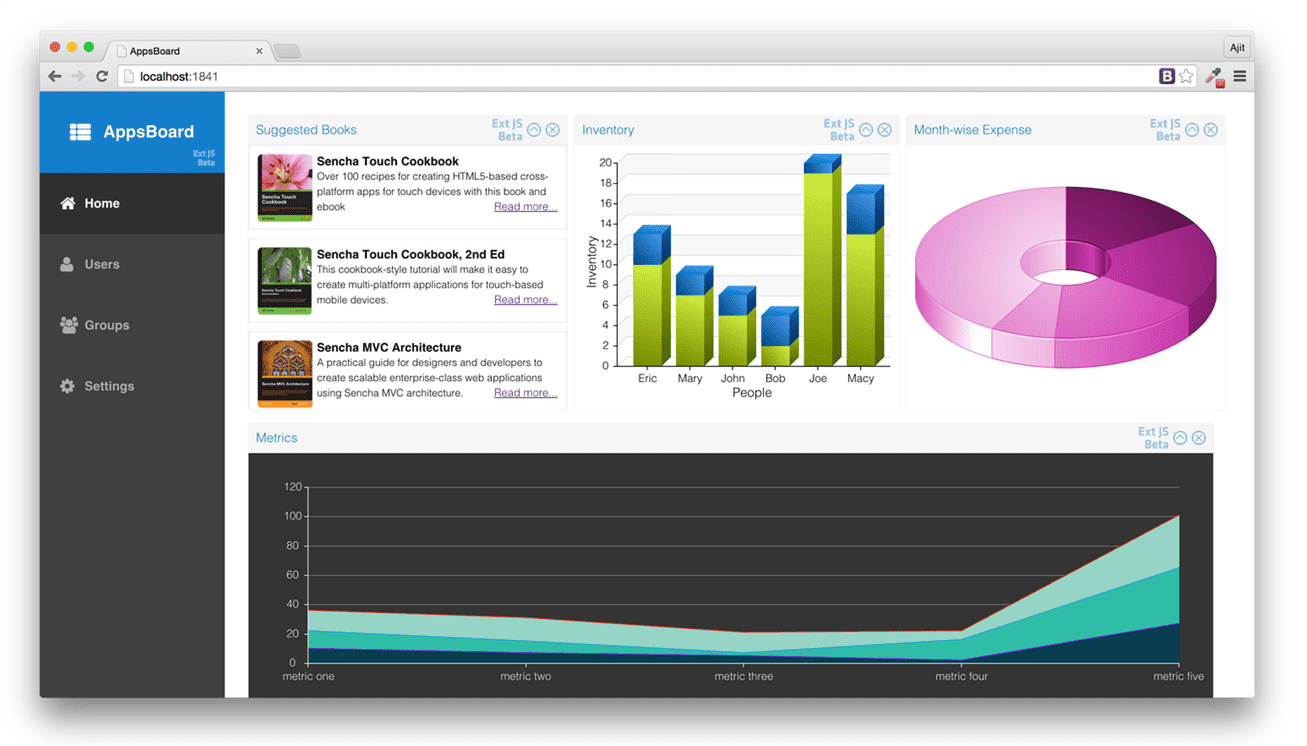
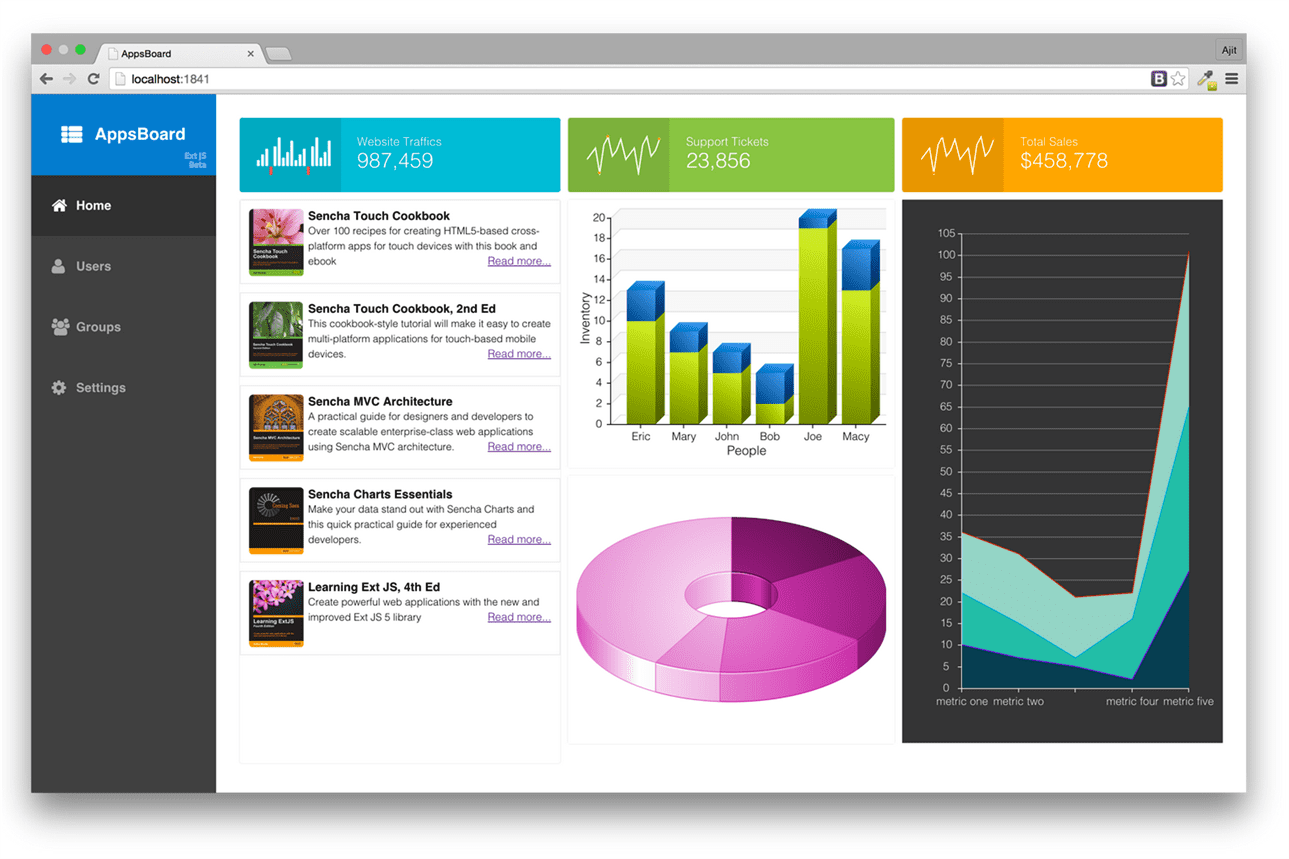
Here is our enhanced Dashboard with some more parts showing different information to the user:
Where is the code! Don’t worry, you can download it from GitHub. It contains the complete article code.
Eureka! Our first Dashboard is ready to woo our users! But wait! Before we pat our back, we will apply certain “pro” changes which will make our dashboard more usable and beautiful.
Showing more/less tools for a Part
Every Part is a Panel component and has the following tools enabled by default:
- Expand/Collapse – clicking on it expands or collapses the part
- Close – clicking on it closes the part and removes it from the dashboard
To remove these tools, we will have to set the following properties to false in the part’s viewTemplate:
- collapsible
- closeable
This way, only the header with title appears.
To show additional tools, we will have to pass tools configuration to the part’s viewTemplate. E.g. to show the Settings icon, following shall be passed to the Inventory part’s viewTemplate:
tools:[{
    type:'gear',
    tooltip: 'Settings',
    handler: function() {
        Ext.Msg.alert('INFO', 'Settings clicked!!');
    }
}]
Making the Dashboard – Read-only
Making the dashboard read-only, generally, means the following:
- A part position (row/column) cannot be changed – set draggable to false on the part’s viewTemplate
- A part cannot be resized – set resizable to false on the part’s viewTemplate
- A part will not have Edit/Settings/etc. options – set header to false on the part’s viewTemplate
The following screenshot shows our enhanced dashboard where the top row parts are neither draggable nor resizable:
 The other items are resizable and re-positionable. Following screenshot shows how we can rearrange and resize the items to personalize the dashboard:
Summary
We looked at how we setup a project using Ext JS 6 and create an enterprise dashboard using the SDK classes. There is more to a dashboard than what I have discussed above. However, this shall help us understand the related classes and what does it take to createa usable dashboard in Ext JS 6.