
Android Application using Polymer 1.0 (Demo)
In this article, we will go through the steps to create first Polymer 1.0 Android application using Polymer Starter Kit. This shall help us create applications in Polymer and package them as Android application, which can be installed and run on Android devices, such as, Nexus Phone, Tablet, etc.
Getting Started
There are couple of things that we need in place to be able to embark on our journey. So, let us get started.
Installing Cordova CLI
First, we are going to use Cordova to build and package our Android application. It offers Command Line Interface (CLI) to help us with project setup, build, and test.
Install Cordova CLI by running the following:
npm install -g cordova
Verify that the installation is complete, run the following command to print the Cordova version:
cordova -v
At the time of writing this article, Cordova version is 5.1.1.
For more detail about Cordova CLI, refer to this page.
Creating Polymer Starter Kit based project
Create a folder, say, polymerstarterkit, and generate the application inside it by following the steps mentioned here.
Installing Android Emulator
Installing the emulator for Android is bit involved one. Follow these steps to install the emulator and setup a Android Virtual Device (AVD) to run the application:
1. Download and install Android Studio from here
2. Launch Android Studio
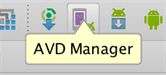
3. Click on AVD Manager icon (alternatively, you can click on Tools->Android->AVD Manager menu) to launch Android Virtual Device Manager
4. Click on Create Virtual Device… button to add a new virtual device
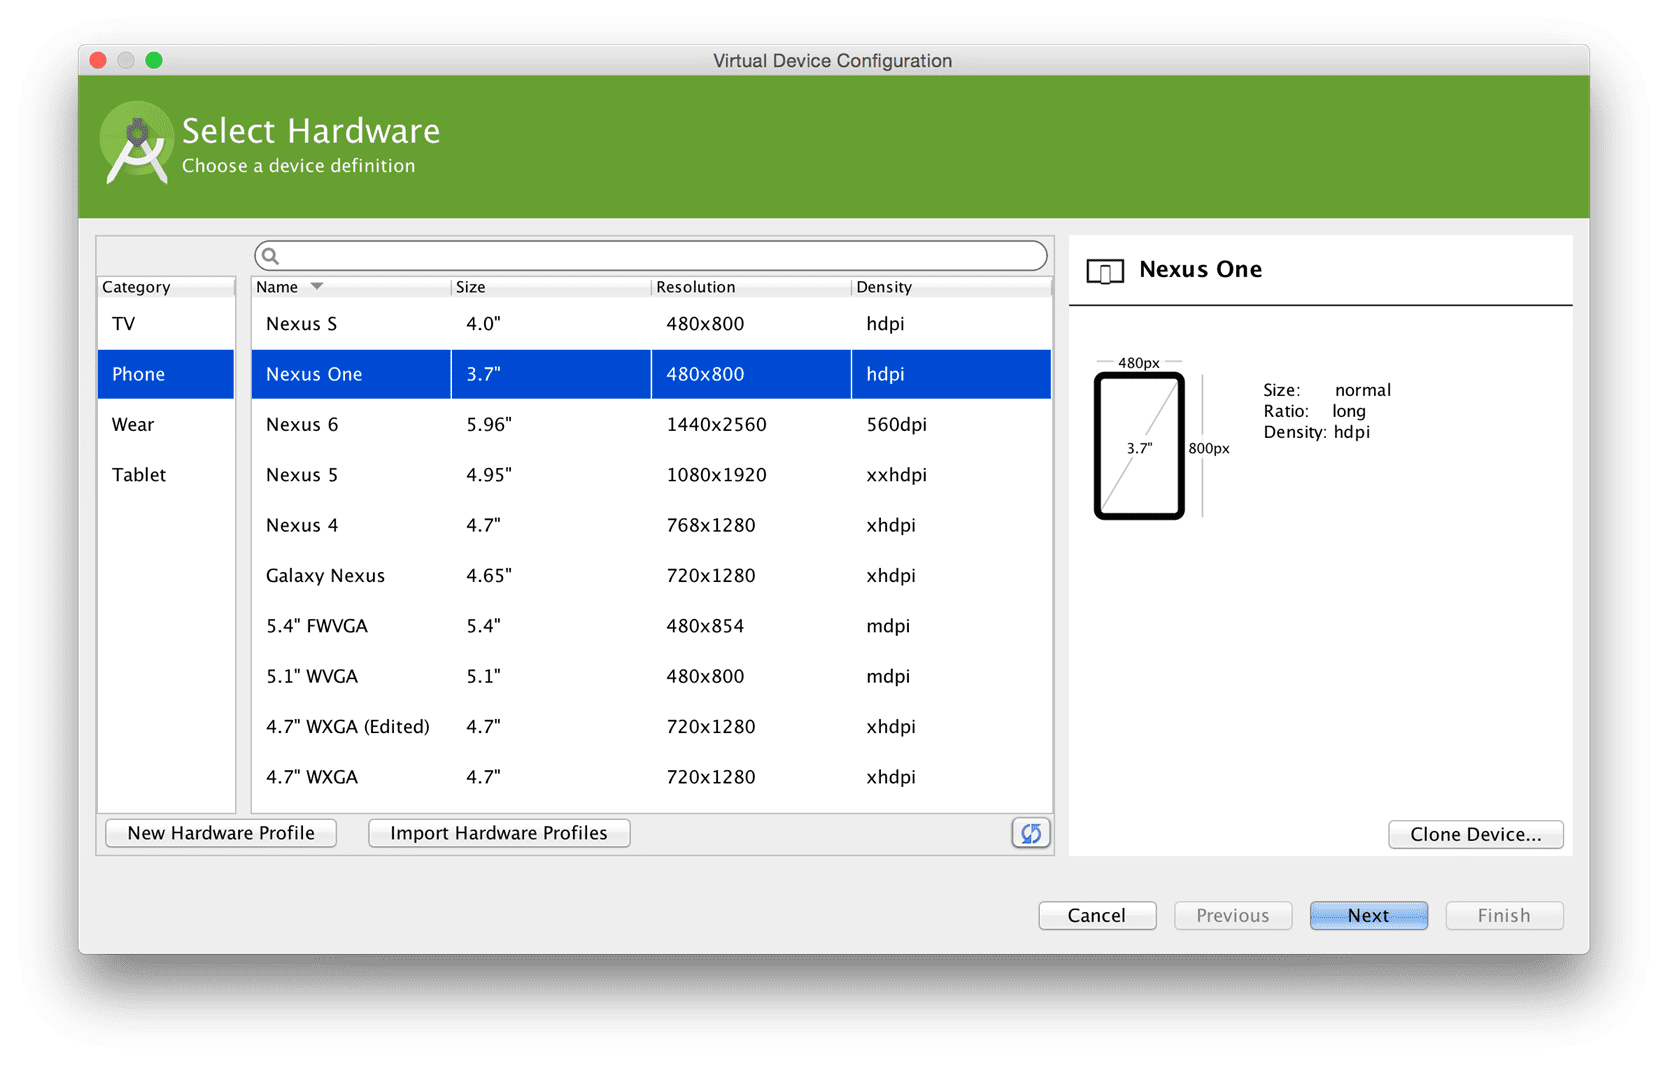
5. Select the Hardware, say, Nexus One, and click on the Next button
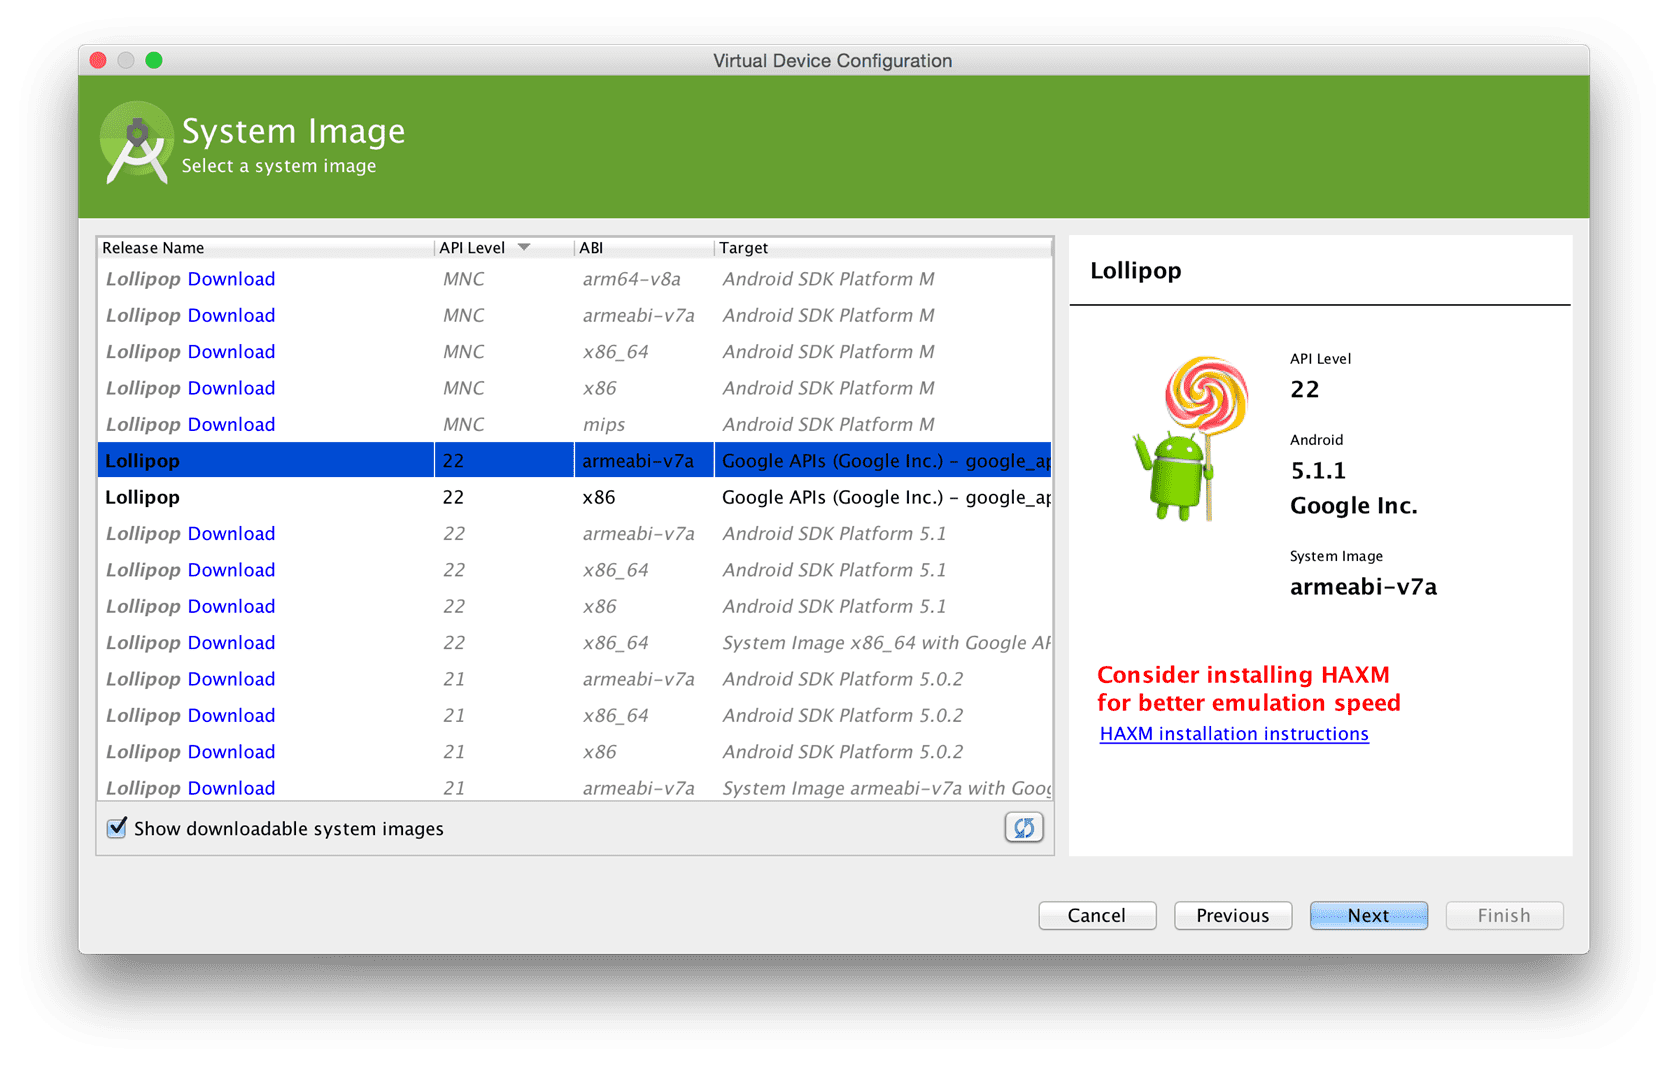
6. Select the System Image, say, Lollipop 22, and click on the Next button. You might have to install the selected image, if it is not already installed
7. Enter the AVD Name and review the Orientation and other settings and click on Finish.
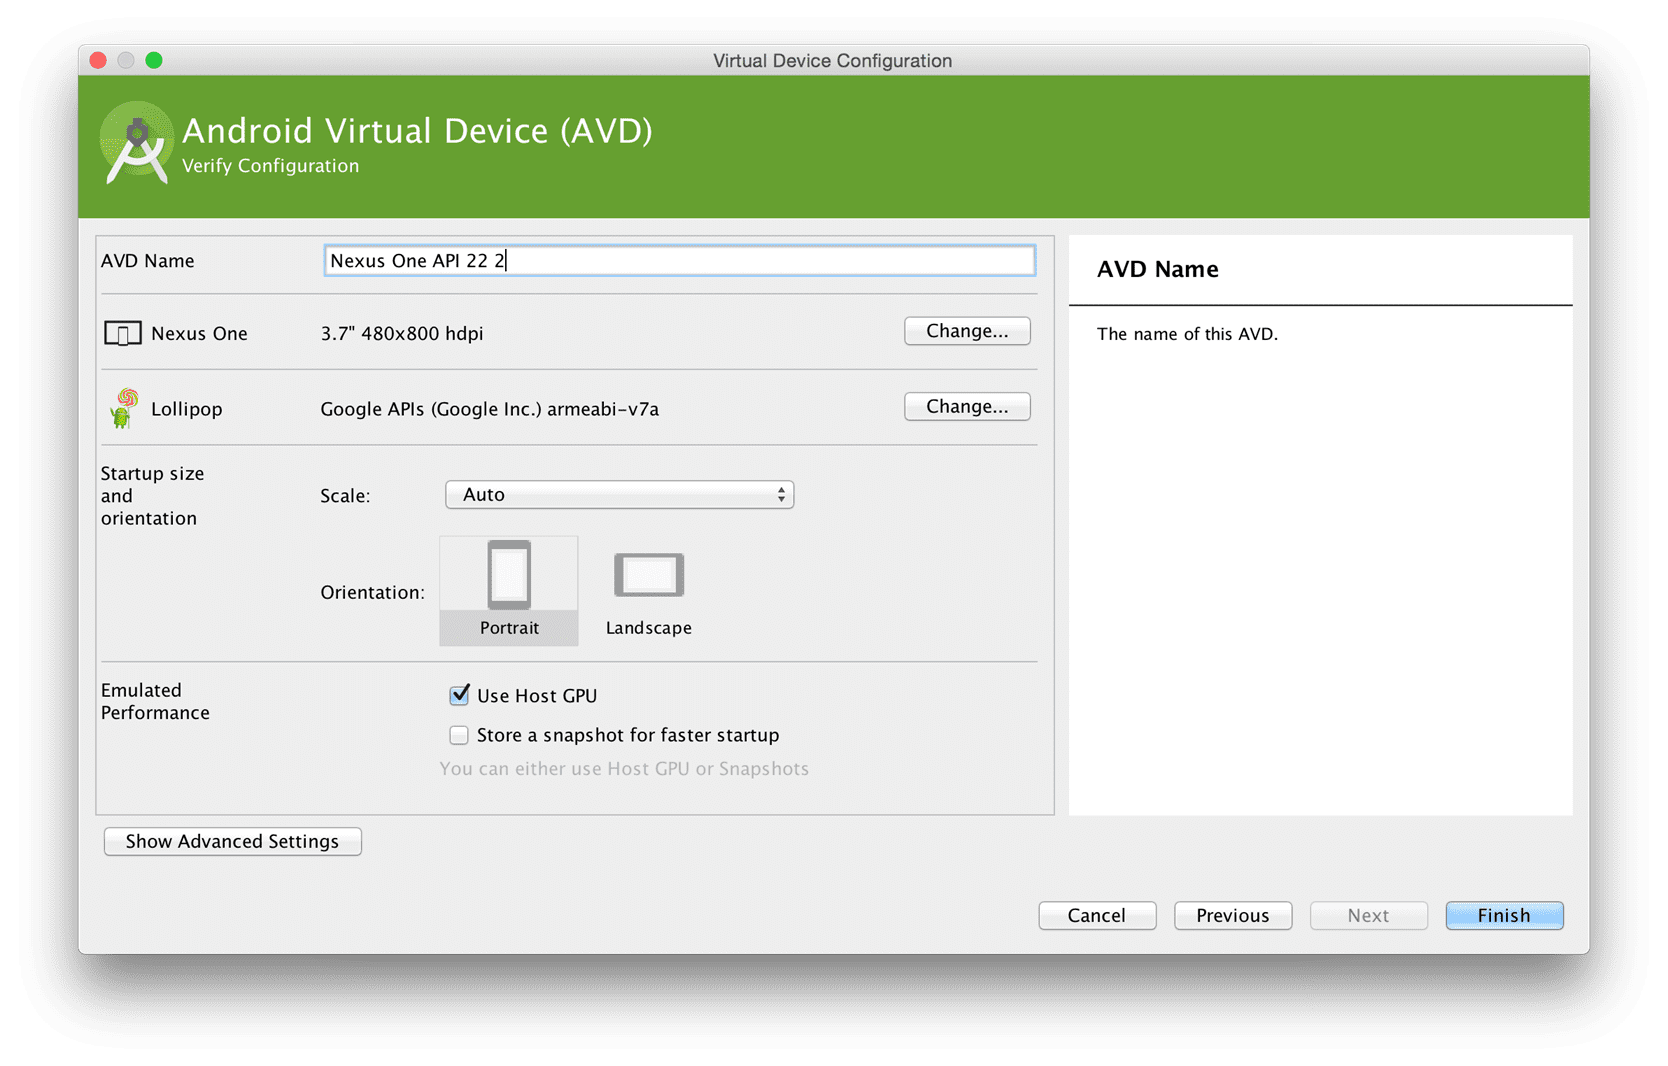
This will create a AVD for you.
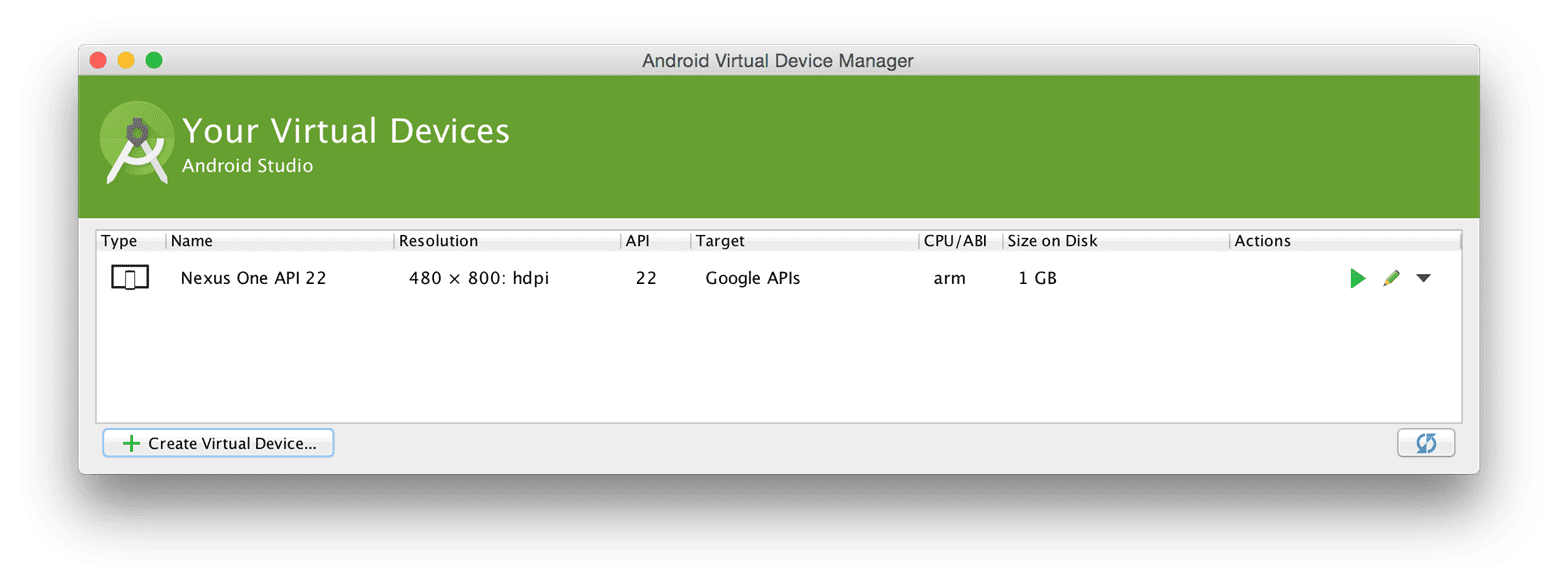
Now we can test the application using the configured AVD using the Cordova CLI as well as Android Studio.
Creating Android Application
With the basic setup in place, let us create a cordova application by running the following command:
cordova create starterapp com.wtc.polymer.starterapp StarterApp
Go inside the newly created directory – starterapp – and add Android platform support to it by running the following command:
cordova platform add android
This creates a project which can be built for Android and tested on an Android device or emulator. Let us see, how?
Building the application
To build the application, we will have to do couple of things, which are described below:
- Go to polymerstarterkit folder and run the following command to build the application:
gulp
This will build the project and create the built artefacts under dist folder
- Copy the content of the dist folder to starterapp/www folder
- Build the application for Android by running the following command:
cordova build android
The built artefacts will be located under starterapp/platforms/android/build folder.
In case your build fails with the following error:
FAILURE: Build failed with an exception.
* What went wrong:
Execution failed for task ‘:processDebugResources’.
> com.android.ide.common.internal.LoggedErrorException: Failed to run command:
/Users/ajitkumar/Library/Android/sdk/build-tools/22.0.1/aapt package -f –no-crunch -I /Users/ajitkumar/Library/Android/sdk/platforms/android-22/android.jar -M /Users/ajitkumar/mystuff/Polymer/starterapp/platforms/android/build/intermediates/manifests/full/debug/AndroidManifest.xml -S /Users/ajitkumar/mystuff/Polymer/starterapp/platforms/android/build/intermediates/res/debug -A /Users/ajitkumar/mystuff/Polymer/starterapp/platforms/android/build/intermediates/assets/debug -m -J /Users/ajitkumar/mystuff/Polymer/starterapp/platforms/android/build/generated/source/r/debug -F /Users/ajitkumar/mystuff/Polymer/starterapp/platforms/android/build/intermediates/res/resources-debug.ap_ –debug-mode –custom-package com.wtc.polymer.starterapp -0 apk –output-text-symbols /Users/ajitkumar/mystuff/Polymer/starterapp/platforms/android/build/intermediates/symbols/debug
Error Code:
1
Output:
Unable to add ‘/Users/ajitkumar/mystuff/Polymer/starterapp/platforms/android/build/intermediates/assets/debug/www/bower_components/web-animations-js/web-animations.min.js.gz’: file already in archive (try ‘-u’?)
ERROR: unable to process assets while packaging ‘/Users/ajitkumar/mystuff/Polymer/starterapp/platforms/android/build/intermediates/res/resources-debug.ap_’
ERROR: packaging of ‘/Users/ajitkumar/mystuff/Polymer/starterapp/platforms/android/build/intermediates/res/resources-debug.ap_’ failed
* Try:
Run with –stacktrace option to get the stack trace. Run with –info or –debug option to get more log output.
BUILD FAILED
Total time: 11.786 secs
Delete bower_component/web-animations-js/web-animations.min.js.gz file and run the build again.
Well, this is manual and error prone. We will automate this soon.
Running the application
We can either run the application inside the emulator or on a real device. Based on the need, the steps would differ. Let us see what does it take to run our application.
Using Emulator
To run the application inside the Android Emulator, run the following command:
cordova emulate android
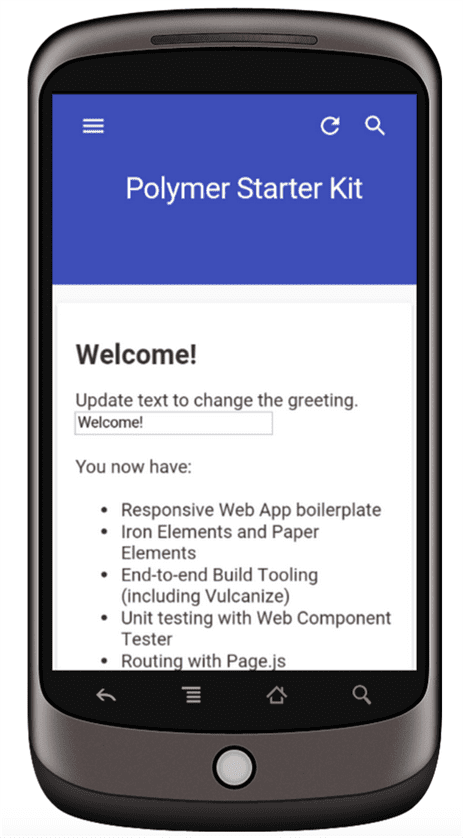
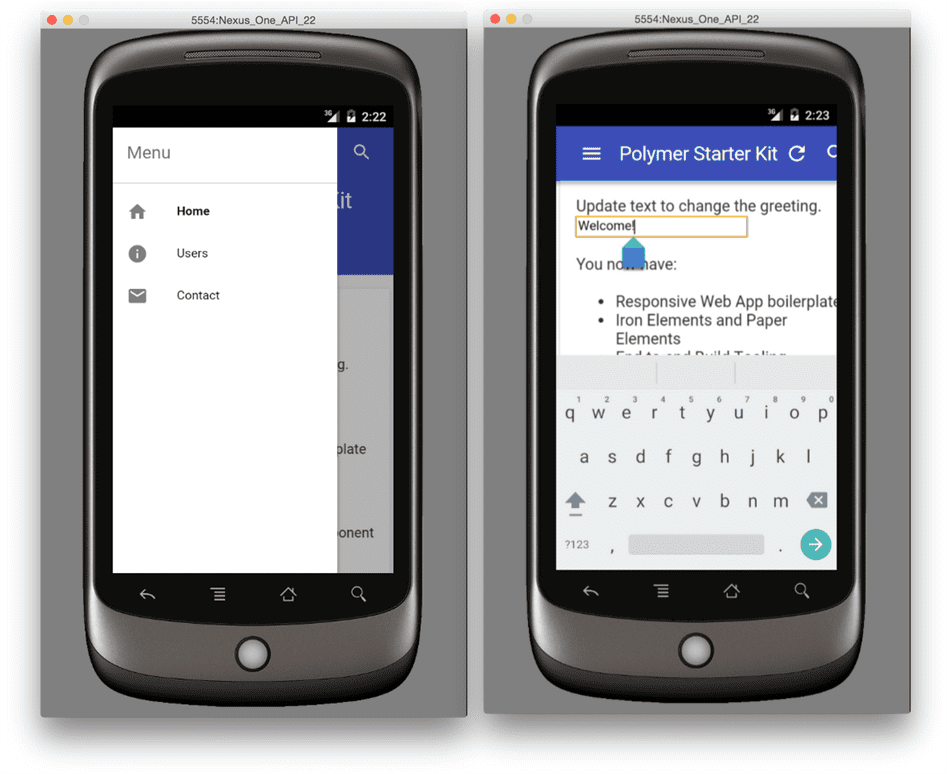
This will build the Android application(as described in the previous section), launch Android Emulator using the configured AVD and run the application inside it, as shown below:

You shall be able to switch between menu items and also edit the Welcome! message, as shown below:
Using real device
To run the application on a real device, say, Nexus One (HTC):
- Connect your phone to your computer, where you have the application, using the USB connector
- Open Android Studio application
- Open your application Android project – starterapp/platforms/android/
- Run the android project by selecting Run -> Run ‘android’ menu in the Studio. This will prompt you to Choose Device where you can select your real device or an emulator
- Choose a device and click on OK button to run the application on your phone
This will build the application, install it on the attached phone/device, and run the application on the phone/device.
That’s all! We are now ready to make changes to our starter application. build cool features, and package it for Android devices.
One last thing that we would like to setup is to integrate the Polymer application build with the cordova build process so that we don’t have to, manually, run gulp and copy the files from dist folder to www. Let us fine finish that part and automate it.
Integrating Polymer App build with Cordova build
To kick off the build of the Polymer application as part of Cordova build process, we need to write a Cordova hook. There are different ways a hook can be written, which are outlined on Cordova Hooks Guide. We will develop our hook in Node.js to ensure its portability across different operating systems.
Our hook shall do the following, in the mentioned sequence:
- Build the Polymer project by running the gulp command
- Clean up the www folder of our Cordova project
- Copy the content of the dist folder of the Polymer project to the www folder
For task#1, we will use child_process API to execute the gulp command. Tasks #2 & 3 require file operations. Node.js has File System APIs that can help us implement these tasks. However, we shall use fs-extra module as it offers convenient methods to clean a directory and copy files/folders from one directory to another. Install the module by running the following command:
npm install -g fs-extra
Now, let us create the hook. Create a scripts folder under the project root folder and save the following hook definition code:
module.exports = function(ctx) {
 var fs = ctx.requireCordovaModule('fs-extra');
 var childProcess = ctx.requireCordovaModule('child_process');
var polymerAppPath = '/Users/ajitkumar/mystuff/Polymer/first-app';
 var destDir = ctx.opts.projectRoot + "/www";
//first - build the Polymer project
 console.log('Building Polymer project located in: ' + polymerAppPath);
 childProcess.execSync("gulp", {cwd: polymerAppPath});
//second - clear the www folder content of cordova app
 console.log('Cleaning up www folder');
 fs.removeSync(destDir);
//third - copy the content from dist to www folder
console.log('Copying built artefacts....');
 fs.mkdirSync(destDir);
 fs.copySync(polymerAppPath + "/dist", destDir);
 console.log("Done!");
};
Name the hook file – buildPolymerApp.js. Notice that we have used the Sync version of the APIs to make sure that we move to the next task only when the previous one is done.
This is not production ready implementation. So, your must review the code and make the required changes (e.g. error handling) before considering it for production.
Next, we will register this hook as a before_prepare type hook so that it prepares the www folder for the Cordova build. To register, add the following entry to the config.xml file located under your Cordova project’s root folder:
<hook type="before_prepare" src="scripts/buildPolymerApp.js" />
Our hook is ready, now! Run the cordova build by running:
cordova emulate android
You shall see the following output messages from the hook:

And, once the build is over, you shall see the application running, as expected, in your Android emulator.
I hope this helps you in building Polymer based Android applications! Share your experience, thoughts, suggestions….

awesome…. really cool. can you provide the apk for the same, just for a quick test.
This is just awesome man,… can you provide the apk sample for this project ?
Thanks leoCj!
Try downloading the apk file from http://www.droidbin.com/p19r06e6ck6c32uot22igce943
Reblogged this on Dinesh Ram Kali.
Hi !
I was able to get it to work with no issues, nevertheless after:
cordova emulate android
The AVD keeps on halted at the “Device is ready” Apache Cordova screen….
any hints?
@Chuy
Have you configured AVD for a virtual device?
Blazzing fast response; it was as I said in the other comment.
Copy inside folders from /dist/ to /www/, so that you don’t end up with something like /www/dist/ which makes the halted screen because index.html is cordova’s default.
As an additional note…I replicated “cordova build android” with “cordoba build ios” and it worked like charm =)
Both apps, no phonegap, full polymer power !
Good luck for your Polymer journey!
sir you can passed run on your Real device using this command :
cordova run android –device
( NOTE: Attach your device first onto PC via USB and also turn ON Debug mode in your device under Development setting Android. )
Btw, very thank’s for sir Ajit Kumar for this helpfull article.. 🙂
@cikal
Happy to hear that the article was helpful to you!
Solved it. I copied entire /dist/ folder into www, not only its contents to /www/.
Cool!
Hi, awesome post, thanks for it :D, I’m having some trouble XD, I know it’s an old post and I don’t new if there is a newer version of this, but my polymer app runs ok with ‘gulp serve’, also I tried with phonegap on the ripple emulator and works fine, but when I build the apk, and install it manually on my device, it opens just a blank screen :, I don’t know if I can build the apk from android studio and debug the thing, but that’s what I’m about to try, any help would be greatly appreciated, thank you :3
Hi Alonso,
What is the Polymer version you are using? Also, does ‘cordova emulate android’ work properly and show the desired output in the emulator?