Blogs
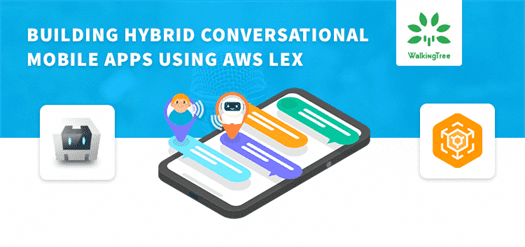
Making your Web Apps Conversational Using Amazon Lex
 In 2016, the idea of conversational UI started making some appearances in high-end technical talks. Think of this topic in 2017 and it looks like 1 out of 10 people are involved in building some sort of conversational application.
In this article, I will talk about how to integrate Amazon Lex in an angular application to build a conversational UI.
Conversational UI
A conversational UI is a user interface which mimics a typical conversation (verbal or textual) with the real human being. In the age of efficiency through the effective use of technology, the business usage of conversational UI has picked up in a great way.
As you would imagine, we, as a human being, have a lot of formal and informal communication happening during a conversation (e.g. eye contact, nod, verbal, written, etc.) and based on that we do a certain transaction or build a certain relationship. Add to that the complexity of people using shortcuts, slangs, reading in between the lines, interpreting based on past experience with the people and the human conversation does look complicated. Trying to achieve something similar with machines is always going to be challenging but exciting.
With a due focus on Machine Learning (ML) for over a decade, we do see a strong possibility of realising effective conversational applications. With the known fact that it is difficult for the human to adapt to what machine is capable of, we do need to teach our machines to talk to humans.
Understanding Amazon Lex
Amazon Lex (the engine which powers Amazon Alexa as well) is an AWS service for building conversational interfaces for any applications using voice and text. Through its deep understanding of Natural Language Understanding (NLU) and Automatic Speech Recognition (ASR), it enables us, the developers, to build sophisticated and highly engaging chatbots in our web and mobile applications.
We all know that building a conversational application is tough. However, this is where Amazon Lex saves the day for us. Without understanding the deep learning in great details, we can develop amazingly engaging applications using Lex. By dynamically managing the conversation, Lex does make our conversation look as real as it can be.
Let’s do this
Create an Angular App using CLI
Launch command prompt and switch to the directory where we want to create an Angular app.
Run the following command to create an application with the name aws-angular
ng new aws-angular
The angular application will be generated with all the required dependencies. We need a trigger action to show the Lex bot. In order to achieve that we have used a simple button upon clicking that the bot will be displayed
The HTML file code snippet is as shown below:
//App using CLI
<div> Click the launch button to start the AWS Lex Bot.
   <button (click)="showLexBot($event)"> Launch </button>
</div>
<p> Final intent response will be displayed here :
   <span class="result">{{finalIntent}}</span>
</p>
<div [hidden]="!showBot" id="bot" (window:onLexResult)="handleLexResult($event)">
	<div id="audio-control" class="white-circle">
	   <div>
		  <img src="assets/images/lex.png">
	   </div>
	</div>
	<div>
	   <canvas class="visualizer"></canvas>
	</div>
	<div id="message-panel">
	   <span id="message"></span>
	</div>
</div>
Upon the end of the conversation, the final intent will be captured and sent to our angular component by dispatching an event. In order to achieve that we need following:
Implement onLexData handler
In index HTML file “onLexData” method.
// onLexData
function onLexData(data){
	if(data && data.dialogState == "ReadyForFulfillment"){
		runLex = false; // To stop further conversation.
		lexaudio.example(); // To set the bot to initial state.
		var lexEvent = document.createEvent("HTMLEvents");
		lexEvent.initEvent("onLexResult",true,false);
		lexEvent.partType = data.slots.PartType;
		document.getElementById("bot").dispatchEvent(lexEvent);
	}
Capture the data from the HostListener
In our Angular Component, we need HostListener to capture the globally dispatched event and capture the data from that event.
// HostListener
import { Component,HostListener } from '@angular/core';
@HostListener('window:onLexResult', ['$event'])
@Component({
...
...
})
export class AppComponent {
	finalIntent: string = "";
	...
	...
	public handleLexResult(e){
		this.finalIntent = e.partType;
	}
}
Integrating with Lex
Download the latest SDK from
https://aws.amazon.com/sdk-for-browser/&http://docs.aws.amazon.com/AWSJavaScriptSDK/latest/index.html
In our Angular application, add the below script tag to include the AWS SDK in our application or we can download the file and use it locally by placing the file in assets folder of your application
<script src="https://sdk.amazonaws.com/js/aws-sdk-2.138.0.min.js"></script>
Or
<script src="assets/aws/aws-sdk.min.js"></script>
Required Files:
-
- control.js
-
- conversation.js
-
- recorder.js
-
- renderer.js
- worker.js
All the scripts can be downloaded from here
https://github.com/awslabs/aws-lex-browser-audio-capture/tree/master/scripts
After you download the files and place them in assets folder of the Angular application.
To load the scripts dynamically, you can place the below-mentioned script inside your Angular component where you want to access AWS Lex bot.
Here is the code snippet to load the scripts dynamically within the application:
// Load the scripts dynamically
scripts_loaded: boolean = false;
ngOnInit() {
	if (this.scripts_loaded == true) {
		return;
	} else {
		this.scripts_loaded = true;
		this.loadScript('assets/aws/control.js');
		this.loadScript('assets/aws/recorder.js');
		this.loadScript('assets/aws/renderer.js');
		this.loadScript('assets/aws/conversation.js');
	}
}
public loadScript(url) {
	let child = document.createElement('script');
	child.type = 'text/javascript';
	child.src = url;
	document.getElementsByTagName('head')[0].appendChild(child);
}
When the bot component is initialized then the scripts get loaded.
Preparing LEX UI
In your Angular application, you can create a component and include the UI as below
//Praparing With Lex
<div id="audio-control" class="white-circle">
   <div>
	  <img src="assets/images/lex.png">
   </div>
</div>
<div>
   <canvas class="visualizer"></canvas>
</div>
<div id="message-panel">
   <span id="message"></span>
</div>
Here is how the UI looks like.
 Launching Lex from Angular
The scripts which we have included in our application consists of voice recorder to maintain a conversation and to display an animated canvas to indicate the listening, speaking, active and passive states of the bot.
As we have already included AWS SDK in our application, all we need to do is declare a global variable in our index.html to access the SDK globally in our application.
AWS SDK and the scripts which we have included returns an object with all the properties and methods to lexaudio variable.
// Declare lexaudio window.lexaudio = {};
In conversation script, we need to add our AWS credentials (Access Key ID and Secret Access Key) and AWS Lex Bot name to access services.
// Create LexRuntime
var lexruntime = new AWS.LexRuntime({
	region: 'us-east-1',
	credentials: new AWS.Credentials('Your AccessKey', 'Your Secret_AccessKey', null);
});
The conversation script already handles the click event on the “audio-control” element. So once we click on the image, the handler automatically initializes the bot and accepts commands and AWS service call will be performed.
To launch the bot dynamically we can either call lexaudio or trigger the click event on the image.
// Launch the bot
lexaudio.example();

//or

document.getElementById('audio-control').click();
The response provides the required intents and properties which we can use for further navigation.
// Get the required data from response

var params = {
	botAlias: '$LATEST',
	botName: 'OrderFlowers',//Your configured bot name
	contentType: 'audio/x-l16; sample-rate=16000',
	userId: 'BlogPostTesting',//Unique user ID
	accept: 'audio/mpeg'
};
lexruntime.postContent(params, function(err, data) {
	if (err) {
		// an error occurred
	} else {
		// success, now let's play the response
		// We can call a global method and pass the data as parameter.
		onLexData(data);
	}
});
Inside index.html file, you need to create a function to access the response from Lex bot.
Once the data is available in the index file, using our Angular application we can process the data to show the required visuals/components or make further services calls.
// Receive the AWS response
function onLexData(data){
	if(data && data.dialogState == "ReadyForFulfillment"){
		// Here you will receive the final response from AWS
	}
}
After the response is captured in the index html file, you can send the data to your Angular components using dispatchEvent and handle the event along with the data in your respective component.
Demo Video
Video demo of the application:
Sample Code
https://github.com/walkingtree/sample-projects/tree/master/angluar2/aws-angular
Summary
In this article, we gave you a very high-level overview of the AWS Lex and also we made use of Angular to demonstrate how you can build a conversational UI for the enterprise needs. The conversational UI is definitely evolving and I hope this write up helps you take advantage of this to become more efficient.
At Walking Tree, we have been building an end-to-end application by using microservices and cross-platform UI development frameworks. I did find Conversational UI as a great opportunity for ourselves.
Connect with us for more details or any professional support.


