Blogs
LoopBack with PostgreSQL
LoopBack is a highly-extensible, open-source Node.js framework that enables you to create dynamic end-to-end REST APIs with little or no coding.
In order to establish connection with different databases, LoopBack provides inbuilt connectors. Once the database specific connector is installed, we need to add a data-source in our project that would tie back with the database using this connector and provide the capability to interact with the database. As a part of interactions, data model definition along with sample data can be auto migrated over this connection. Also existing data model from the database can be discovered and defined over this connection.
In this blog we will see how we can use the LoopBack framework with PostgreSQL database to quickly build RESTful APIs with utmost ease. We will also see implementation of additional capabilities of auto-migrating data into database and discovering data model from database over the LoopBack PostgreSQL connector.
1. INSTALL THE LOOPBACK CLI TOOL USING NPM.
npm install -g loopback-cli
2. CREATE THE APPLICATION.
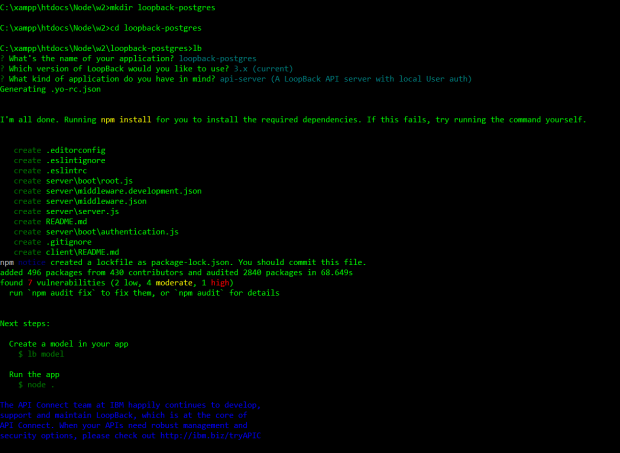
Create a folder for your project. Move into the folder and run the command ‘lb’ to generate the application in an interactive mode answering the questions appropriately.
mkdir loopback-postgres
cd loopback-postgres
lb
The three questions for which you can select the default answers and let loopback generate the APIs for you:
? What’s the name of your application? loopback-postgres ? Which version of LoopBack would you like to use
? 3.x (current) ? What kind of application do you have in mind
? api-server (A LoopBack API server with local User auth)
3. RUN THE APPLICATION.
You can now run the application using
node
You will be positively surprised to see that you already have a user api ready for use. Check your API in browser and explorer by running your application to see the below node:
http://localhost:3000/

http://localhost:3000/explorer – The API Explorer enables you to exercise all the generated API endpoints for the default User model:
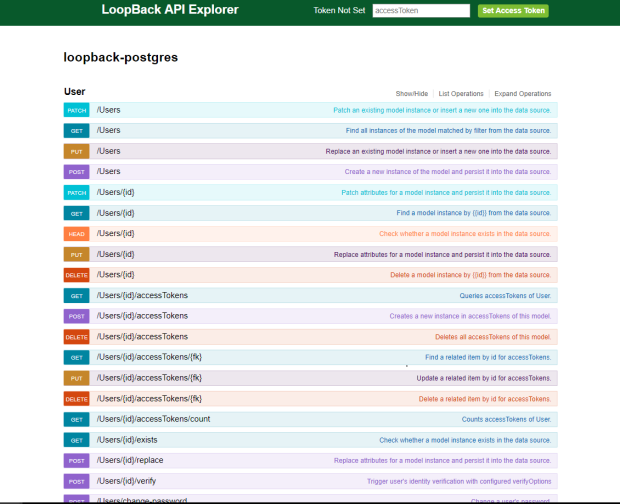
If you check the folder structure, you will find a client and server folder. The client folder is for placing your client application code in future.
The server folder is what we will be dealing with to enhance our application server.
You will find a datasources.json file which maintains the datasource details. It will have a default entry for local storage (local memory).

4.SET UP THE POSTGRESQL DATABASE.
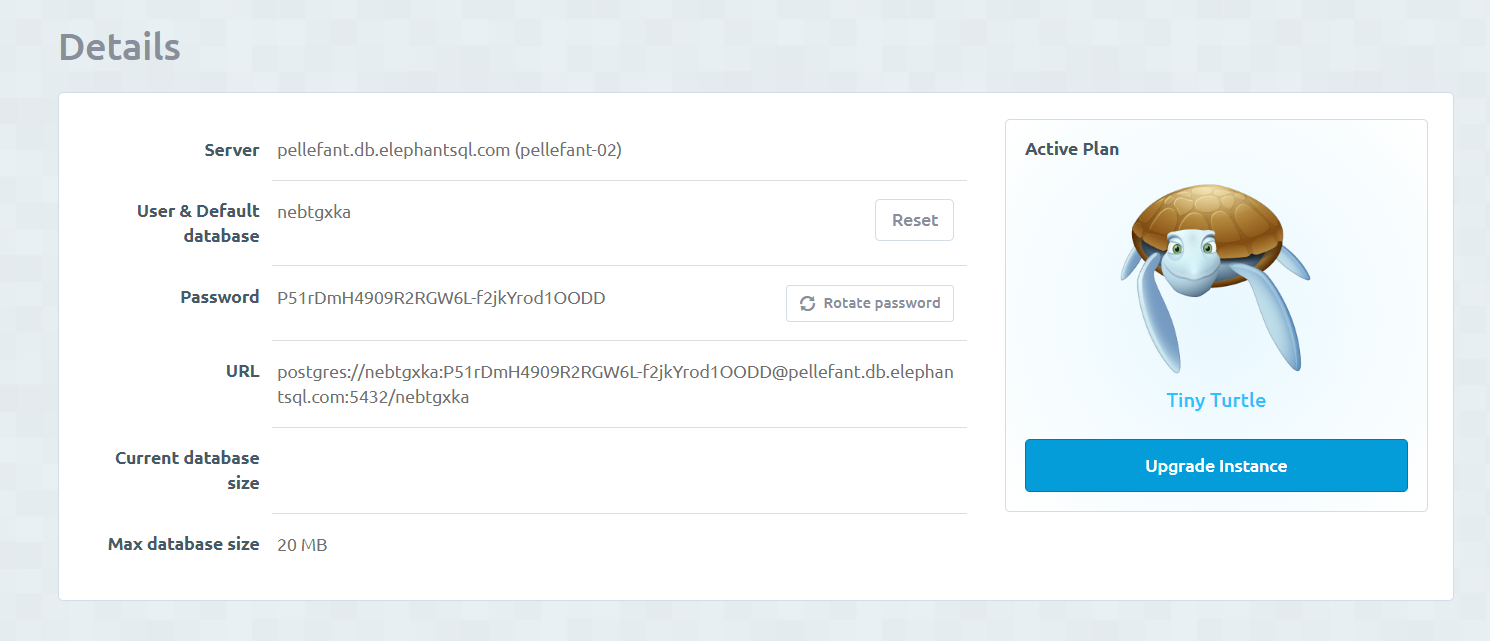
I will be using an instance of PostgreSQL running on ElephantSQL. This is convenient to use for testing and training purposes.
You can signup and create a instance(Tiny Turtle – free). You will be able to get the connection details as below.
5. INSTALL THE LOOPBACK POSTGRESQL CONNECTOR.
npm install --save loopback-connector-postgresql
6. CREATE A DATA SOURCE AND CONFIGURE THE DETAILS.
Create a data source selecting connector as PostgreSQL.
lb datasource testLoopback
You can provide the connection url or the other settings while creating the datasource.

Or You can edit the datasource.json to include the database details as below. (You can substitute these details from your ElephantSQL db or your local db). I am using the instance created in ElephantSQL.
The datasource.json entry can be either using url or specific details(host, user, database and password separately).
"testLoopback": {
"host": "pellefant.db.elephantsql.com",
"port": 5432,
"database": "nebtgxka",
"username": "nebtgxka",
"password": "P51rDmH4909R2RGW6L-f2jkYrod1OODD",
"name": "testLoopback",
"connector": "postgresql"
}
7.CREATE THE DATABASE MODEL USING MODEL GENERATOR
lb model blogs
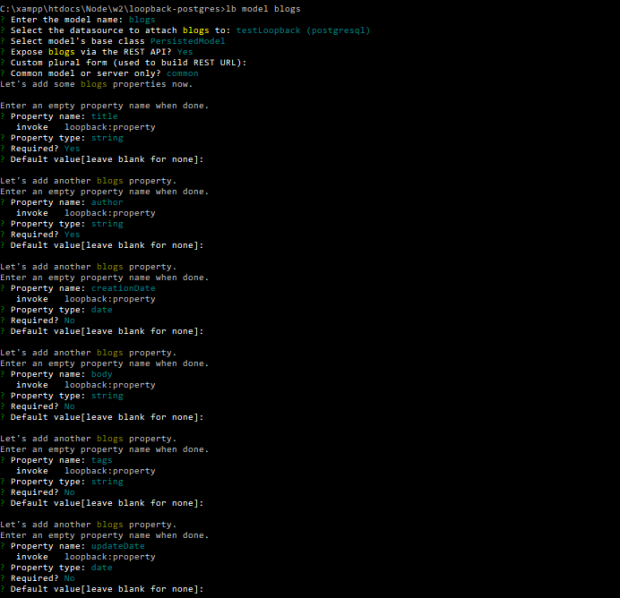
Interactively build your data model and define the properties. Select the model name, select the test loopBack as the datasource and the base class as PersistedModel.
Here I have created the model for blogs having the properties as title, author, creationDate, body, tags, updateDate.
Carefully select the property type, required(Y/N) and a default value if any as below.
- Property name : title
- Property type: string
- Required?:Yes
- Default value[leave blank for none]:
In the same way, you can define all the properties for the model.
This creates a common/models folder with two files
- blogs.json – Having the data model structure
- blogs.js – This can be used to attach any remote methods to the model to handle additional logic.
In case there is any error, you can delete these files and recreate the model or edit the json file to make the changes manually.
8.DISCOVER AND SAVE MODEL DEFINITIONS USING DISCOVERSCHEMA.
Another approach to create Model is by using existing model definitions from your mapped datasource using dataSource.discoverSchema() API.
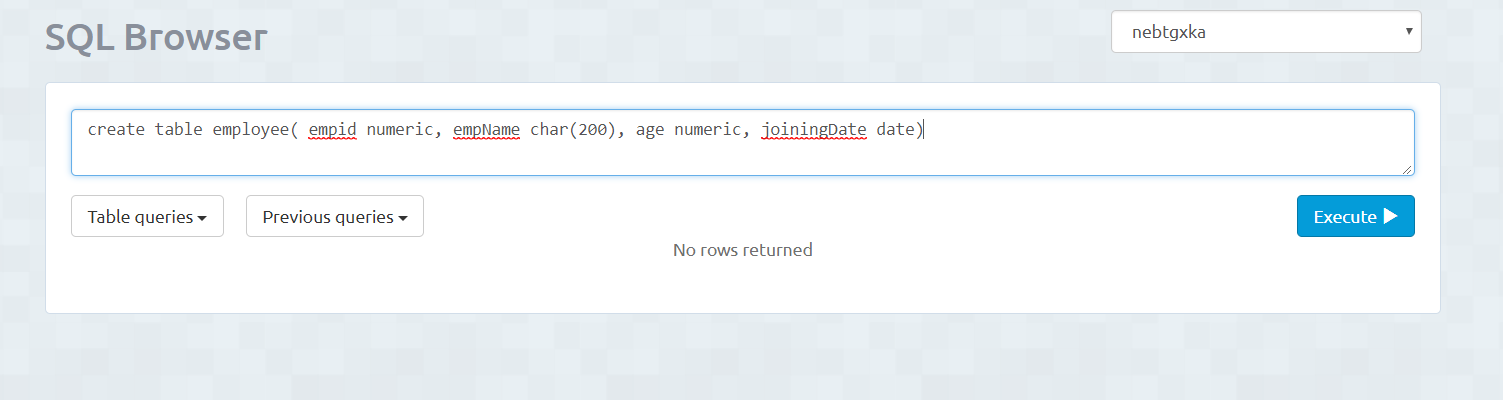
I will create Employee model from my PostgreSQL database as below and use the same to discover.
A new discover-model.js script is added to the project folder as below.
'use strict';
//import APIs
const loopback = require('loopback');
const promisify = require('util').promisify;
const fs = require('fs');
const writeFile = promisify(fs.writeFile);
const readFile = promisify(fs.readFile);
const mkdirp = promisify(require('mkdirp'));
const DATASOURCE_NAME = 'testLoopback';//the datasource name we need to discover
const dataSourceConfig = require('./server/datasources.json');
const db = new loopback.DataSource(dataSourceConfig[DATASOURCE_NAME]);
discover().then(
success => process.exit(),
error => { console.error('UNHANDLED ERROR:\n', error); process.exit(1); },
);
async function discover() {
// It's important to pass the same "options" object to all calls
// of dataSource.discoverSchemas(), it allows the method to cache
// discovered related models
const options = {relations: true};//this is required to discover related schemas
// Discover models and relations
const empSchema = await db.discoverSchemas('employee', options);//employee is the name of the table, if multiple schemas then specify schema name also as public.employee
console.log(empSchema);
// Create model definition files
await mkdirp('common/models');
await writeFile(
'common/models/employee.json',
JSON.stringify(empSchema['public.employee'], null, 2)//get the details for the public.employee schema
);
// Expose models via REST API
const configJson = await readFile('server/model-config.json', 'utf-8');
console.log('MODEL CONFIG', configJson);
const config = JSON.parse(configJson);
config.Employee = {dataSource: DATASOURCE_NAME, public: true};
await writeFile(
'server/model-config.json',
JSON.stringify(config, null, 2)
);
}
Run the script to discover the employee model:
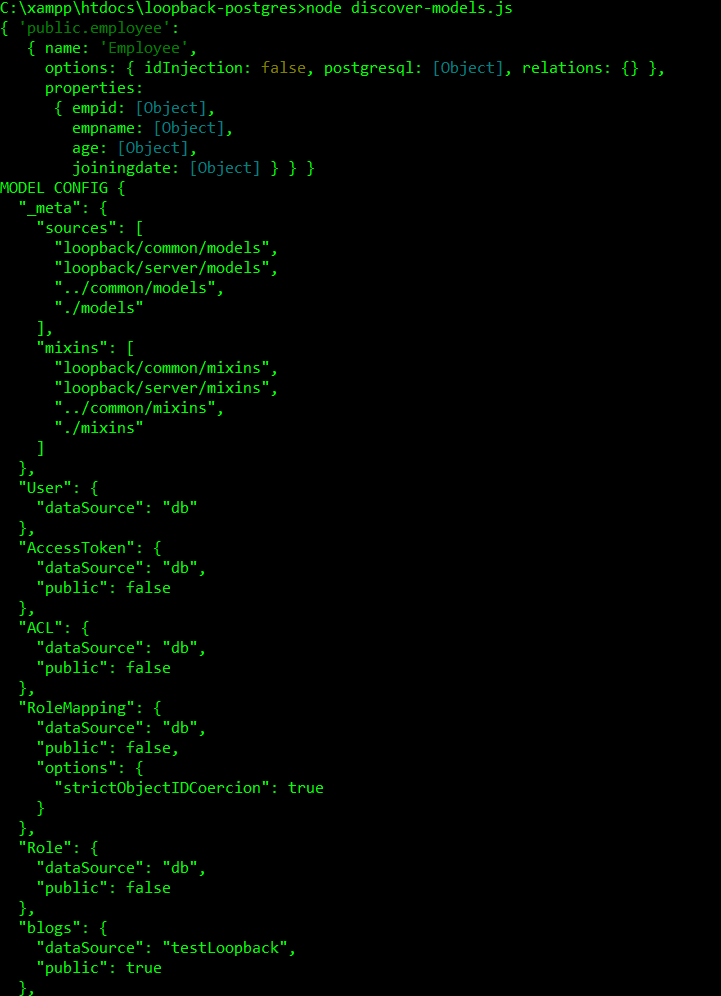
This creates the model specific json file in common/models/employee.json and also adds the Employee in model-config.json which sets up the REST APIs for the newly discovered model.
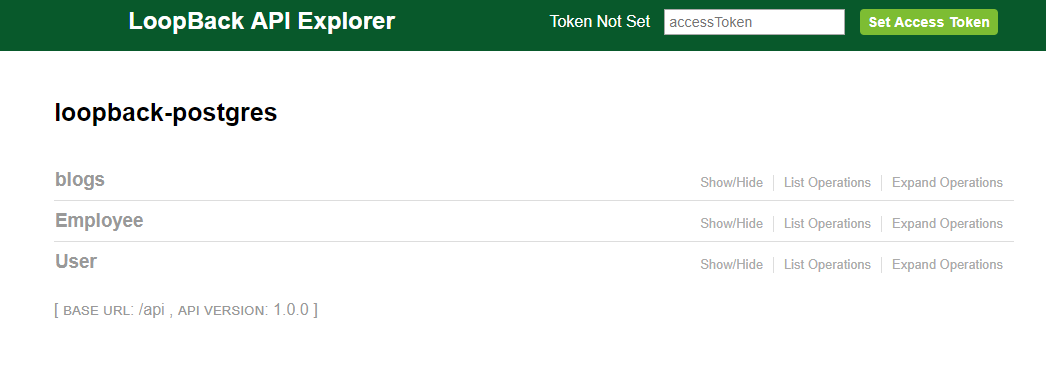
Now if you run the application and check the explorer, you will find both the models here including the blogs(generated by model generator) and Employee(created by discoverSchema) .
9. CREATE THE TABLE IN DATABASE WITH SAMPLE DATA USING AUTOMIGRATE.
If you use the model generator approach to generate the model and you don’t have a table already created in the PostgreSQL Database, you can also create a table with sample data using the automigrate tool from loopback.
We will create a new folder bin inside the project folder
mkdir bin
Create a new Javascript file named automigrate.js and add below code:
var path = require('path');
var app = require(path.resolve(__dirname, '../server/server'));
var ds = app.datasources.testLoopback;
ds.automigrate('blogs', function(err) {
if (err) throw err;
//initialize the data to be inserted
var blogs = [
{
title: 'My first Blog',
author: 'WTT',
creationDate: new Date(),
body:'Test data for the blog',
tags:'loopback',
updateDate: new Date()
},
{
title: 'Another Blog',
author: 'WTT',
creationDate: new Date(),
body:'Test again for loopback with postgresql',
tags:'loopback',
}
];
var count = blogs.length;
//for each row create the data
blogs.forEach(function(blog) {
app.models.blogs.create(blog , function(err, model) {
if (err) throw err;
console.log('Createdmodel);
count--;
if (count === 0)
ds.disconnect();
});
});
});
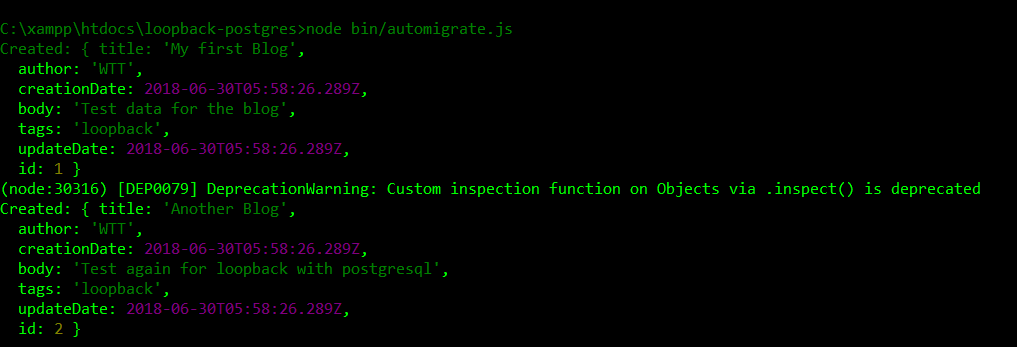
Run the script to create the table and test data.
node bin/automigrate.js
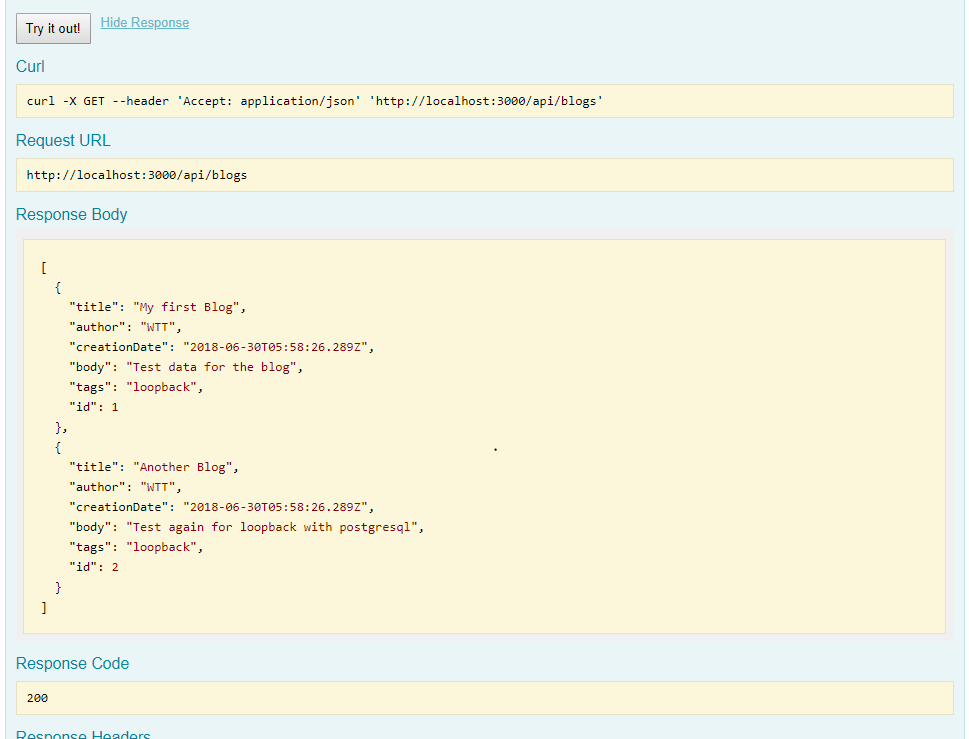
Now run the application and check the explorer to see REST API operations for your blogs model. There are create, read, update, and delete (CRUD) endpoints for the model you just created:

Test the GET by using the Try it Out button and you will be exhilarated to see this!
You can clone and check the Git code link
Summary
You see how easy LoopBack makes the entire process of defining the standard RESTful APIs along with the data model. Using this framework also brings in consistency and ease of extension in real project scenarios.
Next time when you start writing your Node API code using require Express, just stop and give this a try. You will be pleased to see the amount of effort you save.
It’s Time to Loopback!
References
- https://loopback.io/doc/en/lb2/Connecting-to-PostgreSQL.html
- http://loopback.io/getting-started/