Getting your Trinity Audio player ready...
|
 Problem Statement
In a typical Sencha ExtJS based enterprise project, we create various JS+CSS files and it becomes cumbersome to manage them during the development because they need to be listed in the proper order in the index.html file and for every addition of a file, we need to add it to the index.html, as well. After the development is done, we minify all the JS and CSS files to have better loading performance, and go back and modify the index.html file to use the minified files rather than individual files. After the introduction of the new Class System in ExtJS, this tedious task has been taken care by the framework and the developer is not required to do all that, anymore. This is a big relief. However, the new Class System expects a specific folder structure so that it can load the classes, dynamically, and is based on the MVC architecture. To make this managing of folder structure effortless and leverage the same for the minification, Sencha has provided a tool – Sencha Cmd. So, as long as you plan to use the MVC architecture offered by Sencha ExtJS, Sencha Cmd is a must tool to create, build and package your application.
The scope 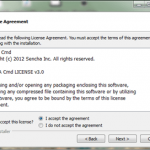
 of the article
This article provides you steps to set up Sencha ExtJS project using Sencha Cmd with an example to create a registration form. The article will cover how we can generate a skeleton application using Sencha Cmd, how we create entities – model, view, controller, and store, and how we can build the application to get the minified JS and CSS out.
Pre-requisites:
- Java Run-time Environment 1.6 or above
- ExtJs 4.1.1a or above
- Sencha Cmd 3.0 or above
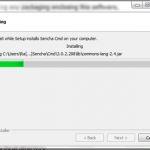
Step 1: Install Sencha Cmd
1) Extract the zip and double click on .exe file.
2) After running the command, you must see similar type of suggestions

Click on Next> button

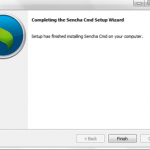
After successful installation, it shows below message.

Click on Finish button
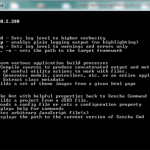
3) Once all the above steps are done successfully, go to command line and enter command “sencha”. You must see suggestions for command as shown below.

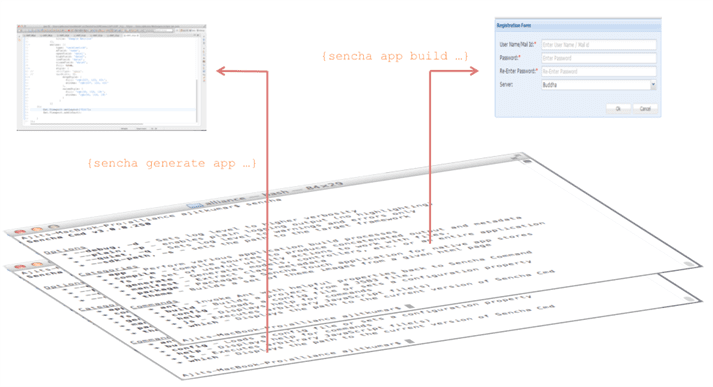
Step 2: Generate project structure using Sencha Cmd:
1) Create sample Sencha ExtJs project structure with following command.
1 |
sencha -sdk /path/to/ExtJssdkFolder generate app MyAppName /path/to/MyAppFolder |
2) Project structure generated by above command will have the following structure:

Step 3: Create sample model, view and controller using Sencha Cmd:
1) Go to project path and create sample controller through Sencha Cmd.
1 |
sencha generate controller Main |
With above command, it should create controller with name Main
1 2 3 4 5 |
Ext.define('extjsExample.controller.Main', { extend: 'Ext.app.Controller' }); |
2) Create Model using following command
1 |
sencha generate model Server name:string |
With above command, it will create model with name Server and with field name and type as string
1 2 3 4 5 6 7 |
Ext.define('extjsExample.model.Server', { extend: 'Ext.data.Model', fields: [ { name: 'name', type: 'string' } ] }); |
3) Create sample view using following command (ExtJs Specific. Doesn’t work for touch )
1 |
sencha generate view Registration |
Above command will create a sample view with name specified.
1 2 3 4 |
Ext.define("extjsExample.view.MyCmdView", { extend: 'Ext.Component', html: 'Hello, World!!' }); |
Note: No other parameters available for creating view and controller except name.
Note: We cannot create store using Sencha Cmd.
Step 4: Create a registration form:
- Edit app.js and add registrationform xtype in viewport as an item.
1 2 3 4 5 6 7 8 9 10 11 12 13 14 15 16 17 18 19 20 21 22 23 |
Ext.application({ controllers: ["Main"], views: ['Registration'], requires:['extjsExample.view.Registration'], name: 'extjsExample', launch: function() { Ext.create('Ext.container.Viewport', { items: { xtype: 'registrationform' } }); } }); |
2. Create a view file with name Registration in app/view folder.
Sample code:
1 2 3 4 5 6 7 8 9 10 11 12 13 14 15 16 17 18 19 20 21 22 23 24 25 26 27 28 29 30 31 32 33 34 35 36 37 38 39 40 41 42 43 44 45 46 47 48 49 50 51 52 53 54 55 56 57 58 59 60 61 62 63 64 65 66 67 68 69 70 71 72 73 74 75 76 77 78 79 80 81 82 83 84 85 86 87 88 89 90 91 92 93 94 95 96 97 98 99 100 101 102 103 104 105 106 107 108 109 110 111 112 113 114 115 116 117 118 119 120 121 122 123 124 125 126 127 128 129 130 131 |
Ext.define("extjsExample.view.Registration", { extend: 'Ext.Container', xtype: 'registrationform', requires:['Ext.layout.container.Card','Ext.form.field.ComboBox', 'Ext.form.field.Text'], renderTo: Ext.getBody(), width: 500, height: 200, initComponent : function() { var me = this; var required = '<span style="color:red;font-weight:bold" data-qtip="Required">*</span>'; Ext.apply(me, { ltems: [{ xtype: 'form', frame: true, title: 'Registration Form', bodyPadding: '10 10 0', defaults: { anchor: '100%', allowBlank: false, msgTarget: 'side', labelWidth: 120 }, items: [{ xtype: 'textfield', name: 'username', emptyText: 'Enter User Name / Mail id', afterLabelTextTpl: required, fieldLabel: 'User Name/Mail Id' },{ xtype: 'textfield', name: 'password', inputType: 'password', afterLabelTextTpl: required, emptyText: 'Enter Password', fieldLabel: 'Password' },{ xtype: 'textfield', name: 'retype-password', inputType: 'password', afterLabelTextTpl: required, emptyText: 'Re-Enter Password', fieldLabel: 'Re-Enter Password' },{ xtype: 'combo', name: 'server', allowBlank : true, fieldLabel: 'Server', store: Ext.create('extjsExample.store.Server'), displayField: 'name', editable: false, valueField: 'name' }], buttons: [{ text: 'Ok', },{ text: 'Cancel', handler: function() { this.up('form').getForm().reset(); } }] }] }); me.callParent(arguments); } }); |
3) In the example, to show content in combobox, store was specified. Hence, Create a store, with the name Server, which is specified in the combo box’s store.
Sample Code:
1 2 3 4 5 6 7 8 9 10 11 12 13 14 15 16 17 18 19 20 21 22 23 24 25 26 27 |
Ext.define('extjsExample.store.Server', { extend : 'Ext.data.Store', requires:['extjsExample.model.Server'], model: 'extjsExample.model.Server', storeId : 'server', proxy: { type: 'ajax', url: 'data/server.json', reader: { type: 'json', root: 'data' } } }); |
4) In above code, proxy was set and data is being retrieved from JSON file. So create a JSON file in data folder.
Sample JSON data:
1 |
{"data":[{"name":"Buddha"},{"name":"Zorba"},{"name":"Ashoka"}]} |
Run the application:
Now, run the application in your server. You should be able to see the registration form view similar to following output.

Click on dropdown to see JSON data.

Step 5: Packaging Application:
Packaging decreases the loading time of your application. Here are the steps to package your app using Sencha Cmd.
Go to your project folder and execute the following command.
1 |
sencha app build production |
Once, above command was executed, it should create a build folder in main project structure.
The structure looks like:

all-classes.js contains the whole code related to application. You can run the application by navigating browser to packaged location.
Summary: This article has provided steps to create and build Sencha ExtJS project using Sencha Cmd with an example to create a registration form.
References:
- http://docs.sencha.com/ext-js/4-2/#!/guide/command_app
- https://github.com/walkingtree/sample-projects/tree/master/ExtJS/RegistrationSample